Paul's (tricky) Normandy Panthers in 1/35 & 1/16

D

dubster72

Guest
Great work so far Paul, you're definitely putting in the hours on this one! 


You could always save yourself some work by posing the hatches open?
 

tr1ckey66

SMF Supporter
Joined
Mar 6, 2009
Messages
3,686
Points
113
First Name
Paul
You could always save yourself some work by posing the hatches open?

The hatches won't take that long to do. I may even get them finished tonight. The time to do this is a mere 'drop in the ocean' compared to the time required to solder the photo etch!


Glad you like the build so far. Will you be joining us?


Cheers


P
 

Snowman

We come in peace, so shoot to kill!
SMF Supporter
Joined
Oct 20, 2014
Messages
1,996
Points
113
First Name
Gavin
Excellent stuff!! O.o B|
 

tr1ckey66

SMF Supporter
Joined
Mar 6, 2009
Messages
3,686
Points
113
First Name
Paul
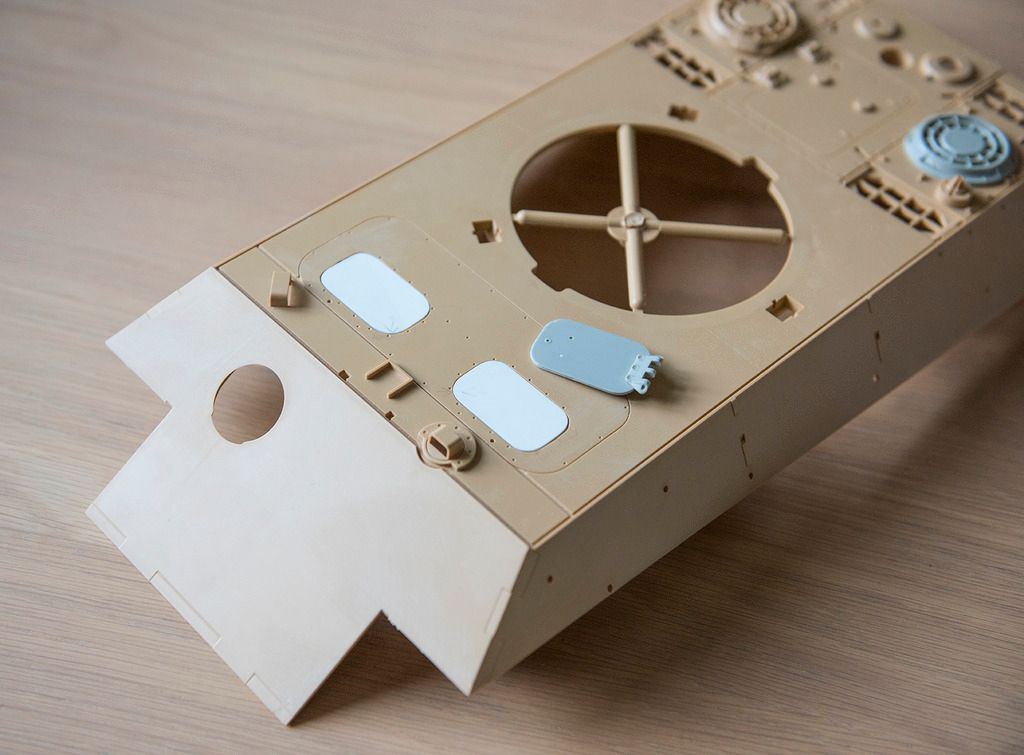
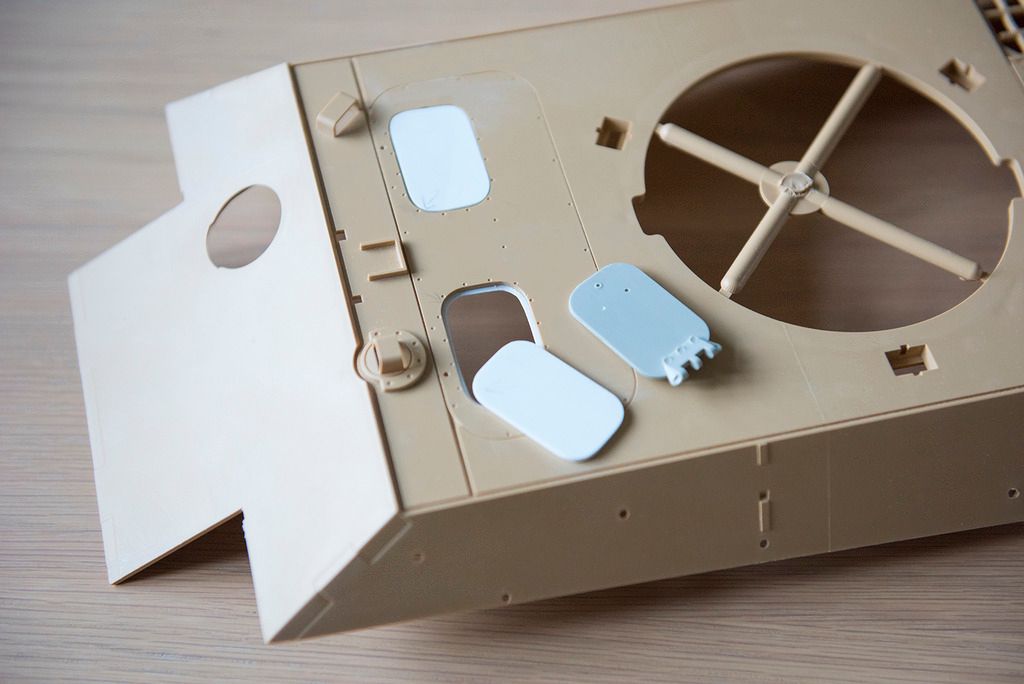
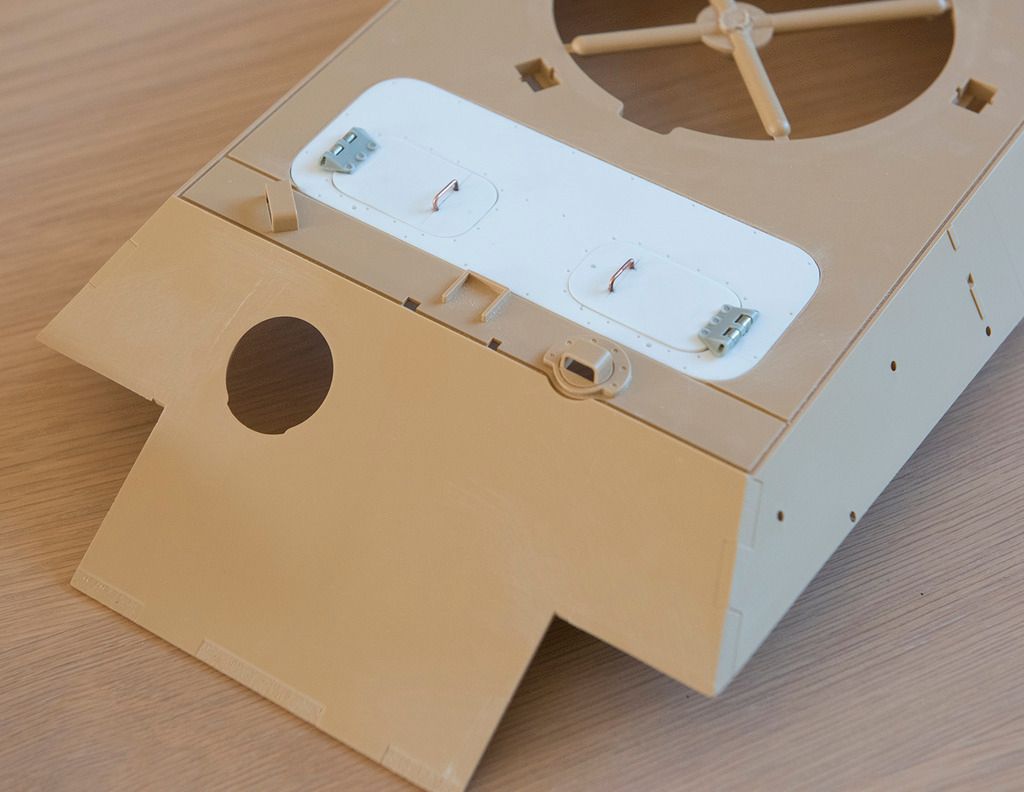
Did a little work on the hatches last night. I've fabricated new hatches from plastic card, a process complicated by the need to laminate 2 weights of card to get the thickness of hatch required to sit level with the deck. All i need to do now is remove the fittings from the resin items and fit to the plastic card replacements.


Or is it?...


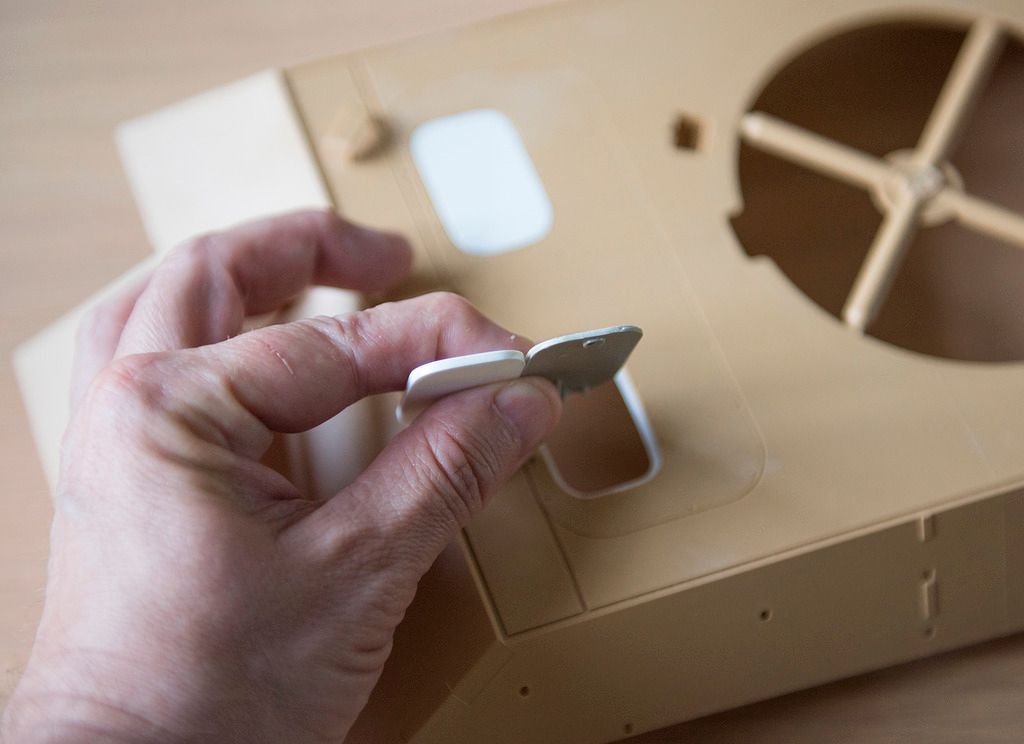
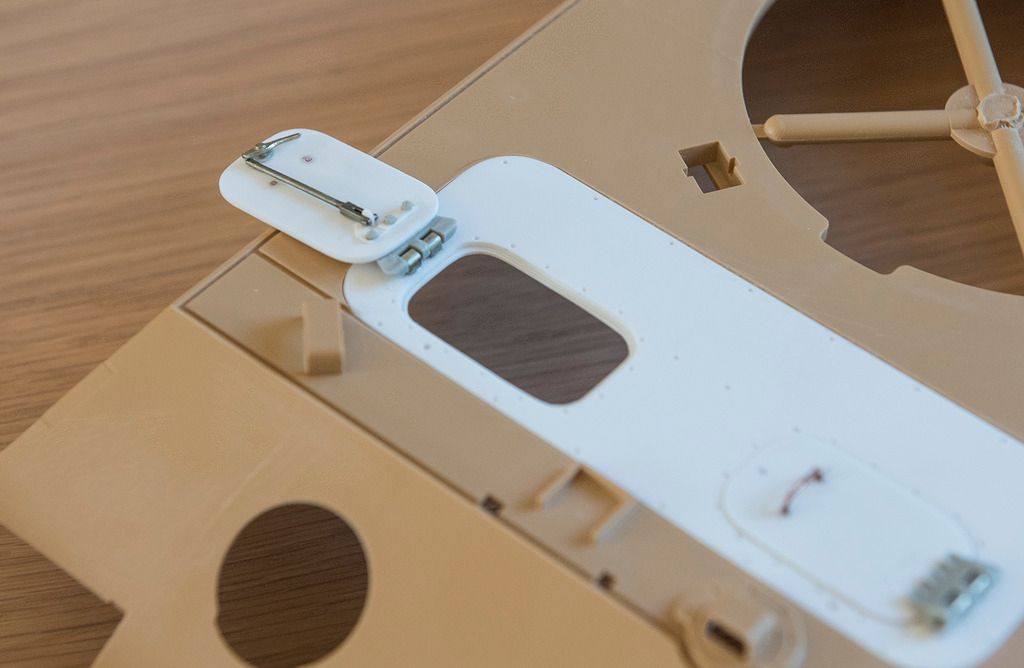
I had a nagging doubt in the back of my mind whilst doing this work, and this doubt proved to be correct - the hatches are now too thick. You can see the problem in the comparative photographs below.


Essentially, the Tamiya hull is too deep to simply fabricate hatches of the same thickness.


There are 2 possible fixes:


1. Raise the lip inside the holes for the hatches to reduce the height to the deck. This will be incredibly difficult to do


2. Rework the entire removable section that contains the hatches as indicated below


I think I'm going to go with the latter option but this may be a weekend job now!


Till then


Cheers


P
 
Last edited by a moderator:

tr1ckey66

SMF Supporter
Joined
Mar 6, 2009
Messages
3,686
Points
113
First Name
Paul
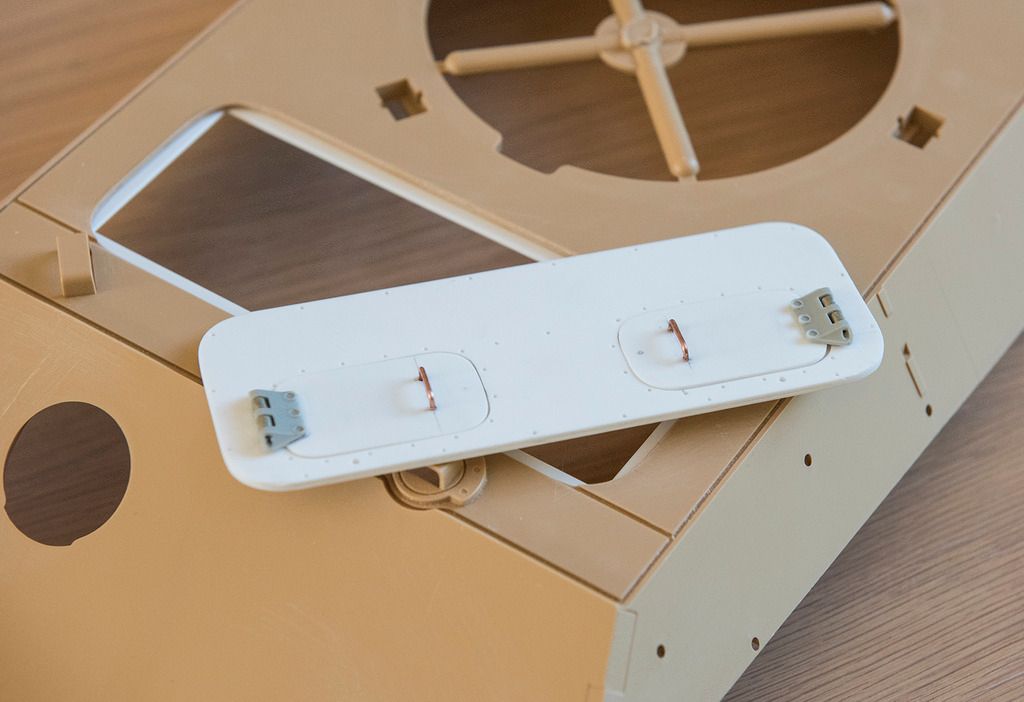
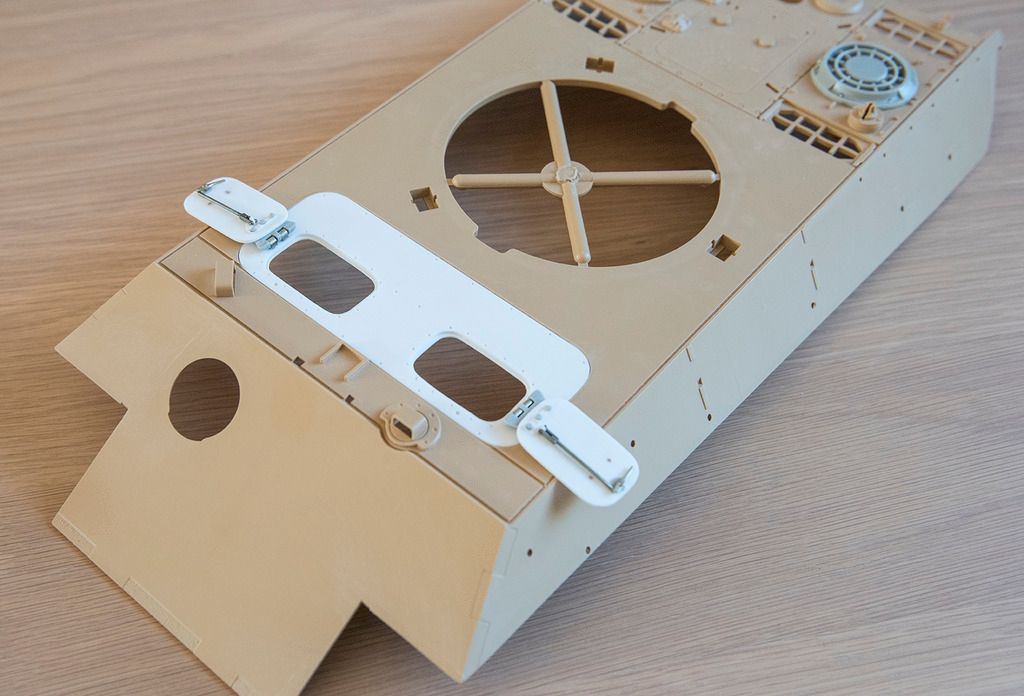
Complete driver's and radio operator's hatches


Hi everyone


Well, this area of the build certainly took longer than I anticipated!


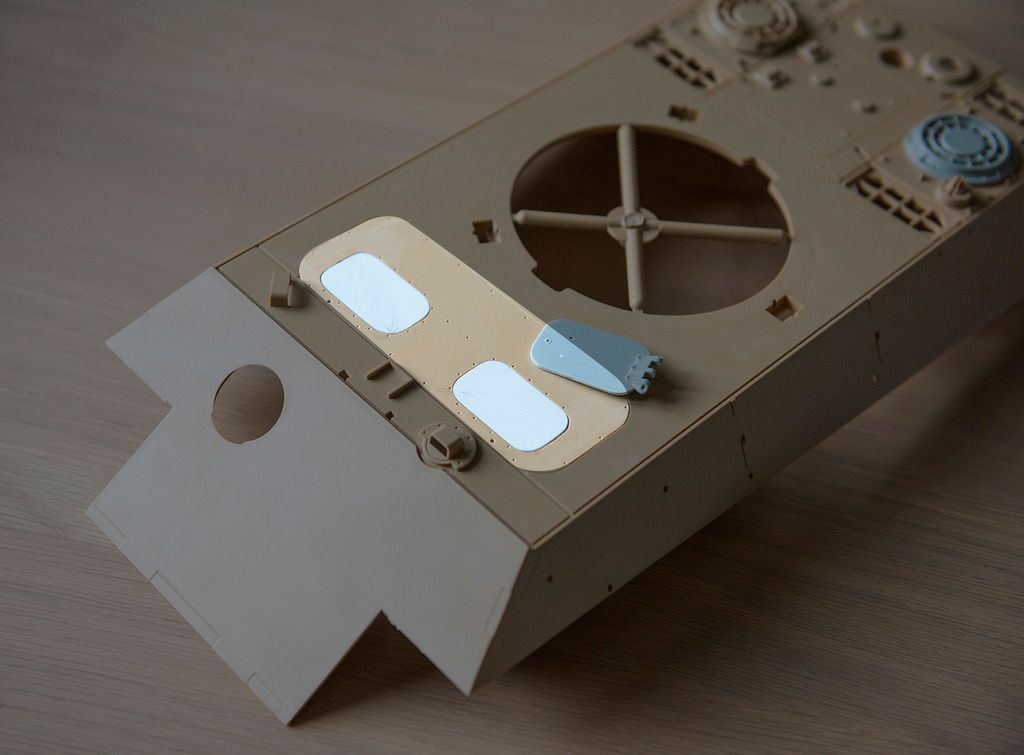
To recap, I decided to rebuild the Wecohe hatches and part of the deck to resolve fit and scale issues. I finally finished this area today and the results can be seen below. I built the deck with 2 weights of plastic card and detailed it with bolt holes and the rebates for the hatches themselves. The fittings from the original Wecohe items were removed and placed on to the new plastic card hatches. I did rebuild some of the detail, again in plastic card, simply because it was easier to do this.


Because the items have rounded edges lots and lots and lots of test fitting went into this part of the build and i'm happy enough with the results..


Next: Hull texture and Zimmerit!


Cheers


Paul
 

monica

“When there's no more room in hell, the dead will
SMF Supporter
Joined
Oct 30, 2013
Messages
15,111
Points
113
Location
Melbourne
First Name
monica
real nice detailing on this,looking very good,liking what and how your doing it, 9_9
 

tr1ckey66

SMF Supporter
Joined
Mar 6, 2009
Messages
3,686
Points
113
First Name
Paul
Cheers Tony/Monica


I'm trying to keep a fairly brisk pace with this build but unfortunately tasks such as this one just seem to take an age.


Cheers


P
 

tr1ckey66

SMF Supporter
Joined
Mar 6, 2009
Messages
3,686
Points
113
First Name
Paul
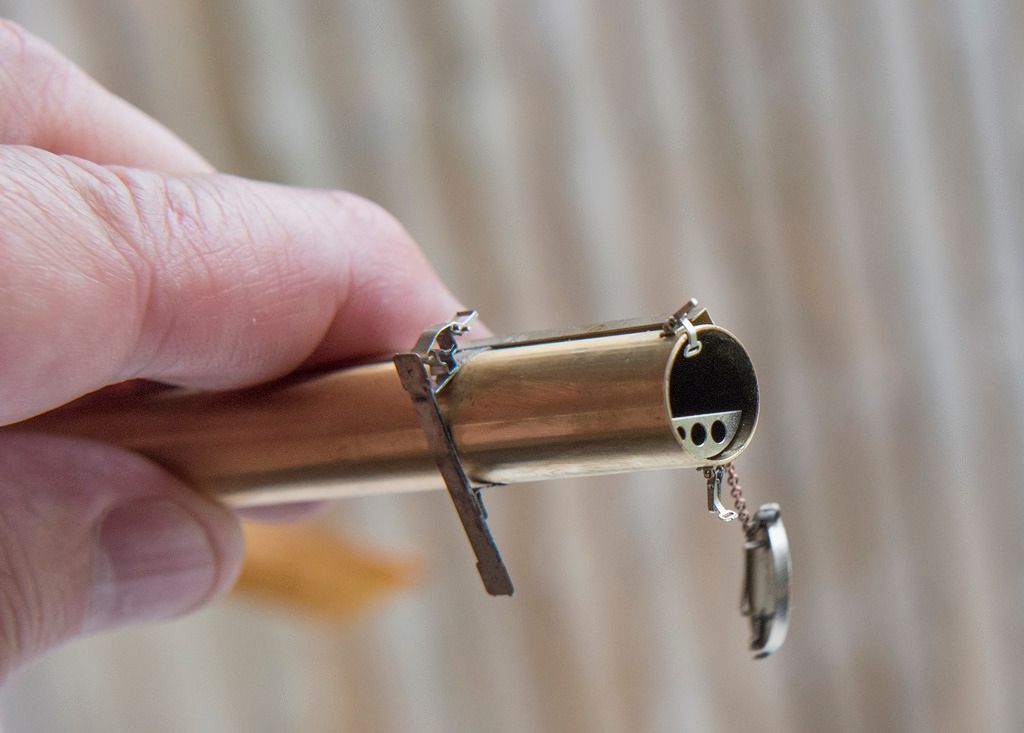
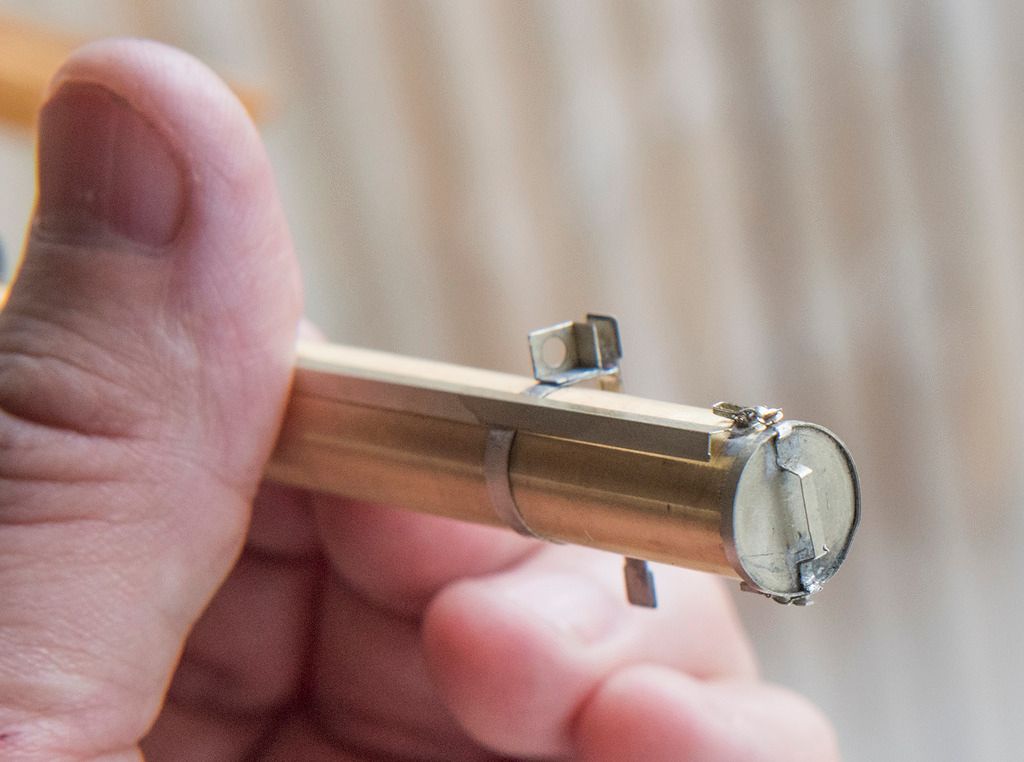
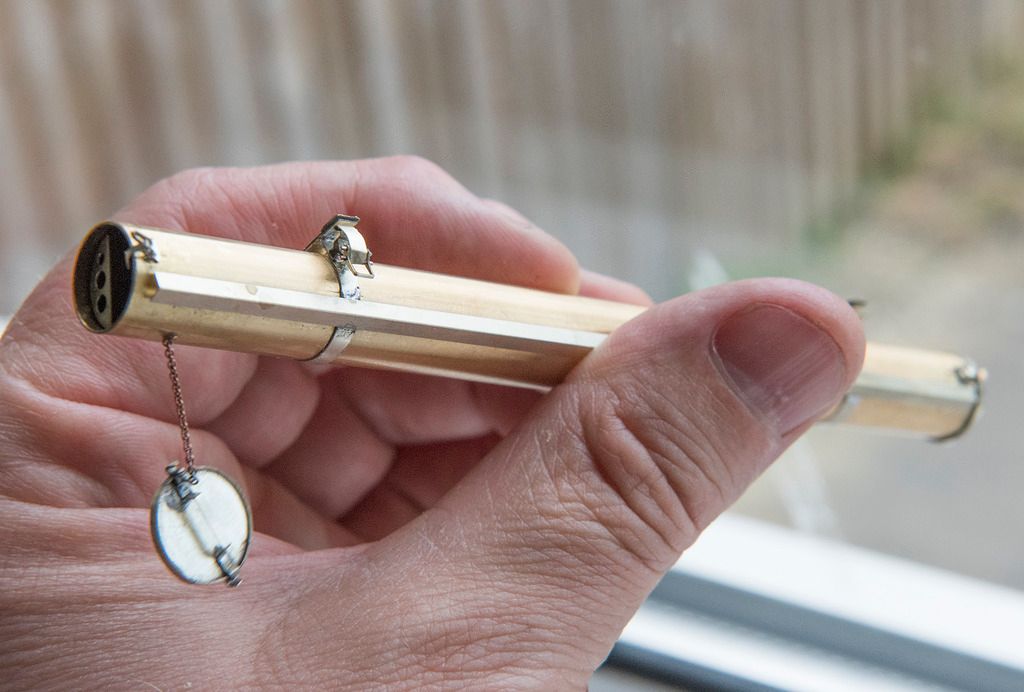
Tube container for barrel cleaning rods and antenna


This post was going to be about hull texture and Zimmerit, but the application of this coating requires knowing where the various brackets and clamps will be located. To do this I'll have to finish most of the photo etch first to ensure their positioning is correct.


So...


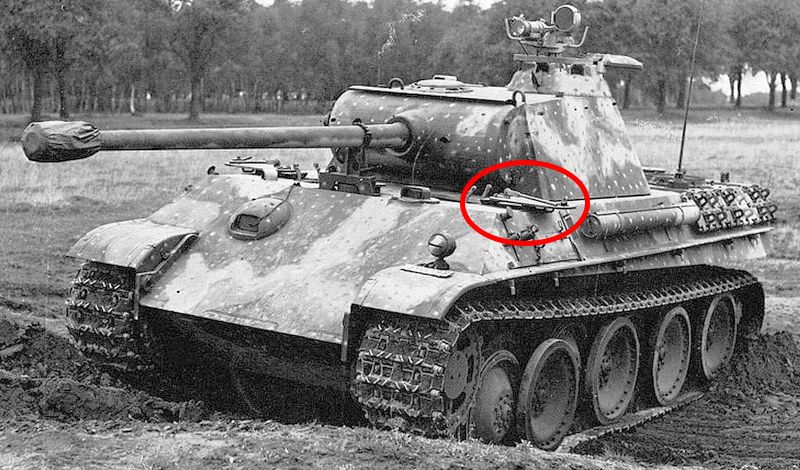
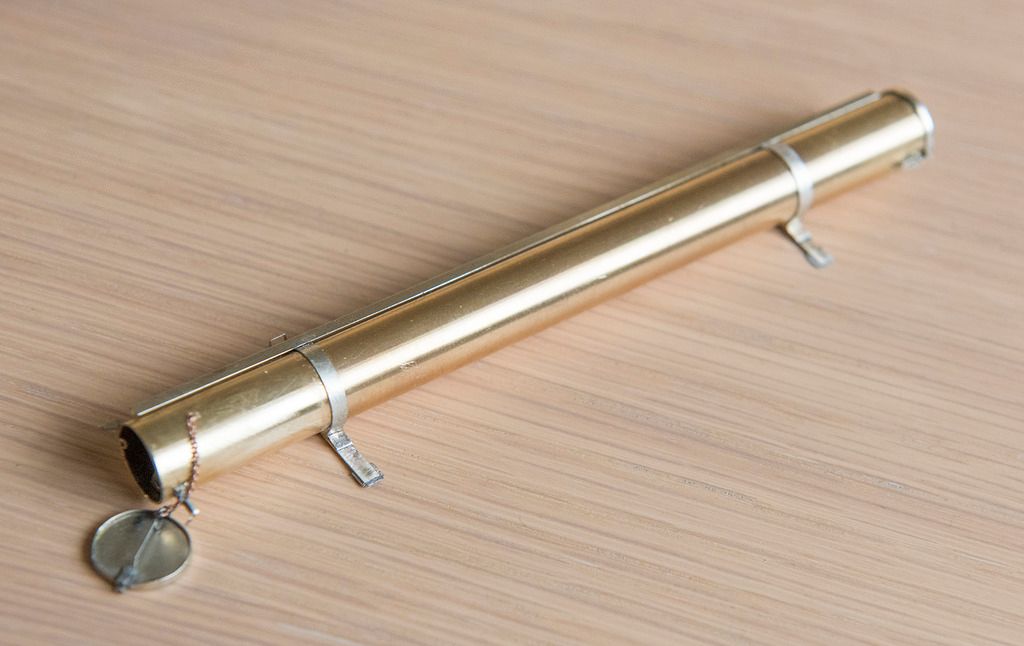
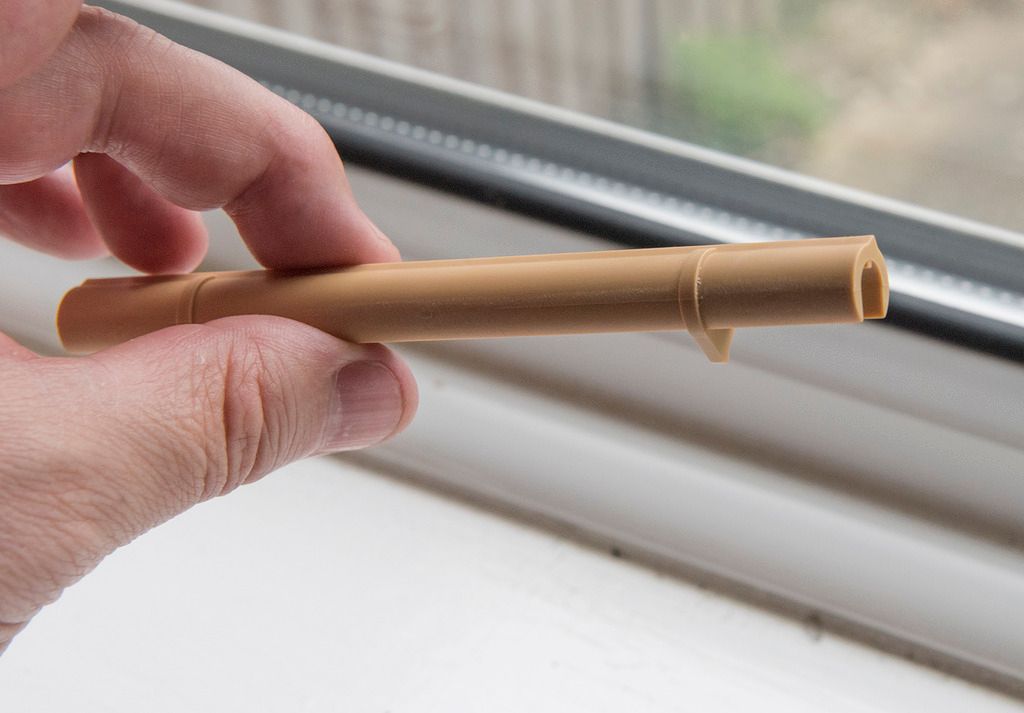
Today I finished the tube container found on the left hand hull side of most Panthers (crews of certain units moved theirs to the back of the rear deck). This tube was used to house the barrel cleaning rods and the antenna.


This Aber photo etch set took another day of soldering but is, I think, infinitely better than the kit part. Again all the clasps work and although occasionally frustrating I think the extra work was really worth it.


Here's a few pics...


The kit part for comparison...


And the part below where it will eventually be positioned on the tank...
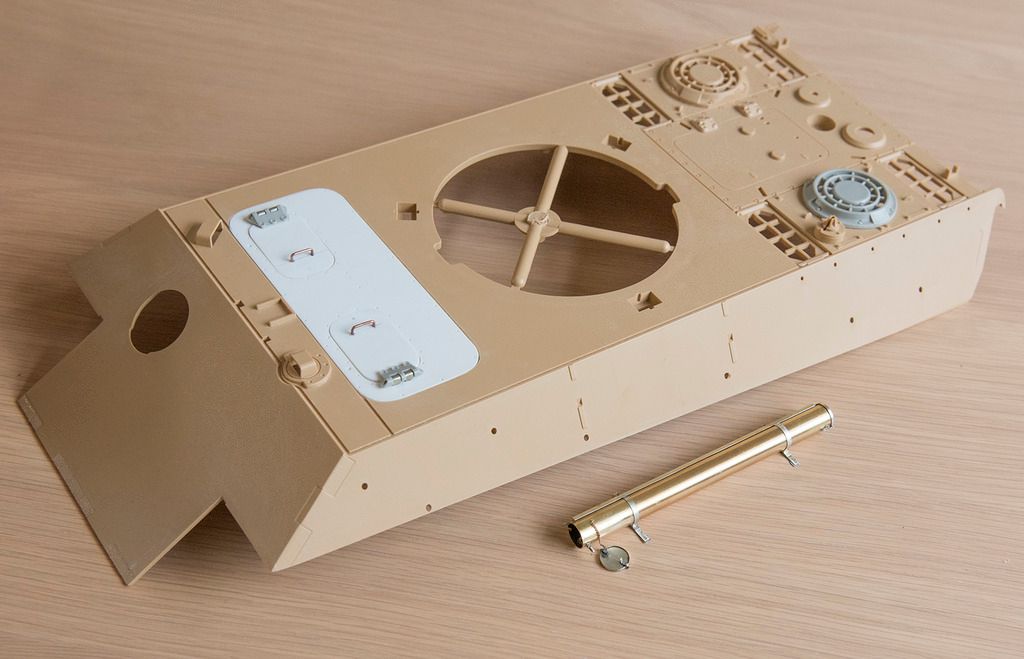


Next...


More soldering I'm afraid with tool brackets, fire extinguishers, jacks etc on the menu!


Till next time


Paul
 
D

dubster72

Guest
That tube container is an absolute work of art Paul! You've got the skills to pay the bills ;)
 

tr1ckey66

SMF Supporter
Joined
Mar 6, 2009
Messages
3,686
Points
113
First Name
Paul
Thanks Patrick.


The PE will take some weekends to complete but once that is done I think the build will progress rapidly.


It's a great project.


Cheers


P
 

tr1ckey66

SMF Supporter
Joined
Mar 6, 2009
Messages
3,686
Points
113
First Name
Paul
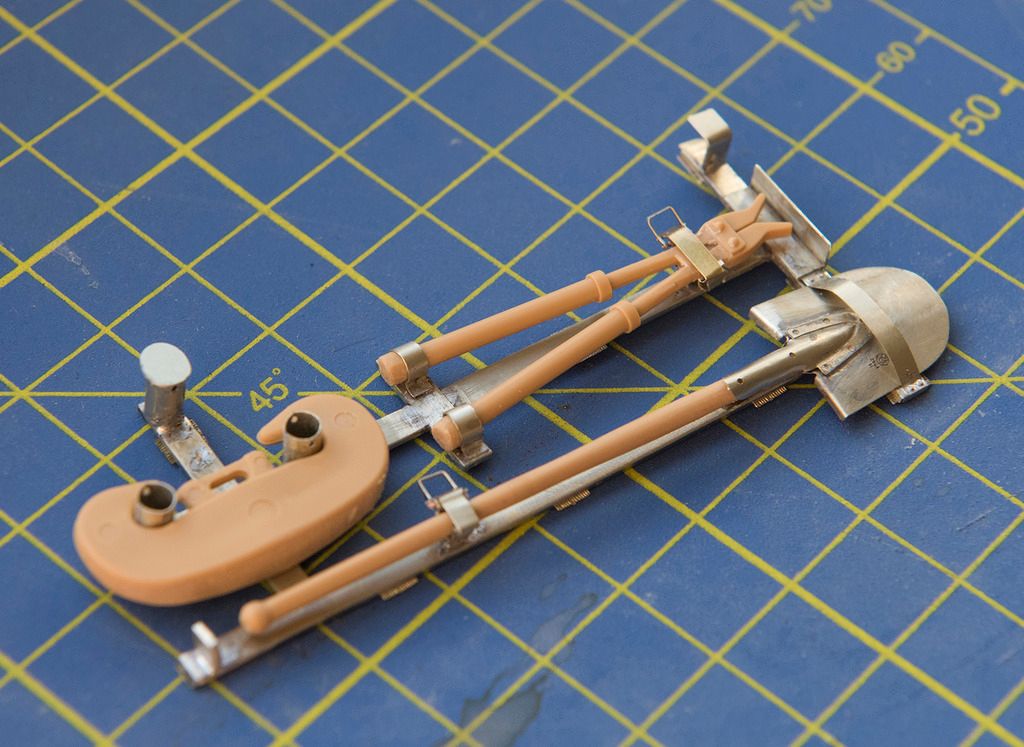
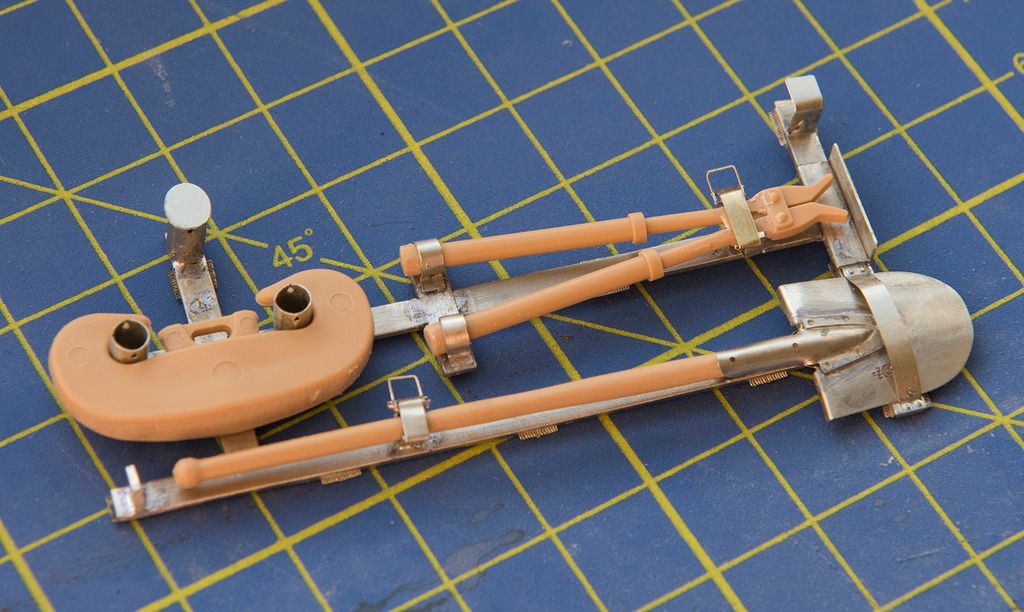
Tool Brackets


The marathon soldering session continues!


Finished the left hand hull tool bracket today. Well, almost! There's still a couple of retains pins and connecting chains to assemble. I'm also going to fashion a new shovel handle out of real wood a little later on in the build.


Anyway here's the progress...


Cheers


Paul
 

monica

“When there's no more room in hell, the dead will
SMF Supporter
Joined
Oct 30, 2013
Messages
15,111
Points
113
Location
Melbourne
First Name
monica
real do love the detail on this build,nice to see how it should look, :D
 
A

Airfix Modeller Freak

Guest
brilliant work mate, been off forum recently, the prolifereation of PE and AM make this into a stunning build
 

tr1ckey66

SMF Supporter
Joined
Mar 6, 2009
Messages
3,686
Points
113
First Name
Paul
Thanks John


I'm thinking that I'll build the majority of the PE before posting next as I think this could become really repetitive.


Thanks all for the support


P
 
Top