Tamiya 1.35 scale 4x2 German cargo truck

Joined
Nov 16, 2016
Messages
1,417
Points
113
First Name
colin
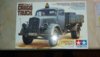
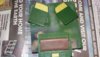
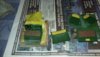
Hi all this will be my next build.
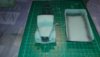
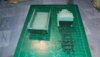
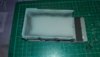
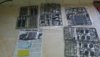
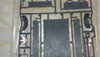
It looks like a straight forward build except the 18 ejector pin marks in the cargo bed which will be visible once its built so its out with the putty and then try to scribe the wood grain into it.
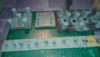
Other than that it looks good even has the window masks and cargo included
 

Attachments

  • 20170203_143949.jpg
    20170203_143949.jpg
    66.9 KB · Views: 39
  • 20170203_144039.jpg
    20170203_144039.jpg
    76.6 KB · Views: 40
  • 20170203_144127.jpg
    20170203_144127.jpg
    66.4 KB · Views: 38
D

dubster72

Guest
Looks like a nice kit Col. But what were Tamiya thinking of with those pin marks?? Couldn't they have done it on the other, less visible side? o_O

A wire brush is good for rescribing wooden texture.
 
Joined
Nov 16, 2016
Messages
1,417
Points
113
First Name
colin
My mistake Patrick they are on the inside I suppose I could hide them with cargo but knowing my luck I'd miss one. I never thought about a wire brush so I'll bear that in mind
 
F

Fenlander

Guest
Cargo and rubbish, that's the best way to hide them lol. Nice kit.
 

grumpa

SMF Supporter
Joined
Jan 14, 2015
Messages
4,690
Points
113
First Name
Jim
I like the old trucks, kind of a rarity that kit I've never seen it beforeo_O
 
Joined
Nov 16, 2016
Messages
1,417
Points
113
First Name
colin
I think it came out last year Jim
 
Joined
Nov 16, 2016
Messages
1,417
Points
113
First Name
colin
Hi all I decided to man a start on this today and I have to say apart from a few pin marks that needed filling its a detailed kit that's going together nicely here's a couple of pics to be gong on with
 

Attachments

  • 20170203_143949.jpg
    20170203_143949.jpg
    80.5 KB · Views: 15
  • 20170205_230048.jpg
    20170205_230048.jpg
    67.7 KB · Views: 16
Joined
Nov 16, 2016
Messages
1,417
Points
113
First Name
colin
Hi all this is the latest update on my newest build
Everything up till now has gone together easily with no filler needed except on the truck bed here's some pics on the cab before it gets glued together
 

Attachments

  • 20170208_130008.jpg
    20170208_130008.jpg
    61.8 KB · Views: 19
  • 20170208_130018.jpg
    20170208_130018.jpg
    75.8 KB · Views: 20
  • 20170208_130026.jpg
    20170208_130026.jpg
    90 KB · Views: 18
  • 20170208_130040.jpg
    20170208_130040.jpg
    84.8 KB · Views: 18

monica

“When there's no more room in hell, the dead will
SMF Supporter
Joined
Oct 30, 2013
Messages
15,111
Points
113
Location
Melbourne
First Name
monica
nice progress so far with this one,Colin,looking good,;)
 
Joined
Nov 16, 2016
Messages
1,417
Points
113
First Name
colin
Hi all a quick update on my latest effort the cab,chassis and truck bed are now assembled and ready for paint it all went together without a hitch.
Tue next step is to scratch build the frame work for the tarp any ideas on how to do it would be gratefully accepted
 

Attachments

  • 20170209_172632.jpg
    20170209_172632.jpg
    57.6 KB · Views: 13
  • 20170209_172644.jpg
    20170209_172644.jpg
    55 KB · Views: 14
  • 20170209_172705.jpg
    20170209_172705.jpg
    60.3 KB · Views: 15
  • 20170209_172718.jpg
    20170209_172718.jpg
    59.2 KB · Views: 14

monica

“When there's no more room in hell, the dead will
SMF Supporter
Joined
Oct 30, 2013
Messages
15,111
Points
113
Location
Melbourne
First Name
monica
nice going Colin,looking good,;)

you could always use a thin gauge of wire,and just bend to shape,maybe some think around
the 2mm mark,
 

Ian M

Administrator
Staff member
Administrator
Moderator
SMF Supporter
Joined
Dec 14, 2008
Messages
19,707
Points
113
Location
Falster, Denmark
First Name
Ian
Nice little truck there. Any idea as to what the make is. Tamiya obviously didn't want to get into a licensing fest.
You need a photo of a real one to work out the framework for the tarp. Once that's sorted, I would use 1 mm (that's about 1 1/4 inch in scale), brass wire to make the frames and then smooth tissue for the tarp.
 
Last edited:
Joined
Nov 16, 2016
Messages
1,417
Points
113
First Name
colin
Hi ian it is an Opel I've made the hoops from 1.5 mm brass but I can't find a picture of how they are attached to the vehicle.
I won't be fitting a tarp I'm going to simulate wire mesh with fern branches attached as camo
 
Joined
Nov 16, 2016
Messages
1,417
Points
113
First Name
colin
Hi all here's the latest update after making the framework for the rear I decided it looked wrong so I took it off and fitted the kit part. Everything is now primed and some parts have had a shadow coat applied ready for a base coat of dunkelgelb.
The cargo will get a coat of German grey.
 

Attachments

  • 20170212_100021.jpg
    20170212_100021.jpg
    69 KB · Views: 13
  • 20170212_100038.jpg
    20170212_100038.jpg
    76.5 KB · Views: 13
  • 20170212_100133.jpg
    20170212_100133.jpg
    71.3 KB · Views: 14
  • 20170212_100214.jpg
    20170212_100214.jpg
    65.8 KB · Views: 13
D

dubster72

Guest
That's coming along really well Col. I think the truck is an Opel Blitz, so if you're after references, I'd Google that name.
 
Joined
Nov 16, 2016
Messages
1,417
Points
113
First Name
colin
Hi Patrick I'm going for a late war 44 -45 I know the base coat is dunkelgelb but would it be the same tri colour camo as a afv as the tamiya instructions are a bit vague after 1943
 
B

Builder

Guest
Great work on the interior and the seats there Colin, begining to look the part now that its primed.
 
Top