The hangar

rickoshea52

SMF Supporter
Joined
Dec 20, 2011
Messages
3,970
Points
113
Location
North West
First Name
Rick
Whilst looking for some inspiration for other modelling ideas I stumbled across this fantastic photo of a Lightning maintenance hangar. The aircraft subject is not the inspiration, but it is certainly tempting, I'm more interested in the interior of the hangar. I've seen plenty of different makers of diorama backgrounds but none that suit my needs so the answer is to do it yourself.


View attachment 106554


I've read somewhere of an old drawer being used for a diorama display so when I saw these wooden boxes being sold off for £1 each I bought a few with the idea of having a play around and see what I can create.


View attachment 106555

View attachment 106556

View attachment 106557


I started by carefully removing one of the long sides and filling in any holes with filler and then painting with some spare white satin paint. Using embossed brick sheet, Evergreen plastic girders and trusses I will construct a back wall along the remaining long side of the box. Later a concrete floor will be added and scratch built hangar doors for the short ends. With some painting and carefully chosen and scratch built clutter a reasonably convincing setting can be created for my future 1/72 scale aircraft of a similar size to a Lightning.


View attachment 106567

View attachment 106568


image.jpg

image.jpg

image.jpg

image.jpg

WP_20150419_16_26_34_Pro.jpg

WP_20150419_16_27_19_Pro.jpg
 
Last edited by a moderator:

PaulTRose

Dazed and confused
SMF Supporter
Joined
Jun 13, 2013
Messages
5,741
Points
113
Location
limbo
First Name
Paul
so what aircraft will be in the dio?
 

rickoshea52

SMF Supporter
Joined
Dec 20, 2011
Messages
3,970
Points
113
Location
North West
First Name
Rick
\ said:
so what aircraft will be in the dio?
Anything that fits. I suppose it will be more of a display setting rather than a specific diorama. It will also serve as a trial build of a larger sized idea that I have, just to see if it works - but I'll keep that to myself for now.
 

yak face

Wossupwidee?
Staff member
Moderator
SMF Supporter
Joined
Jun 13, 2009
Messages
12,393
Points
113
Location
sheffield
First Name
tony
Great idea Rick , cant wait to see the hangar take shape , cheers tony
 

monica

“When there's no more room in hell, the dead will
SMF Supporter
Joined
Oct 30, 2013
Messages
15,111
Points
113
Location
Melbourne
First Name
monica
good idea and a nice start as well ;)
 

rickoshea52

SMF Supporter
Joined
Dec 20, 2011
Messages
3,970
Points
113
Location
North West
First Name
Rick
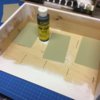
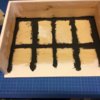
After two coats of paint to the outside of the diorama case the inside can start. I was thinking of using Will's building sheets for the concrete floor but the sheets have a rough finish. While this is acceptable for an external aircraft parking stand I don't think it will look right for a hangar floor as they are usually smooth. The black paint was applied to the wooden base where the sheets joined but this is no longer important.


So a smooth floor surface is required, time to rummage in my box of plasticard.


View attachment 107103


View attachment 107104


image.jpg

image.jpg
 

rickoshea52

SMF Supporter
Joined
Dec 20, 2011
Messages
3,970
Points
113
Location
North West
First Name
Rick
Back to plan A - I'm going with the Will's concrete sheets. I don't have enough so I dropped by Alton Model Centre to get some more and extra plasticard sheets only to find they aren't open on Sunday's anymore.


The back wall is brick embossed sheet, when done there will be H section girder to section it up. The side wall on the left will be a hangar door made from plasticard.


View attachment 107316


image.jpg
 

rickoshea52

SMF Supporter
Joined
Dec 20, 2011
Messages
3,970
Points
113
Location
North West
First Name
Rick
I picked up some more Will's concrete sheets and plasticard this week, I have one strip of concrete left to make. The plasticard was used to make the hangar doors at the left hand side, these doors run on rails and open across each other on an overlap. The hangars that I have most experience of have six doors at each end in two sets of three so with only one and a bit of another I hope that there is an impression of size created here.


The door closest to the back wall is double skinned, I glued a sheet of plasticard along the whole left hand side the using H section girder to create the cross members I glued a smaller sheet to them to create the sandwich effect.


To check that a 1/72 scale aircraft looks okay in this setting I had a play around with a Cold War jet, a WW2 fighter and a helicopter, I think it will look about right.


View attachment 107770

View attachment 107771

View attachment 107772

View attachment 107773

View attachment 107774

View attachment 107775


image.jpg

image.jpg

image.jpg

image.jpg

image.jpg

image.jpg
 
Top