1/700 scale IJN Ships make over

Airborne01

SMF Supporter
Joined
Mar 30, 2021
Messages
3,148
Points
113
Location
Essex
First Name
Steve
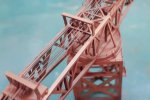
A bit more done just now on the giant crane with railings and ladders...
View attachment 454095
I added a door at the end of the walkway. The kit doesn't show any way into the work house so I'm improvising. I'm sure there is a way in but was too lazy to search for reference and not too worried of riveteers. Might do another walkway and door on the opposite side...perhaps entering higher to another floor level with stairs leading to it from the walkway...that would be interesting. I can really go bonkers with this.

Cheers,
Richard
Go Bonkers? You already are mate ... ! :smiling5:
 

JayCee

SMF Supporter
Joined
Aug 13, 2019
Messages
993
Points
93
First Name
John
Better and better and even better ! Your work really is mind blowing, Richard.
John.
 

adt70hk

I know its a bit sad but I like quickbuild kits!!!
SMF Supporter
Joined
Sep 4, 2019
Messages
9,496
Points
113
First Name
Andrew
Amazing......
 

rtfoe

SMF Supporter
Joined
Apr 29, 2018
Messages
7,504
Points
113
Location
Malaysia
First Name
Richard
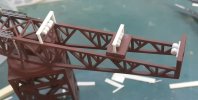
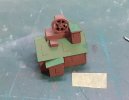
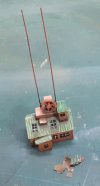
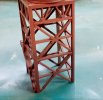
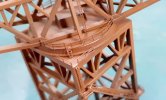
Hi, made more progress on the giant crane...
Raised stairs on the opposite side and started on the cabling pylon structures.
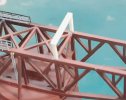
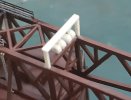
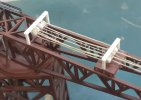
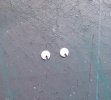
20220527_171835.jpg20220527_172131.jpgMade the cable pulleys...if you think it looks like something else pls keep it to yourself. :smiling6:
20220527_184201.jpg20220527_184218.jpg
Cabling with stretched sprue to be continued to the engine house.
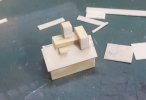
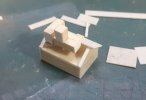
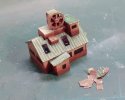
20220528_010631.jpgMeanwhile I scratched an engine house for the base...no plans just gyzmology. Will add a huge pulley somewhere.
20220527_184138.jpg20220527_184125.jpg
That's all for tonight.

Cheers,
Richard
 

Jim R

SMF Supporter
Joined
Apr 27, 2018
Messages
13,713
Points
113
Location
Shropshire
First Name
Jim
Hi Richard
Looking great. Like Scottie I'm impressed with how neat your work is.
Jim
 

Allen Dewire

Proud Rabble Member
SMF Supporter
Joined
Apr 27, 2018
Messages
4,105
Points
113
Location
Bamberg
First Name
Allen
More fantastic work Richard!!! This is just so cool and so tiny......Now remember, Take off optivisor, get up from the bench slowly, watch out for the door frames, walk carefully and feel your way to the sofa, sit down, close your eyes and take a rest. After 20 minutes, your poor vision will (hopefully) get back to normal..........

Prost
Allen (M.D. at large)
 

rtfoe

SMF Supporter
Joined
Apr 29, 2018
Messages
7,504
Points
113
Location
Malaysia
First Name
Richard
Richard,

Lovely neat work mate.
Hi Scottie, thanks for that compliment although tbh at close up it looks a bit messy.
Hi Richard
Looking great. Like Scottie I'm impressed with how neat your work is.
Jim
Lovely Jim, like two peas in a pod but seriously not nearly as good as those I've seen in others but I'll take the compliment just the same. :smiling3:
More fantastic work Richard!!! This is just so cool and so tiny......Now remember, Take off optivisor, get up from the bench slowly, watch out for the door frames, walk carefully and feel your way to the sofa, sit down, close your eyes and take a rest. After 20 minutes, your poor vision will (hopefully) get back to normal..........

Prost
Allen (M.D. at large)
:tears-of-joy: Dear Allen MD, I'm acquainted with the door and have met it a few times head on after sessions with the optivisor still on. Will take your advice seriously as my forehead is spotting a few lumps and I get a few stares at the local groceries while SWMBO gets a wide berth by the customers. Vision is fine the moment SWMBO comes into view ...years of self preservation I guess.
Cheers,
Potion...I mean Patient No.9
 

rtfoe

SMF Supporter
Joined
Apr 29, 2018
Messages
7,504
Points
113
Location
Malaysia
First Name
Richard
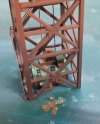
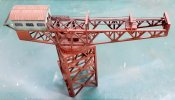
I have been busy at the LHS and managed to add more PE and the final cables to the crane. The next thing I did was giving it a few coats of varying shades of Hull red or red primer after masking the engine shed...
20220529_003345.jpg
There are at least four shades from dark brown to a light orange.
20220529_003359.jpg
Shades very evident on the leg structure...a form of modulation.
20220529_003421.jpg
I will highlight the railings, stairs and ladder with silver as all the PE is guess work and running wild with the detail.
20220529_003457.jpg
Pulleys will be painted in black and cables probably in metallic grey.
While the paint cures before the weathering and highlights I will further work on the lower engine shed.

Cheers,
Richard
 

rtfoe

SMF Supporter
Joined
Apr 29, 2018
Messages
7,504
Points
113
Location
Malaysia
First Name
Richard
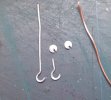
The whole thing needs a hook so I fashioned the crane lifting hooks with thin wire and sliced plastic rod...
20220529_184945.jpg
The sliced rod will act as the pulley...
20220529_201022.jpg
I then bent the wire to shape and flattened it. There are a few ways to do this, place the wire between a flat nosed plier and squeeze the daylights out of it or in between a vice and twist the daylights out of that but I chose the neanderthal way and bashed it with a hammer. :tears-of-joy:
20220530_004348.jpg
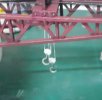
I super glued the assembly to stretched sprue and attached it the the crane. Perhaps I should have painted it first...neanderthal am I...ugg.

Cheers,
Richard
 

rtfoe

SMF Supporter
Joined
Apr 29, 2018
Messages
7,504
Points
113
Location
Malaysia
First Name
Richard
Bravo Sir.
Thank you Paul/Scottie,

I was so engrossed in detailing the bottom engine house that I forgot to take photos but here it is waiting for the base coat paint to cure.
20220530_183015.jpg
I made the fly wheel with sliced plastic tubing, cut section of plastic strip and two sliced rods. Windows have been masked over black. I will add the cables running from the fly wheel up the belly of the crane.
So far I'm just guessing and just making it look busy.

Cheers,
Richard
 

rtfoe

SMF Supporter
Joined
Apr 29, 2018
Messages
7,504
Points
113
Location
Malaysia
First Name
Richard
Great stuff Richard. Neanderthal you may be but it works.
Jim
Thanks Jim, sometimes the simplest means work however crude it may be.
Today I painted details to the engine house with Vallejo. After removing the mask I realised that the black wasn't dark enough so I went over it with black gel pen. It takes a while to dry. Might have to mist with matt varnish to keep it waterproof.
20220601_013227.jpg
Needs a final wash and stains. Colors have turned out bright in the photo.

Cheers,
Richard
 

rtfoe

SMF Supporter
Joined
Apr 29, 2018
Messages
7,504
Points
113
Location
Malaysia
First Name
Richard
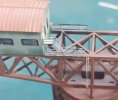
Hi, just dirtied the engine house and etched the window frames freehand...I should have used dymo tape to keep the lines straight but it'll be hidden behind the crane legs. Cables leading to the belly of the crane added and painted looking like feelers.
20220601_142933.jpg20220601_143407.jpg
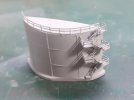
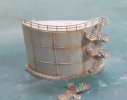
Oil storage tank got weathered and rusted. I didn't paint it with the aid of magnifiers and shows in the photo.
20220601_144750.jpg
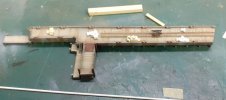
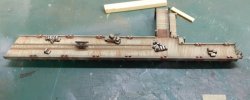
I'll stick them onto the wharf and snap some shots later.

Cheers,
Richard
 

rtfoe

SMF Supporter
Joined
Apr 29, 2018
Messages
7,504
Points
113
Location
Malaysia
First Name
Richard
Created some nick-nacks for the wharf extentions...barrels, oil drums, boxes, crates and trolley.
20220602_130509.jpg
And gave them a base wash of black and it could be just left as is but I want more color and highlights...
20220602_135304.jpg
Need to refresh my palette.

Cheers,
Richard
 

Jim R

SMF Supporter
Joined
Apr 27, 2018
Messages
13,713
Points
113
Location
Shropshire
First Name
Jim
Great work Richard. It is too easy to look at the photos and forget how very small these details are.
Jim
 
Top