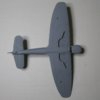
Academy Tempest V 1/72

T

TonyBv9

Guest
The WWI group build duo are still on the go, but I just fancied starting this one.

I wanted a pilot, so I bought some Revell 1/72 RAF figures, but they are much too big for this kit. Think of Jaws from the Bond films and you will get an idea of the relative proportions. Even with considerable surgery I don't think I could have got a pilot in.

View attachment 45160

Anyway, cockpit done. Thanks to Roman for the seatbelt tutorial, except I used some surplus roller blind material, which has a webbing effect.

Primer on. Now I need some help and advice from the forum:

View attachment 45162View attachment 45161

I still want to pose it with the wheels up, but there are no ridges on the walls of the wheel wells to attach the covers to. What can I do to ensure a good, level fit?

Also, what colour should the inside of the radiator cowl be?

Thanks

Tony

View attachment 48272

View attachment 48273

View attachment 48274

IMG_8117.jpg

IMG_8137.jpg

IMG_8139.jpg
 
T

T. van Vuuren

Guest
Nice kit, I built it some time ago.

You could fill the UC bay with something like blue tack /prestik and simply push the doors inplace that way with a little glue on the UC dppr edges. The prestik will hold it inplace till the glue cures.

Not sure about the intake colour, but Hawker had the habit of making wheelwells silver, maybe the same with the intake?

Theuns
 
T

TonyBv9

Guest
Thanks Theuns,

I was thinking about blutack. Filler is a possibility, but I think that much filler might shrink as it cures

I've gone with matt black for now, to match the cockpit. The instructions say interior green for both, but I know that's wrong for the cockpit, so perhaps wrong for the chin piece. I've googled lots of images of Tempests, but can't find a definitive answer.

Tony
 

colin m

Moderator
Staff member
Moderator
SMF Supporter
Joined
Dec 26, 2008
Messages
8,605
Points
113
Location
Stafford, UK
First Name
Colin
I've done the blu tak trick a few times - it works well.
 
V

Vajled

Guest
Looking very good so far...

So mighty looking plane... watching progress with interest

Roman
 
B

Buttonman

Guest
Nice i really love the tempest, Looks so mean with that massive Mouth coming at you are you putting jaws on it?

Will be watching buddy.

Martin
 
T

TonyBv9

Guest
Hi Martin,

There's no jaws in the decal set, sadly. I'm doing Pierre Clostermanns NV724 in British camo and a red spinner. You're right though, it looks awesome head-on. That's why I want it in flight.

Tony
 

flyjoe180

Joe
SMF Supporter
Joined
Jan 18, 2012
Messages
12,438
Points
113
Location
Earth
First Name
Joe
The Tempest is a brutal-looking aeroplane, yet beautiful at the same time. Another great Hawker product. Looking forward to seeing your build.
 
T

TonyBv9

Guest
I've made some sporadic progress on the Tempest. This is my first go at RAF camo. I used blutackto mask off the green bits. All brush painted with Modelcolor. I'm quite pleased with it, but there are a few bits that need touching up. A problem I can see will be the yellow leading edges - I will have to sort them out somehow. There are some paint ridges where I overloaded the brush and got too close to the masking; how would you flatten them? Thumbnail, blade or sand?

Sorry about the photos, I don't have a decent light handy.

View attachment 45790View attachment 45791

View attachment 48861

View attachment 48862

tempest3.jpg

tempest4.jpg
 

flyjoe180

Joe
SMF Supporter
Joined
Jan 18, 2012
Messages
12,438
Points
113
Location
Earth
First Name
Joe
Hi Tony, the paint job looks good from here. If by ridges you mean sharp edges higher than a neighbouring colour, I sand them with 1000 grit very lightly until it's flat. If you mean a hump caused by painting over the other colour, you may have to sand that too and touch the edges up again. In 1:72 you can also get away with small ridges when the gloss coat is applied, I found it tends to blend small ones in. For the yellow leading edges, although people say paint the lighter colours first, I do them last by simply masking the area around them off with tape. As you know yellow is a real pain to use, and it's probably too late to suggest masking the yellow leading edge areas off before doing the main scheme?
 
T

TonyBv9

Guest
Thanks for that Joe. I'll try light sanding on the bumpy edges.

My problem with the yellow started with the grey primer - it was a bugger to cover the primer beneath. White primer next time perhaps. Maybe I should try enamel for the yellow, too.

The leading edges are still masked in the photo, but I can see that paint has bled under the tape. It's just fiddly, really. Next time I'll try your method and do the edges last.

Tony
 
H

Hangtight

Guest
Quick tip to help with paint bleed, although a little late for you on this one! Once the tape is on, seal the edges with the under lying colour. This way any bleed is the same colour as the bit you're trying to mask.
 
B

Buttonman

Guest
Never thought of that, thanks mate that'll save me loads of time and dread when I take the tape off

Cheers

Martin
 
Top