Airfix 1/24 scale Hellcat.

Jim R

SMF Supporter
Joined
Apr 27, 2018
Messages
13,716
Points
113
Location
Shropshire
First Name
Jim
Hi Barry
Great update. Good call with the tail hook. The fit of the fuselage certainly is poor. Luckily the parts causing most problems are not essential. Very interesting to see how well you plan the painting. I have been caught out more than once so your system is noted.
Jim
I do wonder what goes through the mind of the kit designers at times...
Maybe the kit designers don't speak to the kit's test builders :rolling:
Jim
 

Gern

'Stashitis' victim
SMF Supporter
Joined
May 17, 2009
Messages
9,690
Points
113
Location
Stourbridge
First Name
Dave
Hi Barry
Great update. Good call with the tail hook. The fit of the fuselage certainly is poor. Luckily the parts causing most problems are not essential. Very interesting to see how well you plan the painting. I have been caught out more than once so your system is noted.
Jim

Maybe the kit designers don't speak to the kit's test builders :rolling:
Jim

Or maybe they're just IT experts who live inside their a***s unless they're talking to a 'puter screen! The world is full of 'em. They get paid a fortune for producing stuff that only they are interested in - then the manufacturer has to try and get his money back so he just loads it into his machines. And us poor guys on the receiving end have to put up with endless issues caused by overloading some poor basic programme or bit of circuitry.

Sorry Barry. Rant over!
 

Jakko

Way past the mad part
SMF Supporter
Joined
Apr 28, 2018
Messages
10,782
Points
113
First Name
Jakko
But why do they bother with clear plastic? It is pointless. If you are using the inscribed one you will need to paint it black then paint the dial details. If you are using (as I will) the plain one with decals again you need to paint it black, apply the decals and in both cases glue on the face panel, itself painted black. Glass dials can be represented by varnish or something similar. There is no way there is any use for clear plastic.
Not having seen the instructions, I suspect the idea is to put the decals on the back of the clear panel. If they recommend putting the decals on the front, then the clear plastic is just as pointless as for the one with the moulded-in dials.
 

BarryW

SMF Supporter
Joined
Jul 23, 2011
Messages
5,037
Points
113
Location
Dover
First Name
Barry
Not having seen the instructions, I suspect the idea is to put the decals on the back of the clear panel. If they recommend putting the decals on the front, then the clear plastic is just as pointless as for the one with the moulded-in dials.
There is no mention of that. They are not printed reversed the way Tamiya are which are designed for using the way you describe. You could use a setter on the front to do it that way but, the transparency is thick and the plate over the top is thick as well so it just won’t look right.
 

Jakko

Way past the mad part
SMF Supporter
Joined
Apr 28, 2018
Messages
10,782
Points
113
First Name
Jakko
Odd. Sounds almost like they kind of lost track of what they were intending to do.
 

BarryW

SMF Supporter
Joined
Jul 23, 2011
Messages
5,037
Points
113
Location
Dover
First Name
Barry
I had a thought yesterday evening and I am convinced that the whole fuselage sides fit issue relates to warping and not engineering.

Last night I eased the bulkehead away from the side and, after cleaning it up, I loose fitted it and taped the fuselage together around it. I adjusted the position slightly and gently pushed the bottom up and obtained a good bottom join. I then applied some drops of cement to one side of the bulkhead with a long brush and after a few minutes removed the tape and seperated the sides. It is now in the optimal position. I am sure the little bit I removed previously helped a bit though simply because of the very tight tolerances, but doing so I gave myself a little wriggle room to sort it. I will need to adjust my approach to the other bulkheads too when I fit them.

As a result I did not have the time to finish off the initial painting run last night, I will do so tonight and I will get some pictures up tomorrow.

It is a mystery to me how they cocked up the tail hook fit though, not that it was a problem to resolve.
 

BarryW

SMF Supporter
Joined
Jul 23, 2011
Messages
5,037
Points
113
Location
Dover
First Name
Barry
I had an unexpected 20 minutes to sneak onto the bench to finish the paint run.

The subs below are ready for decals/weathering
EBE70175-F89A-4CD2-B6F4-CD29A37A07C5.jpeg

These need detail painting, decals and weathering.

I am also trying out something different to normal.

while the best paints to use for detail painting over lacquer airbrushed paints are water based acrylics, MRP is very glossy and, as such it is not the best surface to take water based paint. I have decided to spray a light semi- matt coat over the subs in the picture below as I think it will take the paint better.

CB8DD904-1F6A-4F39-9856-7A19CE70CAAA.jpeg

Below is a close up of the bulkhead with the reverse of the seatbelts painted. The masking did it’s job.
29EBD7A3-FE61-4344-9D74-4405D96A3A5B.jpeg

Tonight the paint brushes come out....
 

BarryW

SMF Supporter
Joined
Jul 23, 2011
Messages
5,037
Points
113
Location
Dover
First Name
Barry
update on interior detailing.

These are what I am using:

I have tried out these Posca paint pens for the first time. They are brilliant, I tried this with sharpies before but it did not work but these do. Ideal for applying a drop to a knob, you can work fast and accurately. Plenty of colours, as you can see. Google to find them if you want to try them.

i also supplemented them with the MRP’s water based acrylics. The pens are really good but some paint needs a brush.

1B3F6D24-885A-48C7-B0C7-24645983D316.jpeg

There are also quite a few decals for the interior as well. These went down well, no problems and I tried out the MIG decal solutions for the first time. These work very well.
C1956225-22C8-4801-ADFE-32691EE82BD3.jpeg

Just a few shots of the result. I applied a semi matt varnish over the whole lot once dried.

B15D074C-C5E8-48F3-8CBC-0FA21F13720C.jpeg

7AEEC62B-E6A4-4035-A1AE-7DA5845287F2.jpeg

AF2CB98A-5BF5-472F-A549-58B7478DDBF6.jpeg

3FADDCAC-D0A1-44B6-A46A-42ECFFF20FF0.jpeg

Next I need to weather this lot. A combination of washes and drybrushing with pigment. I will be using these washes and pigments applied with a mix of tools.
DE8DF872-7BDA-4BD4-BC2D-F5C8CE2A6D3B.jpeg

Below are my applicators. The MIG weathering brush set is great with the long thin brush perfect for applying small amounts of pin wash. The cotton buds and cocktail stick are useful for a controlled application of Uschi metal powder for chipping while I have a hard brush for more general dry brushing.
EB02261F-7B84-4014-8B5D-790BDB6DF8F3.jpeg

I do think this cockpit will come together well within the next day or so. I will be applying some varnishes, by brush, a couple of coats of Humbrol enamel gloss where I want a high shine on dials and Aqua Gloss for where i want a more ‘semi gloss’ effect.
 
Joined
Feb 25, 2020
Messages
577
Points
93
Location
Gloucestershire
First Name
Carl
Looking nice Barry, that green is quite different from the usual olive drab. As you have said before the detail on those large models is superb. I might go for one for my next plane build. I got a few models stashed now and the missus is starting to question why I need more than I can build ,lol
 

BarryW

SMF Supporter
Joined
Jul 23, 2011
Messages
5,037
Points
113
Location
Dover
First Name
Barry
Looking nice Barry, that green is quite different from the usual olive drab. As you have said before the detail on those large models is superb. I might go for one for my next plane build. I got a few models stashed now and the missus is starting to question why I need more than I can build ,lol
It’s US Interior Green not Olive Drab.
 
Joined
Feb 25, 2020
Messages
577
Points
93
Location
Gloucestershire
First Name
Carl
It’s US Interior Green not Olive Drab.
I seem to recall this discussion on here somewhere referring to olive drab as being a brown colour rather than green. Might be a daft question but was US interior green only uses on US aircraft?
 

Jakko

Way past the mad part
SMF Supporter
Joined
Apr 28, 2018
Messages
10,782
Points
113
First Name
Jakko
I seem to recall this discussion on here somewhere referring to olive drab as being a brown colour rather than green.
That was probably me, the other day :smiling3:

Might be a daft question but was US interior green only uses on US aircraft?
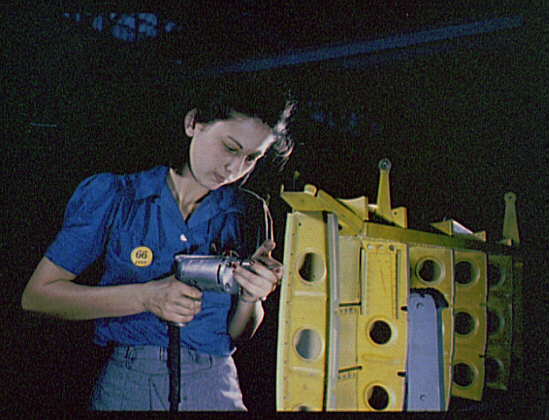
US interior green is, well … a green finish used on many (not all) American planes. The story is a bit complex, so I’ll point you to this page for a lot of background:

In short, interior green was a standardised mixture of zinc chromate (not a paint, but a coating applied to aircraft for protection) and lamp black paint. It is, apparently a pretty green green.

Other countries also used green interior finishes at the time (especially the British), but those were likely of different shades to the American one, and for obvious reasons were not known as US Interior Green :smiling3:
 
Last edited:
Joined
Feb 25, 2020
Messages
577
Points
93
Location
Gloucestershire
First Name
Carl
That was probably me, the other day :smiling3:


US interior green is, well … a green finish used on many (not all) American planes. The story is a bit complex, so I’ll point you to this page for a lot of background:

In short, interior green was a standardised mixture of zinc chromate (not a paint, but a coasting applied to aircraft for protection) and lamp black paint. It is, apparently a pretty green green.

Other countries also used green interior finishes at the time (especially the British), but those were likely of different shades to the American one, and for obvious reasons were not known as US Interior Green :smiling3:
Thanks Jakko, I guess that’s where I read it. Anyway I like that green. il‘l have to build a US plane so I can use it I guess.
 

BarryW

SMF Supporter
Joined
Jul 23, 2011
Messages
5,037
Points
113
Location
Dover
First Name
Barry
Some shots of the weather cockpit parts...
IMG_2297.jpg

IMG_2298.jpg

IMG_2299.jpg

IMG_2300.jpg

IMG_2301.jpg

IMG_2302.jpg

Bringing out detail is about a wash first to create shadows and to take the 'newness' off the paint and then drybrushing a lighter colour for highlights.

Once I used to drybrush either a lightened shade of the base colour or a light grey, but I have found that when depicting painted metal it is far better to drybrush Uschi Metal Powders. Done carefully you can pick out the raised detail and give it an appearance of paint wearing off the edges. It is paricularly effective over a matt black but it works really well over any other colour. Only use it over painted metal though. If you are drybrushing a painted wood, then drybrush with a light brown coloured pigment.

Doing that I tend to go easy on 'chipping' as such but when doing that the metal powders work well, rubbed into the paint with a cocktail stick.

Applied over a black painted surface, well rubbed and polished, it also gives a really good matallic appearance. Some people even use then for NMF schemes though I think metallisers are better for that.
 

Jim R

SMF Supporter
Joined
Apr 27, 2018
Messages
13,716
Points
113
Location
Shropshire
First Name
Jim
Hi Barry
Looking very nice indeed. The weathering process is very effective.
I have tried out these Posca paint pens for the first time.
They certainly look useful. Which ones do you use? They seem to do a few types.
Jim
 

BarryW

SMF Supporter
Joined
Jul 23, 2011
Messages
5,037
Points
113
Location
Dover
First Name
Barry

Jim R

SMF Supporter
Joined
Apr 27, 2018
Messages
13,716
Points
113
Location
Shropshire
First Name
Jim
Thank you Barry. They certainly look to be a good buy with quite a few uses.
Jim
 
Top