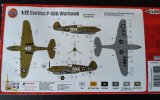
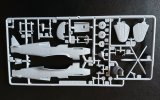
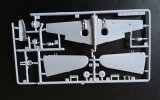
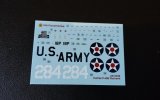
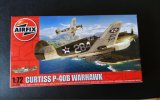
Airfix 1:72 Curtis P-40B Warhawk

Valeron

SMF Supporter
Joined
Jan 7, 2022
Messages
611
Points
93
Location
St Albans, Hertfordshire
First Name
Mike
I've recently just completed my first model - A 1:72 Spitfire Mk. Vc.

I was then going to start a Tamiya T-62 kit I have but as I've signed up for the Mossie Group build in July and I'm new to all of this, I thought I be better of practising with another 1:72 aircraft as that is what I'll be building in the GB.

I will be building this out of the box and hand painting using Vallejo paints.

20220425_145618.jpg

20220425_145707.jpg

20220425_145632.jpg20220425_145643.jpg20220425_145718.jpg20220425_145731.jpg
 

Jim R

SMF Supporter
Joined
Apr 27, 2018
Messages
13,717
Points
113
Location
Shropshire
First Name
Jim
Hi Mike
Strike while the iron's hot - straight on to another plane :thumb2:
Looks a nice kit which judging from your Spitfire you'll make a great job of.
Jim
 

Lee Drennen

Box Stock Builder with a Twist/ Rabble Member
SMF Supporter
Joined
Apr 29, 2018
Messages
5,641
Points
113
Location
Wortham Mo
First Name
Lee
Mike that’s a nice kit. I’ll be following along I have that same kit I hope to build some day.
 

langy71

SMF Supporter
Joined
Apr 27, 2018
Messages
1,558
Points
113
Location
Nottingham
First Name
Chris
Just looking at the dates on the aircraft description..(on the box), I'm presuming this is one of the 12 aircraft that actually got off the ground and then attacked the Japanese attackers during the Pearl Harbour attacks?
 
Joined
Sep 1, 2008
Messages
225
Points
43
First Name
Jean-Marc
CCCCCCCCCCCOOL ...Go,go,gooooooooooo !
 

yak face

Wossupwidee?
Staff member
Moderator
SMF Supporter
Joined
Jun 13, 2009
Messages
12,394
Points
113
Location
sheffield
First Name
tony
Great choice mike , its a lovely kit that builds up without any problems . Only thing to watch out for is dont get too much glue on the canopy rear panels as it can wick under due to the small clearance ( use pva type stuff too ) cheers tony
 

Valeron

SMF Supporter
Joined
Jan 7, 2022
Messages
611
Points
93
Location
St Albans, Hertfordshire
First Name
Mike
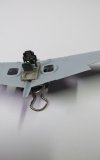
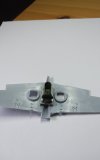
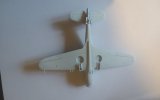
Bench time has been limited but I'm back on it now. The cockpit has been assembled and the fuselage started.

I'm currently struggling with fitting the upper wings. Something isn't quite right but I will prevail.

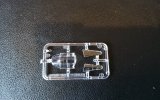
Also trying to work out what clear part 4 is. I'm going mad and can't see it on the intructions at all.20220505_174705.jpg20220505_174728.jpg20220505_174756.jpg20220506_102136.jpg20220506_102148.jpg
 

Allen Dewire

Proud Rabble Member
SMF Supporter
Joined
Apr 27, 2018
Messages
4,105
Points
113
Location
Bamberg
First Name
Allen
Just got in on this Mike and it looks like you are having fun here. Could the clear part maybe be the gun sight??? it looks too big for a light of sorts and it's only one piece...Good luck fitting the wings....

Prost
Allen
 

Jim R

SMF Supporter
Joined
Apr 27, 2018
Messages
13,717
Points
113
Location
Shropshire
First Name
Jim
I'm currently struggling with fitting the upper wings.
in my limited experience of aeroplane building the fit between wings and fuselage is always tricky. As you say though you'll sort it :thumb2:

Also trying to work out what clear part 4 is. I'm going mad and can't see it on the intructions at all.
Could it be a part that is not used for this kit??
Jim
 

Allen Dewire

Proud Rabble Member
SMF Supporter
Joined
Apr 27, 2018
Messages
4,105
Points
113
Location
Bamberg
First Name
Allen
Hey Mike, Check out step 16 on the instructions, that should be your piece 4c.....Looks like a landing clearance light......

Prost
Allen
 

Valeron

SMF Supporter
Joined
Jan 7, 2022
Messages
611
Points
93
Location
St Albans, Hertfordshire
First Name
Mike
Hey Mike, Check out step 16 on the instructions, that should be your piece 4c.....Looks like a landing clearance light......

Prost
Allen
Brilliant. Spot on. You're good.

I'd looked through the instructions, of which there are not many pages, so many times and there it is as clear as daylight at step 16.

Thanks.
 

Allen Dewire

Proud Rabble Member
SMF Supporter
Joined
Apr 27, 2018
Messages
4,105
Points
113
Location
Bamberg
First Name
Allen
I know that feeling so well Mike. You search and scan and search, but you can't find it. Glad to help, oh, and sometimes a beer helps too.....Drive on and have fun Sir!!!

Prost
Allen
 

colin m

Moderator
Staff member
Moderator
SMF Supporter
Joined
Dec 26, 2008
Messages
8,604
Points
113
Location
Stafford, UK
First Name
Colin
Great progress Mike. All looking very good.
 

Valeron

SMF Supporter
Joined
Jan 7, 2022
Messages
611
Points
93
Location
St Albans, Hertfordshire
First Name
Mike
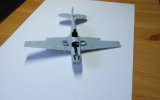
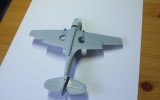
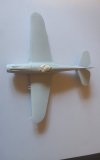
The main body of the aircraft has now been completed and went together quite easily. I applied tiny bit of filler, did some light sanding, then applied a thin coat of rattle can (Army Painter white) Primer.

It needs a bit of tidying and maybe another coat of Primer then I'll add some colour. I'll be hand painting using Vallejo paints which should be arriving in the post today.

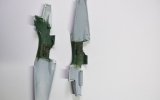
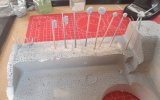
I have also started to add colour to some of the smaller parts shown below. What this (pre painting) photo doesn't show is that I somehow snapped off one of the propeller blades. I have no idea how I did it and it was whilst I was painting one of the other parts. I only noticed after the event so will need to fix this.

Looking at the photos now, it's amazing how expanding a photo shows up seam lines which aren't visible to the naked eye when looking at the model itself.

20220512_151218.jpg


20220517_074700.jpg20220517_074712.jpg
 

adt70hk

I know its a bit sad but I like quickbuild kits!!!
SMF Supporter
Joined
Sep 4, 2019
Messages
9,497
Points
113
First Name
Andrew
Coming on nicely Mike!
 
Top