BarryW's Hawker Typhoon Airfix 1:24

BarryW

SMF Supporter
Joined
Jul 23, 2011
Messages
5,030
Points
113
Location
Dover
First Name
Barry
This will be built 'buttoned up' to display the brutal lines of the Tiffey to best effect. It is a shame not to display that engine but maybe another one day?

My main focus will be on the painting and weathering for which I will use:

AK Interactive Air Series RAF camo acrylic paints plus some Vallejo Model Air and Vallejo Primers.

Metallics will be AKI True Metal.

Weathering will be done with AKI enamel washes and pigments.

I will now be able to start the build on the 2nd January and will post progress at least weekly.

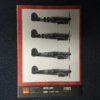
The box:View attachment 95265


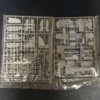
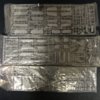
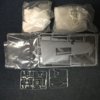
The sprues

View attachment 95266

View attachment 95267

View attachment 95268

View attachment 95269


Above there are no less than three sets of canopy sprues due to the problems Airfix had over quality. I will use the best of them and use one of the others to mask the cockpit as I like to paint canopies off the model.

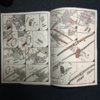
Next the instructions:

View attachment 95270

View attachment 95271

View attachment 95272


I am likely to build the top scheme although there is a small chance that I will choose a non standard scheme.

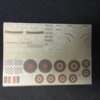
Now the decals, the main markings will not be used.

View attachment 95273


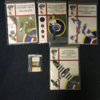
Now some extras:

View attachment 95274


As you can see I have a full set of Miracle Masks for the RAF insignia, invasion stripes, camo etc plus some fabric seat belts (though I may not use them this time).

I also have this:

View attachment 95275


I will be using the Brett Green way of approaching the cockpit with a cockpit green/black interior rather than aluminium/black as per instructions.

I am looking forward to getting to my workbench Friday and making a start.
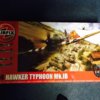
image.jpg

image.jpg

image.jpg

image.jpg

image.jpg

image.jpg

image.jpg

image.jpg

image.jpg

image.jpg

image.jpg
 

colin m

Moderator
Staff member
Moderator
SMF Supporter
Joined
Dec 26, 2008
Messages
8,595
Points
113
Location
Stafford, UK
First Name
Colin
Looks great Barry. I think Duxford has a cockpit section of one of these in their museum. There might be pics around somewhere.
 
P

Polux

Guest
Great!

I will follow this thread with interest Barry, you are a more experienced modeler and I'm sure I will learn a lot :smiling3:

PS: Thank you to join in Barry :smiling3:
 

papa 695

Moderator
Staff member
Moderator
SMF Supporter
Joined
May 9, 2011
Messages
20,329
Points
113
Location
Doncaster, South Yorkshire
First Name
Ian
Some very nice extras Barry looking forward to seeing this.

If I had this kit I would do the blue nose shark scheme
 

Alan 45

Plastic Abuser
Joined
Nov 29, 2012
Messages
10,221
Points
113
Location
Home
First Name
Alan
I'm looking forward to seeing this built Barry
 

BarryW

SMF Supporter
Joined
Jul 23, 2011
Messages
5,030
Points
113
Location
Dover
First Name
Barry
\ said:
Some very nice extras Barry looking forward to seeing this.If I had this kit I would do the blue nose shark scheme
I was tempted by that one but decided on a more classic Tiffy look with the invasion stripes.
 
M

Mike

Guest
I'm very much looking forward to seeing this one. A New Tool 1/24, awesome!
 

Ian M

Administrator
Staff member
Administrator
Moderator
SMF Supporter
Joined
Dec 14, 2008
Messages
19,691
Points
113
Location
Falster, Denmark
First Name
Ian
THAT is a lot of plastic.

I am looking forward to seeing you build this Barry.

Ian M
 

BarryW

SMF Supporter
Joined
Jul 23, 2011
Messages
5,030
Points
113
Location
Dover
First Name
Barry
A quick update. Got the cockpit sub-assemblies ready to paint. Very tight tolerances for fit but no real issues. Lots of dry fit and lots of cleaning up of parts needed. Enjoying this.

View attachment 95865


image.jpg
 
P

Polux

Guest
My cockpit will be one of the most difficult parts on my build....and I haven't any plan yet :oops:

Looking at yours... I have more dubts now O_o

Looks a clean and tidy start Barry.
 

BarryW

SMF Supporter
Joined
Jul 23, 2011
Messages
5,030
Points
113
Location
Dover
First Name
Barry
It does come together nicely. I decided to bring more of the cockpit sub-assemblies together before painting than I originally intended because of the tight fit and I could forsee some issues if I did it after painting. This will create some awkward detail painting but it looks manageable. I think I may well use the kits plastic seatbelts as I am quite impressed with the moulding. I am proceeding as if I am and if not satisfied with the look I will get out the fabric ones. As I am building the model closed up with just an open canopy I will only paint areas that may be seen. The visible cockpit will be limited and that will help the detail paint as well.

Polux with your plans you will need to tread carefully. The plastic is soft and it is easy to break fragile parts. As you are doing your cutaway there will be a lot of clean up time needed and some parts may need to be thinned. Watch the angles and the order of the assembly as well, this is where dry fitting will help. I am really looking forward to seeing yours.
 
P

Polux

Guest
Thank you very much for the input Barry. I will take care ;)

I don't know exactly when I will start mine....I must admit I'm quite intimidate and I feel some serious respect for this build.... One morning I will wake up and say: Today is the day!!! :smiling3:

If you need any kind of "help", or just want I test some mix with the True Metal, let me know ;)
 

BarryW

SMF Supporter
Joined
Jul 23, 2011
Messages
5,030
Points
113
Location
Dover
First Name
Barry
This Tiffy is a well engineered kit, one of the best but like most model manufacturers Airfix really get it wrong with instrument panels. A 1/24 scale kit deserves and could get something better, it just needs some joined up thinking. See what I mean below:

View attachment 96022


As you can see there is a solid grey instrument panel plus a clear plastic part that fits into the grey part so you have dials that appear to have glass covers. But the decals need to go on top, first because of how they are printed and secondly even if you wash off the glue and used Microset to fix them behind the glass the glass is too thick and because of molding behind the clear part they will not fit in the dials anyway!!! In other words there is no point in having a clear part at all.

Why on earth they didn't put some thought into this I will never know.

I will paint both parts black and paint in some detail then affix the decals to the front of what was a clear part before fitting it into the front of the panel then use Micro Crystal Clear to represent the glass.

Tamiya on their 1/32 props seem to be the only company to have thought this issue through properly.

image.jpg
 

monica

“When there's no more room in hell, the dead will
SMF Supporter
Joined
Oct 30, 2013
Messages
15,111
Points
113
Location
Melbourne
First Name
monica
nice start Barry,looks like a great deal of work,in front of you, ;)
 
P

Polux

Guest
\ said:
I will paint both parts black and paint in some detail then affix the decals to the front of what was a clear part before fitting it into the front of the panel then use Micro Crystal Clear to represent the glass.
Ouch!! One point for Airfix O_o

Nice idea Barry, seems the best practic idea.....

I will be looking for your final result there.
 

BarryW

SMF Supporter
Joined
Jul 23, 2011
Messages
5,030
Points
113
Location
Dover
First Name
Barry
Well the cockpit is done. Remember my model will be buttoned up so there is little of the interior on display hence not painting much forward of the instrument panel (other than some black primer) or behind the armour behind the seat.

I am very pleased with how this has come together. It is a complex construction with tight tolerances but it View attachment 96400


is a real pleasure and I am very happy with the look. What do you think?

View attachment 96401


View attachment 96402


View attachment 96403


I am not sure if it comes across in the photo but the leather seat back looks superb it was Vallejo Red Leather with a dark brown AK wash. It has the right sheen and texture appearance. The seat belts are better on the kit than in the photo too.

Next the engine. I will only be doing the basic block and those not needed for my buttoned up appearance. It will not be painted.

image.jpg

image.jpg

image.jpg

image.jpg
 

dave

SMF Supporter
Joined
Nov 16, 2012
Messages
1,918
Points
113
Location
Brussels
First Name
Dave
The cockpit is looking good, can't wait to see the rest of the build.
 

stona

SMF Supporter
Joined
Jul 22, 2008
Messages
11,470
Points
113
First Name
Steve
x2...it looks great.

Cheers

Steve
 
Top