CDWs' Hummer 1025

P

Polux

Guest
Wow! This seatbelts are fantastic, and a great idea too!

Cheers.
 

flyjoe180

Joe
SMF Supporter
Joined
Jan 18, 2012
Messages
12,419
Points
113
Location
Earth
First Name
Joe
Great job on the interior. I agree about the seat belts, they are awesome.
 
T

treyzx10r

Guest
Colin like what you've got done so far,nice touch adding the seat belts. BTW whats laggers tape? cheers Trey
 
C

CDW

Guest
Thanks chaps, the belts (although not in any way perfect) turned out better than i expected.

\ said:
. BTW whats laggers tape?
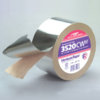
Its Aluminium foil tape, adhesive on one side with a peel off paper backing. it's used for heating, ventilation and air conditioning to stick insulation sheets and metalwork together. The guys who do this job are nicknamed "laggers"

i "borrowed" two full rolls off the laggers on the last electrical installation job i was on :smiling3: :smiling3:

looks similar to this

View attachment 57150

View attachment 59120

3520CW.jpg
 

mossiepilot

A learner learning
SMF Supporter
Joined
Jul 17, 2011
Messages
2,480
Points
48
First Name
Tony
Cracking looking work Colin, the interior is very impressive and the paint job so far is beautifully done.

Tony.
 
C

CDW

Guest
did a little more to the interior ... added some fuel cans, tent material, ropes, rifle & spare MG with ammo, couple of bits of headgear and a pair of bino's

View attachment 57303View attachment 57305View attachment 57304

Looks as though you'll see a fair bit when the lids on too which makes it worthwhile doing it :smiling3:

View attachment 57307View attachment 57306

(PVA glue still needs to cure ... you can just see it in some places .... i was impatient to get the photies done so i can go to bed:smiling3:)

View attachment 59266

View attachment 59267

View attachment 59268

View attachment 59269

View attachment 59270

20130126_000810.jpg

20130126_000837.jpg

20130126_000852.jpg

20130126_001042.jpg

20130126_001131.jpg
 

spanner570

SALAD DODGER
SMF Supporter
Joined
May 26, 2009
Messages
12,983
Points
113
First Name
Ron
That is some serious scratch building you have there Colin, really nice work.

My Hummer is in the post.....has been for two weeks!!!

Cheers,

Ron
 
F

Fenlander

Guest
Looking very good Colin, think I will build mine with a tarp covering it having seen the detail you are adding lol.
 
M

mobear

Guest
dashed amazing stuff,love it when people scratch bits together

mobear
 

geegad

Can't cheat fate..
Joined
Mar 7, 2010
Messages
2,477
Points
113
First Name
John
superb painting of the interior..keep the pics coming
 
C

CDW

Guest
Thanks for the comments guys ...

next update ......

We have this picture in the destructions ....showing a flexible hinge, a handle and catch so i've tried to replicate it

View attachment 57396

Hatch cut in half along rivets and bit of masking tape cut to shape and size

View attachment 57395

Hatch folded and glued with catch and handle in place

View attachment 57397

glued in position

View attachment 57398

Also got the snorkle and high level exhaust on

View attachment 57399

the doors have glass in (in back of picture) but i need to make some drawbar deadlocks for these as they'll be seen when the doors are positioned open for final display.

View attachment 59350

View attachment 59351

View attachment 59352

View attachment 59353

View attachment 59354

20130127_182101.jpg

20130127_182155.jpg

20130127_182944.jpg

20130128_122122.jpg

20130128_122141.jpg
 
C

Caledonia

Guest
I see this is becoming a class act Colin - great modelling. Derek
 
M

mobear

Guest
first class scratch building,see you can do it lol :laughing:

mobear
 
P

Polux

Guest
Hi Colin!

Well...you say are a scratch building addict, mmmm... if you say it...

You are the King scratch building!! ;) ;)

Polux
 
C

CDW

Guest
Derek, Ole ... thank you

Polux .... i wouldn't go to that extent, but thank you :smiling3:

Did a bit to the bonnet tonight. Noticed on a few pictures that there was a fireproof/soundproof substance stuck to the inside so i've attempted to replicate that, have now weathered it a bit and it blends in a bit more.

Just gave the bonnet a lick of paint to check colours when they've dried and added the headlight glass etc. will wait till it's stuck on the model before weathering as it'll be better to "muddy" it up all in one go.

View attachment 57412View attachment 57411

Have got the lid on now but it's all clamps, tape and rubberbands to hold it in place over-night so no picture coz you can't see much of the model.

View attachment 59366

View attachment 59367

20130128_182321.jpg

20130128_182412.jpg
 

spanner570

SALAD DODGER
SMF Supporter
Joined
May 26, 2009
Messages
12,983
Points
113
First Name
Ron
Colin, this build is a credit to you, even at this relatively early stage..........Your scratch building work on your Hummer is just magic.

Really impressive.....

Ron
 
Top