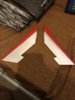
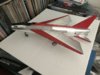
Latest update just finished the top surface of the wings and tailplane with foil still need to clean up the wings with regard to the red stripe
Wings have proved to be a right pia and still have loads of faults with them that need sorting
looks good mate! This trumpeter kit looks to be a real pig. Pity, as they can make some really nice stuff (like their 1/32 109 and 262 series) when they put their mind to it
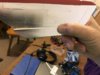
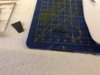
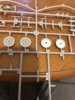
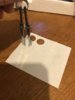
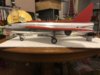
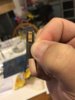
Thanks to you all for the comments tonights is a short one cut even shorter by the non fit of the aileron into the main wing as you can see from the picture does nothing fit on this kit mind you I am enjoying the the challenge of piecing it together if anyone is interested so far I have used 42 x 3" squares of sweet wrapping foil
Regards
Colin
PS
My fault I should have fitted the ailerons when I joined the wings doh never mind I have found a way to resolve this
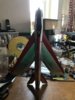
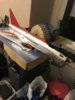
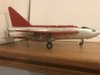
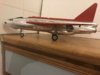
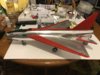
Morning people here is the obligatory rocket pose everybody seems to do note my main wings are only pushed on not glued still got to do undercarriage assembly's
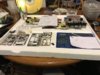
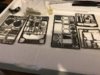
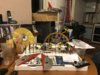
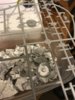
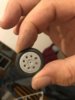
Your very welcome Tony started tonight the least looking foward to doing 100+ pieces of photo etch for the undercarriage assembly came up with a use for a polystyrene lid I had in the basement hopefully will confine the pe to the lid and not the carpet monster
Unfortunately the lid idea failed miserably spent most of yesterday retrieving bits of pe pinging from my tweezers is it me or is pe one of the biggest pia's in the modelling world it's made from a metal that refuses to stick where you want it despite my use of one of those sticky placement tools & most of it is litterarly invisible to the naked eye yet you have to bend and fold into intricate shapes and configurations yuk
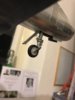
Small update front landing gear done working on the main at present after that assemble the main wings and do any filling required before final touch with foil and chrome pen
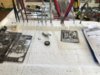
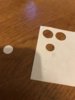
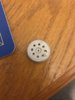
Another small update main landing wheels I used a pair of dividers to cut out a paper disc which was then mounted into one of the wheel pieces without the bolts on top of this I glued some foil dull side up to represent a disc brake inside the wheel assembly I believe they were very dark grey but in my version I have left them dull metalic foil so you can see the detail trough the bolt holes which I have drilled out and you should notice one of them is slightly elongated I presume this was for access to the inflating valves etc
All in all the effect is pretty good and gives a depth to an otherwise flat piece of plastic
Last night 07/09/2017 Wings and undercarriage on I just like to say in keeping with tradition of this particular model again an awful fit luckily the foil will hide the hideous join lines after they have been filled and sanded smooth
Tonight 08/09/2017 sanded and smoothed joins
Just washed the model in soapy water then when dry will go over looking for damage that's bound to have occured I can see a load on the port side or left side of the fuselage never mind using foil is great you just scrape of the damaged panel being careful not to remove detail just the foil and replace it with a new piece which because its newer will have a different metalic shade to the previous one giving you more variation and patinas
From the looks of the red has taken a battering as well and its a tail sitter however when its gets to its base I have a way round that probably drill a couple of holes in the base and tie down front wheel with fishing line which should be practically invisible
One thing I would do different next time is to assemble the main bits 1st ie. fuselage wings tail fin fill it where needed prime it paint the bits that are not going to be foiled then wash it in soapy water foil it then wash it again in soapy water then carry on where I am now
Right all the damaged foil removed now just a case of refoiling repainting and should be good as new waiting for a bottle of jonsons clear to be delivered which I will coat the model and dip the canopy with then will be ready for final fitting and decaling
Repairs done joints filled and plane re foiled where needed next on the list is the main undercarriage doors then the canopy and finally decals but I am now waiting for additional items to arrive before I can progress any further
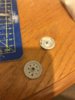
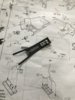
Busy this weekend so only thing done is this still its another piece of the puzzle so to speak I think its the hydraulic cylinders for raising and lowering the canopy
It comprising of eduard pe with a whittled down toothpick to the correct dimensons the 2 metal bands will be folded under the tubes bracket style wise and then the tubes will be painted silver & grey with black banding if my interpretation of the photo's is correct
Latest update canopy raise and lower assembly complete except for 1 piece of pe and I have dipped all the transparencies in the pledge floor care finish so we will see if it improves their clearness or not