Das Werk: 3cm Flakvierling 103/38

prichrd1

SMF Supporter
Joined
Apr 27, 2018
Messages
614
Points
93
First Name
Paul
Box.JPG

Recently purchased the 2cm version from John @ Scale Model Shop and whilst doing a little research on it, I came across this 3cm version - I think on Evilbay! So could not resist - I have to have the set!!!!! ;)

There is very little on line about these experimental artillery pieces, like most things developed late war from WWII Germany they were over engineered knee jerk reactions to "problems" whilst defending against the Allied forces. They did however spawn a series of weapons utilized by the German forces in different guises.

So whats in the box??

You get two sprue's with some nice crispy detail and very little flash just the odd small seam line. Obligatory pin marks but all appear to be on the underside of parts - hidden from view.
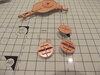
A set of decals for a "What if" scenario (There are two sets in my box!! :smiling5:).

Spru.JPG Closeupwood.JPG Detail2.JPG Decals.JPG

Colorfully illustrated A5 size instruction booklet, with a short history of these artillery pieces and clear construction steps.
Instructions.JPG Page1.JPG

Right now to the fun bit.

Paul.
:smiling5::smiling5:
 

Steve Jones

Steve Jones Scale Modelling Site
Joined
Apr 27, 2018
Messages
6,698
Points
113
Location
Plymouth
First Name
Steve
Big fan of the German Flak units. Looks a nicely detailed kit. I wish you all the best with this build. Looking forward to seeing the progress updates
 

prichrd1

SMF Supporter
Joined
Apr 27, 2018
Messages
614
Points
93
First Name
Paul
Like most peeps on here, I like to get essentials ready at hand to start a new creation.

So the instruments of choice today -
Weapons.JPG
(Other more gruesome instruments in man cave)

And the fun stuff!! :sick:
Funstuff.JPG

Necessities!!
Eyes.JPG
MkII Eyeball Extensions.:cool:

A quick read of the instructions, checked for any missing bits, now for the off.

Part 1. Assembly of the base. Two stages fairly straight forward.

Step1.JPG
I always detach the part, clean up, test then glue in place so I don't know if it was my own doing or
whether the instructions have the numbers the wrong way around?
Parts A26 & A27 for some reason were not initially glued on the correct side.

Stage1.1.JPG

Also of note is to attach parts A28 & A29 first before A26 & 27. the detail on these side panels
stops the other parts locking over the locating pin - ask me how I know!! :anguished:
(Didn't realize TET dried so fast!!).

So now I have a base - very similar to the Tamiya 20 mm Flak 38, I know from what I have read online about it's development, that this frame was used initially as a base for the new guns.

Stage1Fin.JPG Stage1.4.JPG

Little splash of MrSurfacer 1000 - to fill in the invisible pin marks!!
(Nobody will notice anyway - there underneath!!;)).

O.K. so far so good.
The rest of the pedestal next.

Paul.
:smiling5:
 

Attachments

  • Stage1.2.JPG
    Stage1.2.JPG
    121.4 KB · Views: 11

prichrd1

SMF Supporter
Joined
Apr 27, 2018
Messages
614
Points
93
First Name
Paul
Big fan of the German Flak units

Thanks Steve, same here, I tend to go for the unusual vehicles/tanks etc. :thumb2:

Saw the 2cm version on "Scale Model Shop Whats New?" page so ordered one, was impressed. That lead onto this one.
2cm Variety in the stash, may build it next? These aren't overly complicated kits, low parts count and easy
instructions.

Paul.
:smiling5:
 

prichrd1

SMF Supporter
Joined
Apr 27, 2018
Messages
614
Points
93
First Name
Paul
I started this on Wednesday evening, so am a little bit ahead in terms of posting.

Part 2 is the construction of the pedestal.
Again as with Part 1 - it's fairly straightforward.

Step2.JPG Step2.1.JPG

All the parts cut ready for cleaning & assembly.

Stage2.1.JPG

I cant get over these elevator wheels - such thin plastic didn't crack or break when cut from the sprue,
and, the handles are molded on!! :astonished:

Stage2Detail.JPG

So after very little swearing and cursing - I ended up with this little unit:-

Stage2fin.JPG

And the two parts - loose fit.
Stage1,2Fin.JPG

For the eagle eyed and before anyone says - yes the operator's seat is missing - on porpoise !
I will paint and assemble the two piece later on.

Paul.
:smiling2:
 

prichrd1

SMF Supporter
Joined
Apr 27, 2018
Messages
614
Points
93
First Name
Paul
Just a little update today, managed to prime the base and pedestal, Mr Primer Surfacer 1000, brushed on.

BasePrimed.JPG

Also started on the long bits that go bang!! :smiling2:

Hopefully will post another update later, very much depends on what Mrs Wifey has planned for me!:flushed:

Paul.
:smiling2:
 

Jim R

SMF Supporter
Joined
Apr 27, 2018
Messages
13,717
Points
113
Location
Shropshire
First Name
Jim
Hi Paul
We don't see many stand alone gun models. This looks a very nice kit. I do like the way the instructions are set out. Looks like you're off to a very neat, organised start.
Jim
 

prichrd1

SMF Supporter
Joined
Apr 27, 2018
Messages
614
Points
93
First Name
Paul
Looks like you're off to a very neat, organised start.

Thanks Jim, yes it always looks organised - with a bigger kit chaos usually descends about half way through the build!! :flushed: :flushed:

The instructions are really clear and so easy to follow. It's a bit like one of those cookery books that has a picture of what you're creation is supposed to turn out like!! :smiling2::smiling5:

Paul.
:smiling2:
 

Allen Dewire

Proud Rabble Member
SMF Supporter
Joined
Apr 27, 2018
Messages
4,105
Points
113
Location
Bamberg
First Name
Allen
Looking in from the sidelines Paul and a great job so far getting it put together. I like these type of things too!!!

Is there any mention in the destructions about where the original mold came from? Michael Baldeweg at Custom-Scale in Berlin made this kit in full resin and a few other Das Werk kits are based on his stuff. Just wondering???

Prost
Allen
 

prichrd1

SMF Supporter
Joined
Apr 27, 2018
Messages
614
Points
93
First Name
Paul
Allen,

Thanks :thumb2:

Yes, Custom-scale are mentioned on the cover of the instructions and on the rear there is a mention of
the 3cm Project Team, of which Michael is one of them (Harald Bauske CEO - MBK & Pete Hamann, 3D Designer also mentioned)

Paul.
:smiling2:
 

Allen Dewire

Proud Rabble Member
SMF Supporter
Joined
Apr 27, 2018
Messages
4,105
Points
113
Location
Bamberg
First Name
Allen
Thanks for that Paul,

Most of the time kit makers just take his (and other's) stuff and don't even ask permission. I grabbed his kit of this from evilbay for under €15 delivered. It's a real beauty and so well cast. Can't wait for your next update Sir...........

Prost
Allen
 

prichrd1

SMF Supporter
Joined
Apr 27, 2018
Messages
614
Points
93
First Name
Paul
Continuing the saga, here is where I am up to at the moment -
Part 3 is assembly of the four long things that go bang!!!!
GunInstr.JPG GunInstr1.JPG

There are seven pieces to each gun in total, the detail is very intricate on these, small seam line along the barrel. I just ran the sanding stick over the length once. The main four are shown here:-
GunBits.JPG
and assembled:-
CleanGuns.JPG
The fifth part (magazine/breech cover) I decided to paint on the sprue.
The instructions suggest "satin black" the nearest I have semi gloss wise is a Mr Color Burnt Iron,
polishes nicely when dry.
BreechPaint.JPG

The sixth part is shown here - the flash thingy at the end of the barrel !! :flushed:

1598112701524.png

Section 3.8 suggests that you open the 7 holes on each with a 1 mm dia drill. We'll see!! :cold-sweat::cold-sweat:
Also be very careful with the "clean up" there is a small locator pin on the flash guard that locates into the small hole in the end of the barrel.

The seventh part is a small fitting about 10 mm in length Part A33 (Step 3.4) - it is painted in the "body" color. Apart from the obvious position of the magazine - this is a part that the position/angle governs if the gun is either upper or lower deck.

The ammunition is supplied and loaded in what appear to be very large drums, this drum consists of three parts - 2 x half of drum and carrying handle. Ammunition is supplied on short 6 shell length strips - these were painted on the sprue - MrC Brass with MrC Stainless tips and Burnt Iron magazine links.

AmmoCase.JPG AmmoPaint.JPG

There are a total of 10 x ammunition drums and 6 x magazine strips supplied in the kit - presumably so you can incorporate this gun into some kind of diorama??

Guns finished all but the flash bits on the end !!! ;)
GunFin.JPG

You may notice that there are 5 x handles in the "magazine" picture above !
Well guess who left half a handle on the sprue???
Booby.JPG
:flushed::flushed:

Paul.
:smiling2:
 

prichrd1

SMF Supporter
Joined
Apr 27, 2018
Messages
614
Points
93
First Name
Paul
Now comes the messy fun part!!
Paint :astonished: :sick: !!!!

I will try and color within the lines this time!! :smiling2::flushed::flushed:

The instruction booklet gives four basic color schemes:-
1) RAL7028 Dunkelgelb with RAL6003 Olivegrun diagonals.
2) RAL7028 Dunkelgelb with RAL8017 Schokoladenbraun Splinter diagonals.
3) RAL6011 Resedagrun overall.
4) RAL7028 Dunkelgelb overall.

Paint1.JPG Paint2.JPG

And on the box rear the four same camouflage schemes, but with locations :-

PaintBox.JPG
(L-R) as follows:-
As above No2 - Unknown unit, Ardennes, September 1945.
No4 - Rheinmetall test shooting range, Unterlub, 1945.
No1 - Unknown unit, Potsdam, May 1945.
No3 - Unknown unit, Seelow Heights, April 1945.

So which one do I color???? :anguished:

Anyone have a preference please let me know ?

Number 3 is out tho - I don't even have the Humbrol equivalent!! :flushed:

Did some test painting in RAL7028 to see how the MrP Surfacer covers:-

Test.JPG

Left is Lifecolor RAL7028 (UA204), Right is MrHobby H403 Dark Yellow.

Probably not the best lighting or background, but you can see the shade difference for what are essentially the same color? Don't want the Dunkelgelb argument, thanks, but I'm leaning to the left one.
:smiling2::smiling2::smiling2:

Paul.
:smiling2:
 

Steve Jones

Steve Jones Scale Modelling Site
Joined
Apr 27, 2018
Messages
6,698
Points
113
Location
Plymouth
First Name
Steve
Once weathered there will be little difference. Coming along nicely. Liking the magazine belts. Nicely painted
 

Jack L

SMF Supporter
Joined
Jul 25, 2018
Messages
1,004
Points
113
First Name
Jack
Looks good so far. Ardennes version get's my vote. I like the 'splinter' camo.
 

prichrd1

SMF Supporter
Joined
Apr 27, 2018
Messages
614
Points
93
First Name
Paul
Steve,
Thanks, weathering is not one of my strong points!! :flushed: but will probably give it a darker "sandy" wash once assembled. The level of detail, and the parts fit is excellent.

Had a look round the net yesterday at reviews for other DW kits, and, their all really positive.
There are two excellent build reviews, one for the 35th scale Faun L900 & SdANH 115 here :- Faun
and the 32nd scale JU EF-126 / EF-127 here :- JU E-126

And what makes it worse - John @ Scale Model Shop has them in stock!!!! :cold-sweat:

Jack - I think that I'll start with the customary Dunkelgelb and take it from there.
The Ardennes pattern is probably the easiest of the camouflage effects and there is none on
the base !!!!:thumb2: :smiling2: (So it also ticks a box for me!! :smiling5::flushed::smiling2:).

Paul.
:smiling2:
 

prichrd1

SMF Supporter
Joined
Apr 27, 2018
Messages
614
Points
93
First Name
Paul
Have now given the base and pedestal the first brush coat of Lifecolor dunkelgelb, seems to have covered the primer fairly well. I will give it a second coat later today let it dry overnight.

Also done some work on the magazine cases and I mentioned in an earlier post that there are 10 shell magazines - well after accusing the hoover and carpet monsters of theft :angry: - realized that there are only 9 on the sprue's - :flushed: :flushed: but in my defense there are 10 carrying handles supplied!!!! :smiling2:

Firstcoat.JPG

Plucked up the courage, closed my eyes and drilled and cleaned up the flash guards.
8 Holes @ 1 mm diameter drill :cold-sweat::cold-sweat:.
Flash.JPG

Drilled from 1 side - 20 turns then from the other side 20 ish turns. Drilled down through 4 holes then cleaned the rubbish off.
shavings.JPG

Paul.
:smiling2:
 

prichrd1

SMF Supporter
Joined
Apr 27, 2018
Messages
614
Points
93
First Name
Paul
Yesterday, Tuesday, managed a second coat of color on the base and pedestal :-
2ndCoat.JPG 2ndCoat1.JPG

Also gave the magazine drums a bit of variety, top to bottom:-
Humbrol 111 - Field Grey, Lifecolor DGelb & Lifecolor Slate Grey.
MagDrums.JPG

Flashy things at the end of the pop guns, MrMetal Stainless, high lighted with
MrMetal Chrome - holes Tamiya Flat Black.
FlashSup.JPG

Dry fit of the gun/magazine assembly an added a couple of highlights.
GunMagAss.JPG
Steve - those "lovely" magazine belts are in there, if you look closely you can see at
least one shell :disappointed2:, but at least I know there there!!!! :smiling2:

Also did a little work on the gun sights, you can also pick out the holes drilled into the seat base!!
SightSp.JPG

Drilled & painted -
Sights.JPG SightPaint.JPG

Next job - a little weathering.
Any advice welcome.
I was going to weather the base and pedestal before attaching the guns.
Or would it be better to assemble the whole lot - then weather it??
:anguished::anguished:

Paul.
:smiling2:
 

prichrd1

SMF Supporter
Joined
Apr 27, 2018
Messages
614
Points
93
First Name
Paul
Marked out approximate lines for splinter camouflage in pencil,
SplinterPencil.JPG

Then painted, Lifecolor RAL8017 Schokoladenbraun!
between the lines :smiling5: :thumb2:
SplinterC.JPG

Next is the final assembly.
FinalInsr1.JPG FinalInst.JPG

Step 4.1 looks like you have to insert part A30 into the pedestal & then glue on the
two gun "sides". Take it from me - it fits - no need to dry fit test run!!
The best method is to glue it first to one of the gun "sides" and then fit it !!

(Ever tried playing "track maze game" blindfolded - with a scalpel, cotton bud and tweezers???)
:flushed::cold-sweat::flushed:
marbles.jpg

4.3 Is the assembly of the sights and lever mechanism, this is identical to the Tamiya method !
On my part #A25 - there was no pin to "melt", so out comes the surgery kit!! :sick:
Armsurgery.JPG
0.9 mm Drill bit - drilled then super glued a piece of 0.7 mm wire into the hole.

Finally arrived at this point:-
FinalBits.JPG
All the bits ready to fasten together!! :smiling2:;)

Paul.
:smiling2:
 

prichrd1

SMF Supporter
Joined
Apr 27, 2018
Messages
614
Points
93
First Name
Paul
Last night I applied some Tamiya clear gloss to the two gun panels and the front of the pedestal.
So, today is sticker book day!!!! ;)

From what I can gather the decals supplied are for fictitious "units".
Very clearly printed on the carrier.
You get a selection of black or white "kill" marks, unit markings and what look like insignia badges.
Stickers.JPG
Already cut out the four that I like, a white "bat" style, red "insignia" mark and two white
"kill" markings - one for aircraft the other for tanks. ;)

These do not take long once immersed in water - in fact it's seconds!
Once applied they adhere straight away !! Not much room for error!! :flushed:
Bat.JPG Killmark.JPG

I will let these dry and then finish off assembly, before giving it a matt coat to seal it :thumb2:

Paul.
:smiling2:
 
Top