Dogfight double pt. 2: Gladiator

stillp

SMF Supporter
Joined
Nov 17, 2016
Messages
7,218
Points
113
Location
Rugby
First Name
Pete
Well, the Stuka is finished, the Mossie GB doesn't start until next month, so I need something fairly simple to keep me busy for the rest of the month. I did look at that 144th Fairey Battle I picked up a while ago, but that looks as if I could finish it in a week, so what better than the other half of the Dogfight Double! Let's hope it's as good a kit as the Stuka.
Here's the sprue shots:
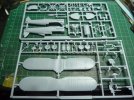
P1170190.JPG
And the clear parts:
P1170191.JPG
There is an open canopy option as well as two different closed canopies, only one of which is referenced in the instructions.
More later - first job is to sort out what paint colours to use. I'm thinking Dark Earth/Dark Green/Sky, as suggested by Airfix for a 112 squadron aircraft in Crete, 1941. A chance to dig out a Hataka BoB set that I've had for ages.
Pete
 

Tim Marlow

Little blokes aficionado
SMF Supporter
Joined
Apr 27, 2018
Messages
16,774
Points
113
Location
Somerset
First Name
Tim
Interesting choice for a “simple” build Peter, a biplane ;) Looks good on the sprue though….
As to colours, I think, but I might be wrong, that RAF biplanes of the period had lighter versions of the Earth/Green colours on the lower wings.
 

stillp

SMF Supporter
Joined
Nov 17, 2016
Messages
7,218
Points
113
Location
Rugby
First Name
Pete
I did wonder just how simple a biplane could be Tim, but the cabane struts are moulded as part of a plate that fits into the upper fuselage, and the interplane struts between the wings have a cross-brace moulded on between them, that is removed after joining the wings, so the worst part of biplane building should be somewhat simplified. There's also not a great deal of rigging on a Gladiator, so that should be doable with some of the EZ-line that Mick kindly sent me.
Pete
 

stillp

SMF Supporter
Joined
Nov 17, 2016
Messages
7,218
Points
113
Location
Rugby
First Name
Pete
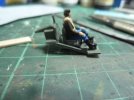
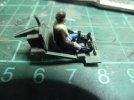
Started, as usual, with the cockpit, and pretty soon found the first problem:
P1170192.JPGP1170193.JPG
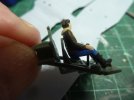
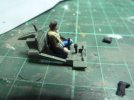
The pilot sits several millimetres higher than his seat! Some surgery required, so off with his legs!
P1170194.JPG
I would have preferred to cut him at the knees, but he has his hands on his knees, presumably controlling the aircraft by psychokinesis.
Glued the pilot to the seat, then shaved down the detached legs until they fitted in between his truncated legs and the rudder pedals:
P1170195.JPG
Not perfect, but you won't see much through the canopy anyway.
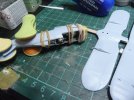
Here's where I've got to so far:
P1170196.JPG
I'll take a break while that's drying.
Pete
 

Tim Marlow

Little blokes aficionado
SMF Supporter
Joined
Apr 27, 2018
Messages
16,774
Points
113
Location
Somerset
First Name
Tim
Moving along swiftly Pete. Weird about the pilot, but perhaps he’s a standard moulding for all their aircraft?
 

stillp

SMF Supporter
Joined
Nov 17, 2016
Messages
7,218
Points
113
Location
Rugby
First Name
Pete
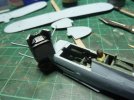
Moved on a little; the upper part of the forward fuselage, that includes the cabane struts, assembled and the IP decalled. Have a good look as I don't think it'll be visible later!
P1170197.JPG
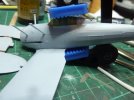
Masked the canopy, that upper fuselage part fitted after a small amount of trimming of the fuselage, then added the canopy.
P1170198.JPG
Looks brutal but there's not much force on the clamp, it's just to hold the canopy while the Gator's Grip dries.
My plan is to paint as much as I can before I add any more parts, particularly the upper wing, so sometime very soon the undersides should get painted, then I'll mask up for camo on the upper surfaces and fuselage sides.
Thanks for watching,
Pete
 

Allen Dewire

Proud Rabble Member
SMF Supporter
Joined
Apr 27, 2018
Messages
4,105
Points
113
Location
Bamberg
First Name
Allen
Off and running again with this one Pete??? Looks real good so far.....The pilot figure is a little mystery, but when you showed the problem with him, in the second pic, I thought maybe he had just farted in his seat......What do I know about wing thingy pilots...........

Seriously, this build shouldn't take that long and I think this is just the 'quickie' you needed Sir!!!...

Prost
Allen
 

Lee Drennen

Box Stock Builder with a Twist/ Rabble Member
SMF Supporter
Joined
Apr 29, 2018
Messages
5,640
Points
113
Location
Wortham Mo
First Name
Lee
Looks good Pete. Surgery on the fig looks like a success
 

Lee Drennen

Box Stock Builder with a Twist/ Rabble Member
SMF Supporter
Joined
Apr 29, 2018
Messages
5,640
Points
113
Location
Wortham Mo
First Name
Lee
Pete on this scale the Rigging would be so small I never mess with it but some do try Ship Rigging if your going to or very thin wire and glue it but if was me I wouldn’t bother with it.
 

stillp

SMF Supporter
Joined
Nov 17, 2016
Messages
7,218
Points
113
Location
Rugby
First Name
Pete
I was hoping someone was going to show me a step-by-step guide to rigging biplanes!
MickC kindly sent me some EZline, so I should at least try, even if I only add the most visible lines, the X-shape between the wings. Not sure if I'll bother with the more-or-less vertical wires nearer the fuselage.
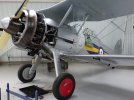
Here's a photo I took at the Shuttleworth Collection:
P1060307.JPG
Speaking of which, I haven't been to the Shuttleworth yet this year, must get back there soon.
Pete
 

stillp

SMF Supporter
Joined
Nov 17, 2016
Messages
7,218
Points
113
Location
Rugby
First Name
Pete
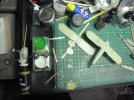
Undersides are now painted, using Mr Hobby lacquer. I normally use water-based paints but the lacquer is much more robust and will better withstand handling during the rest of the build. Also I had it there, and it gives a lovely finish, thinned with Mr Levelling Thinner.
P1170199.JPG
Also started painting the wheels and the engine parts, although I'll leave the engine off until the fuselage is painted.
Pete
 

stillp

SMF Supporter
Joined
Nov 17, 2016
Messages
7,218
Points
113
Location
Rugby
First Name
Pete
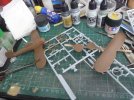
Got the Dark Earth on (Mr Hobby).
P1170200.JPG
I'll mask that later and throw some Dark Green on. Probably Hataka as I don't have that colour in Mr Hobby.
Pete
 
Top