"eternal war of the poor man"

R

rogue-one

Guest
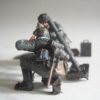
Finished mortar team.

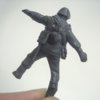
ok! its been a heavy wee bit of work and i think i'm getting spine problems (only kidding) but i've finished painting my german mortar team! hard detailed work but good fun! seeing them build up in colour was great and i think i've managed to give each one his own character. i painted them with model acrylics and enamel with a little ink wash often used on warhammer figures. i did a couple more custom changes as well, i made the dead soldier wear a camo smock which i did by glueing little bits of material to the body and arms to thick'n him up and then a hood to the back collar. i then used a hot pin head to melt small holes into 2 of the figures back and legs to give them bullet wounds.i used a little bit of material to give a figure a scarf then finally, i cut long thin strands of plastic to attach to all the figures equipment so that they didn't seem strapless. i have also used fine dirt from outside the house mixed with brown paint and wood glue to mix up some mud and brush onto the figures boots and knee's. i think they all turned out well and i'm very happy for my first figures. i might do a few more touch up's to them when adding them to the dio.

now, its time to get to work on the kv-1 tank build. looking forward to it.

View attachment 25156

View attachment 25157

View attachment 25158

View attachment 25159

View attachment 25160

View attachment 25161

View attachment 25162

View attachment 25163

View attachment 25164

View attachment 25165

View attachment 25166

View attachment 25167

View attachment 25168

View attachment 25169

View attachment 25170

View attachment 25171

CIMG1929.jpg

CIMG1940.jpg

CIMG1914.jpg

CIMG1901.jpg

CIMG1915.jpg

CIMG1905.jpg

CIMG1907.jpg

CIMG1908.jpg

CIMG1909.jpg

CIMG1923.jpg

CIMG1938.jpg

CIMG1927.jpg

CIMG1934.jpg

CIMG1932.jpg

CIMG1944.jpg

CIMG1922.jpg
 
Last edited:

tr1ckey66

SMF Supporter
Joined
Mar 6, 2009
Messages
3,686
Points
113
First Name
Paul
Well done Bobby! What a great set of figures. The painting and the personal touches are first rate you must be really pleased. I'm really looking forward to seeing how these fit into the diorama now and how this action unfolds. Keep up the good work mate.

Outstanding!

Paul:thumbsup:
 
F

Fenlander

Guest
Very nicely done, as you say, they all have their own characters. Somewhere else I can send me figures for painting. Been out all weekend so no progress on mine :sad:
 

yak face

Wossupwidee?
Staff member
Moderator
SMF Supporter
Joined
Jun 13, 2009
Messages
12,373
Points
113
Location
sheffield
First Name
tony
Hi bobby , excellent figures well done, i wish i could do figures like this! I really love the mud effect too ,absolutely lifelike! cheers tony
 
B

bikerbart

Guest
Super job bud, well done, well worth all the effort youve put in. Theses are ganna look fab in the dio mate, cant wait to see it all come together, all the best Martin :smiling:
 
C

Cov1

Guest
Wow, fanstatic stuff Bobby. Its not something seen on dios is the dead and dying! More realistic in a strange way, like the effects of torn clothing where the bullets ripped into them.

Thats war!!

Ade
 
R

rogue-one

Guest
thanks guys. i'm not sure what makes a well painted figure but your positive comments make me feel like a done good. i am chuffed with them and keep looking at them on the desk. i'm now getting more confident with the prospect of doing this dio and looking forward to seeing it finished myself. still having bags of fun too.

and ade, yeah, i wasn't sure if having the dead or dying in a diorama was a bit faux-pas or not?! but its a main factor of war and i just wish to show the disaster ,sacrifice and brutal reality of these events. at least in this project anyway.
 
R

rogue-one

Guest
actually! i hope i'm not offending anybody because i am going to add 2 more dead figures to the dio idea. i have a couple of toy figures that are about 1/35 scale in size. there not to bad in detail and they already look like they could be russian. with a little bit of custom work i think they'll be perfect. i'll post up a few pics soon.
 
K

Kressy13

Guest
Hi mate. Great work on the mortar team. Looks amazing. Great work. Cant wait to see how it all goes.

Kresten.
 
R

rogue-one

Guest
extra russian figures

hi there everybody. as said in last post, i have decided to add 2 more extra figures to the dio idea. these are actually toy figures takin from a small bag of soldiers that i originally bought for £2 so that i had something to quickly practice on. i felt the detail wasn't to bad,particuarly for what i had in mind. which was to have a few dead or injured soldiers from the russian side half buried in the mud of battle ground. i think they looked quite like russian troops but i added a bit of custom work to make them better (any pics of russian uniform will be appreciated).

i'm gonna paint these later tho, because i'm eager to get started on my KV-1 tank.

because i've only done a few models, i have just used a brush but i have now got myself my first airbrush. i'm going to do the tank with this so i hope it all turns out well. fingers crossed (any tips or technics of the use of airbrush will be appreciated too). cheers.

View attachment 25241

View attachment 25242

View attachment 25243

View attachment 25244

CIMG1948.jpg

CIMG1958.jpg

CIMG1952.jpg

CIMG1954.jpg
 
R

rogue-one

Guest
have you used one before martin? or like me, had you only used a brush?
 
Last edited:

tr1ckey66

SMF Supporter
Joined
Mar 6, 2009
Messages
3,686
Points
113
First Name
Paul
Hi Bobby

Nice little touches to the plastic figures. I'm going to put some Russian soldier ref in the reference section for you. Only one pic tho, sorry, but it is good reference for uniform colour.

Below is some tips for the airbrush...

I think with an airbrush the most important thing to get right is the consistency of the paint. It should be the consistency of milk.

Also, airbrush in thin coats with the airbrush far enough away from the subject so as not to make the paint run or the paint be too dry on contact. When you paint your tank this is probably going to be around 12" away.

Personally I'd get used to the brush before committing to the model (I think I'd do this with any new airbrush I was buying - just to get the feel).

If it's your first airbrush, and you've bought a dual action one, you will need to get used to the control of both paint flow and air pressure through the brush. Once you have this control your ready for the model!

Lastly, look after the brush, clean it after each use and it should last you a lifetime.

Have fun with the airbrushes, I think you're going to enjoy it and get some great results!

Cheers

Paul
 
B

bikerbart

Guest
Some great points on the airbrush there Paul...one thing taht puzzles me though, ive heard alot of people say the consistancy of the paint should be "milky", its probably difficult to explain in words, but what exactly does this mean? Regards Martin :smiling:
 

tr1ckey66

SMF Supporter
Joined
Mar 6, 2009
Messages
3,686
Points
113
First Name
Paul
Milk consistency: mix the paint thoroughly diluting with the solvent, when you just get to the point where the paint will run down the side of the pot you're mixing it in you're there. Don't mix it too thin either as you will end up with runs on the finish. I can't really give any more advice than this, it's now just down to practice - but you will come to recognise what the paint is supposed to look like. One other thing to remember about paint consistency or the 'wetness' of the paint - the further you are away from the subject when spraying the dryer the paint will be on contact. I mention this as a kind of quick fix for minor paint consistency issues but it will not remedy paint that is completely the wrong consistency.

Hope this helps

Cheers

P
 
Last edited by a moderator:
B

bikerbart

Guest
Yep that does help, cheers Paul. I will be getting a large artists pad when i get my AB, also just a cheap kit that i can practice on...i guess like all things that have to do with modelling then its time, patience and practice :smiling:
 

tr1ckey66

SMF Supporter
Joined
Mar 6, 2009
Messages
3,686
Points
113
First Name
Paul
Yeah, 'fraid so! Practice does make perfect (or at least better) in this case. It does take some getting used to but once you've got the knack you can get some fantastic results. BTW, you never stop learning - I'm still picking up hints and improving (hopefully!). I hope I'm not coming across as a know-it-all I just wanted to pass on what works for me. Do you have a compressor? Personally I think this is essential kit - canned air is rubbish!

All the best with it

Paul

Ps. Sorry Bobby for hi-jacking your thread for a little while, I don't think you'll mind because you did ask for advice about airbrushing.
 
Last edited by a moderator:
B

bikerbart

Guest
Yep, sorry Bobby we have only borrowed this thread, will give it back now...honest lol. Paul, yep got a compressor, and picking up the airbrush at the Torbay model show at the end of the month...cant wait hehehehe :smiling: And no, you dont come across as a know it all at all bud, far from it, thanks for all the help matey, regards Martin.
 
F

Fenlander

Guest
Great advice from Paul there. I was as nervous as anything first time i used one but I was soon ruining kits without even a thought lol. The "milky' consistency is a good way of looking at it and Paul has described it well. However, you will find your own way of working and mixing. I, like a lot of others, do not measure. A good rough guideline is 50/50 but that depends on the thickness of the paint, certainly not a good idea with Revell acrylics which are very thick and work really well at about 25% paint to 75% water or thinners.

Once you get a feel for it, and you will, mixing will become automatic and you will be surprised what you will get away with. I have done sessions where I have quickly realised I have the mix not quite right but just adjusted the way I work and got around it. Too thin, just add a bit more paint or drop the pressure and dust a few more light coats. Too thick just add some thinners. From my experience, too thin is better than too thick but others may disagree.

Like most things, there is a fear of doing it until you have a go and then you will wonder what all the fuss was about. Some people make it sound like you need a science degree just to get the paint right, just rubbish. Only one thing you should take seriously, that is the cleaning and care of your airbrush. Treat it like your rifle Marine!!!!!
 
Top