- Home
- Forums
- Military Vehicles
- Military Vehicles Under Construction
- Armoured Vehicles Under Constuction
You are using an out of date browser. It may not display this or other websites correctly.
You should upgrade or use an alternative browser.
You should upgrade or use an alternative browser.
A
andyco
Guest
Another update, and thank you everyone for the encouraging comments.
First I did a pin-wash, with Wilder Deep Shadow, which took a lot longer than I expected and didn’t come out nearly as good as I hoped (it’s not as easy as it looks on all the YouTube videos I’ve been watching!).
Then I used some oils, which I’ve also over done a bit; the Light Buff made it look almost whitewashed so I used a lot more of the Brown Shadow than I was intending. It’ll have to do (I’m still enjoying it though! And learning for next time).
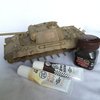
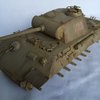
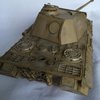
Chipping next I think.
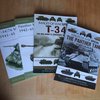
(Also, I’ve just got a few new books).
First I did a pin-wash, with Wilder Deep Shadow, which took a lot longer than I expected and didn’t come out nearly as good as I hoped (it’s not as easy as it looks on all the YouTube videos I’ve been watching!).
Then I used some oils, which I’ve also over done a bit; the Light Buff made it look almost whitewashed so I used a lot more of the Brown Shadow than I was intending. It’ll have to do (I’m still enjoying it though! And learning for next time).


Chipping next I think.
(Also, I’ve just got a few new books).

Andrew, that looks ok, I'm no expert in oils , better ask Steve Jones, but did you apply an acrylic varnish over the acrylic paints before the oil washes ? The pin wash on the rear in photo is great, lots of depth, and the weathering to the paint work is brilliant.
Don't worry, just keep going .
John.
Don't worry, just keep going .
John.
Steve Jones
Steve Jones Scale Modelling Site
Hi Andrew
Its difficult to tell from the pictures the exact tones and depth of your oil work but for a first attempt its not looking to bad at all
I'm not sure what your issues around the pin wash was but PM me and I will give you some advice around this.
I assume you used the "oil dot" method for the oil work. If so its not unusual to apply too much oil on the first attempt. Again if you want some pointers PM me.
It's great to see you having fun and its all heading in the right direction. Keep up the great work
Last edited:
Jim R
SMF Supporter
Hi Andy
Looks fine and as you say you're having fun and learning. Take Steve up on his kind offer and you'll get sound advice from someone who has been there and done that and come out the other end very skilled at this weathering lark.
Jim
Looks fine and as you say you're having fun and learning. Take Steve up on his kind offer and you'll get sound advice from someone who has been there and done that and come out the other end very skilled at this weathering lark.
Jim
A
andyco
Guest
Hi Andrew
I'm not sure what your issues around the pin wash was...
I assume you used the "oil dot“ method...
Thanks guys.
With the pinwash, there was just too little, then too much going on, had to spend a lot of time cleaning it up with thinners, suppose that’s part of the process?
With the oil, Yep, I did use the dot method and I definitely was putting too much on, and I think I didn’t let it dry enough, as soon as I tried streaking with the thinner the (excessive amount of) oils just mixed in and it ended up being more of a wash.
Learning for next time!
Steve Jones
Steve Jones Scale Modelling Site
Hi Andrew
I dont know which varnish you put on first. A lot of people like to use gloss to improve the flow of the pin wash. However I prefer to use Matt as the pin wash doesn't spread out so much and thus reduces the need for cleaning up. If possible rather than cleaning up the excess try and incorporate it into the weathering process by using it as streak lines where appropriate or blend it in to make shadows. This can be done by using a moist (with thinner) round brush useing a dappling motion. As you improve your skills try and use three or four different colours of pin wash. For example a darker oily one for the running gear, a beige one for dust on the upper surfaces etc
The oil dot system is a good one to use to get used to how oils work and the shading that they create. There are more effective methods that will nullify the issues of " just mixed in and it ended up being more of a wash". Again this will come with more experience of the use of oils. Now that you have experienced this process you will realise less is more and that even the smallest dot of oil goes a long way. All I will say is once you have done the initial blending of the dots - no matter how bad it looks just leave it for 5 to 10 minutes and then come back to it and blend it in fully. Trial and error and a lot of practice will soon enable you to master the art of oil work
The important thing is that you are having fun and learning as you go. I look forward to seeing how you progress.
I see you use Wilder Oils so would I be right in assuming you come from USA or Canada?
scottie3158
SMF Supporter
Hi Andrew,
That's not at all shabby. Steve has given you some great pointers.
That's not at all shabby. Steve has given you some great pointers.
A
andyco
Guest
Hi Andrew
I see you use Wilder Oils so would I be right in assuming you come from USA or Canada?
No, England. I watched a lot of videos on YouTube before I started, and a lot of them were using Wilder products (most of the videos were US) so that’s what I went with. (The best videos I found, for me, were those by a Panzermeister36 and the Wilder Techniques Series).
Thank you very much for all the advice there, I have definitely realised that less is more, I think I’ve used too much of everything, need to learn to moderate more, and will try out the methods you’ve described.
I used a gloss varnish - Tamiya TS-13 Clear (over the Tamiya TS-3 dark yellow) I can try using the matt one next time.
A
andyco
Guest
Update -
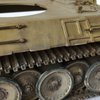
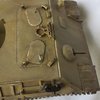
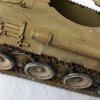
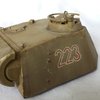
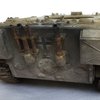
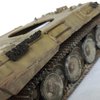
Chipping and scratches done (maybe too much but mainly trying to learn how to do them). Used Tamiya XF deck tan and XF hull red.
Used Tamiya XF aluminium on the grab rails.
Exhausts painted with Wilder orange rust and XF nato black and Wilder black powder.
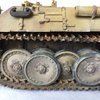
Mud and dust done with Wilder pigments.
Wheels and tracks on, used staples to join them and will be glueing them to the tops of the wheels.
Spare track links and towing hooks on, painted with Tamiya XF dark iron, still need to weather them. (No towing cables because I snapped them both! another lesson learned!).


Last edited by a moderator:
A
andyco
Guest
All done now. New thread on the completed forum.
Steve Jones
Steve Jones Scale Modelling Site
Well done Andrew. Looks like you had a lot of fun and learnt a lot. Will pop over and see the finished work

 . Nice progress so far.