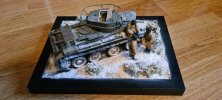
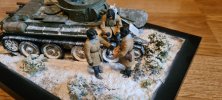
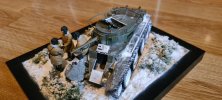
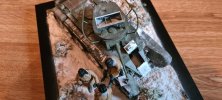
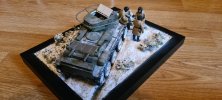
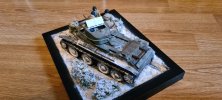
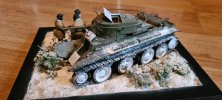
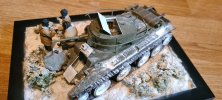
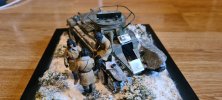
Greg's 1/35 BT-7 (Lee's Russian Tank GB) 2022

Greg_147

SMF Supporter
Joined
Feb 4, 2014
Messages
126
Points
63
First Name
Greg
Hello all,

I took a bit of a break with this one, but have finally got it done over the past week (only one day late!).

Our scene here is set in Finland, 1939, and shows the crew of a Soviet BT-7 having some navigational problems. The commander and driver of the vehicle can't agree on where they are, whilst the gunner just sits back, tired, cold and fed up with being lost again.

This was a good build for my second 1/35 project, and playing around with the interior was an interesting element. I'm quite happy with how the snow turned out. If, however, anyone has any tips on how to paint faces (especially eyes) then please don't hesitate to share! :smiling5:

Greg

20220501_183606.jpg20220501_183629.jpg20220501_183638.jpg20220501_183645.jpg20220501_183655.jpg20220501_183700.jpg20220501_183711.jpg20220501_183723.jpg20220501_183738.jpg
 

Lee Drennen

Box Stock Builder with a Twist/ Rabble Member
SMF Supporter
Joined
Apr 29, 2018
Messages
5,641
Points
113
Location
Wortham Mo
First Name
Lee
Greg. Beautiful finish looks all good to me I’m glad you got to finish it. I agree with the others be proud of your accomplishment. Thanks for joining us on this GB.
 

Tim Marlow

Little blokes aficionado
SMF Supporter
Joined
Apr 27, 2018
Messages
16,771
Points
113
Location
Somerset
First Name
Tim
Excellent stuff. Really looks the part. Terrain is very effective and the tank matches it and then some. Can’t see your perceived issues with the figures, but they look fine to me :thumb2:
As to eyes, there are techniques out there that will help. I’ve quite a bit of experience because I mostly paint small figures at the moment, and the following is what I use. It will work fine at 1/35, but anything bigger will need more detail work.
The best advice I can give is to paint the whites, using ivory paint. It flows and covers better than pure white. Once that is done, then outline them with black, resizing the white of the eye to what is required. Once you are happy with the size and shape of the whites, then paint a vertical line through the middle to represent the pupil. You must leave white either side for the eye to “read” correctly. Don’t try to do the iris colour and pupil, you will go mad at that scale…..The important thing is to get them symmetrical. Once all of that is done, and you are happy with the eye effect, then cut the black outline around the eye back to size using flesh paint….all you need is a fine line around the eyeball. It is far easier to cut back the black line than to paint it as finely as it needs to be.
 

adt70hk

I know its a bit sad but I like quickbuild kits!!!
SMF Supporter
Joined
Sep 4, 2019
Messages
9,497
Points
113
First Name
Andrew
Greg

That's very nicely done indeed.

Well done.

Andrew
 

Greg_147

SMF Supporter
Joined
Feb 4, 2014
Messages
126
Points
63
First Name
Greg
Thank you all! And Tim, thanks for the tips on faces. I hadn't thought of doing the pupils as a black line and covering up the excess. I'd been dabbing a cocktail stick in black paint and trying to get a small dot in the right place. I'll give your method a go next time, as it sounds infinitely less frustrating :smiling5:
 

spanner570

SALAD DODGER
SMF Supporter
Joined
May 26, 2009
Messages
12,981
Points
113
First Name
Ron
Very nice result, Gregg.
Nice, compact scene too.
Re- eyes. Keep in mind figures are not viewed close up. so I doubt any eye detail would be seen. Due to the snow, the lads are probably squinting anyway.

Test your eyes in a mirror, at the correct scale distance. There will be precious little of them to see. A simple off white would do me. Certainly no pupils. Far too small.

The above is just my take on 1/35 and smaller eyes, so please no pillory, or pond dunking!
 

Tim Marlow

Little blokes aficionado
SMF Supporter
Joined
Apr 27, 2018
Messages
16,771
Points
113
Location
Somerset
First Name
Tim
Agree ref eyes Ron, except that if you put any white in there you do need the line down the middle. They look like zombies otherwise LOL…what I was trying to say, albeit clumsily, is that it’s easier to start from the middle and cut them down to size from the outside in than it is to paint them the right size in one go….
To be honest, a basic flesh tone followed by a coat of flesh wash brings out the features well enough from normal viewing distances for the smaller scales. It is very quick as well…..
 

spanner570

SALAD DODGER
SMF Supporter
Joined
May 26, 2009
Messages
12,981
Points
113
First Name
Ron
Agree totally about white. It would look naff!
What I forgot to type was a Vallejo I have is called 'Aged white', which is really a cream. But a white? Nah..
 

Tim Marlow

Little blokes aficionado
SMF Supporter
Joined
Apr 27, 2018
Messages
16,771
Points
113
Location
Somerset
First Name
Tim
To be honest, if you don’t use the flesh wash step that I do, you could probably get away with just a “T” shape in black. I need a light colour in there, and find VJ model colour Ivory flows and covers best for my painting technique. You can also use off white, silver white, light flesh, or pale sand……Is aged white a model air colour, by the way?
 

Greg_147

SMF Supporter
Joined
Feb 4, 2014
Messages
126
Points
63
First Name
Greg
Thanks for the tips guys. The colour I was using at the moment was Ammo Matt White, which I found to cover a bit better than the Tamiyas that I normally use. I'll certainly look into some of the Vallejo 'off' whites for future usage, and see will pick up a flesh wash and try that out too.
 
Top