ICM L1500s lf8 fire truck

Mark1

SMF Supporter
Joined
Apr 17, 2021
Messages
3,553
Points
113
Location
South london
First Name
Mark
Hi all, well as other things are now in weathering or painting stages I have nothing to glue so I've decided to pull this out the stash to fill in the time.
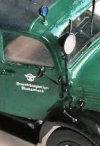
German light fire truck from icm,undecided on the colour yet as they were only painted red after ww2 when the fire brigade officially began,before that they were painted dark green and were operated by the police.
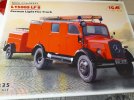
20220609_222024.jpg
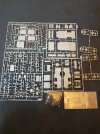
And some sprue shots, plenty of bits to be careful removing from the sprues.20220609_222342.jpg
 

Mark1

SMF Supporter
Joined
Apr 17, 2021
Messages
3,553
Points
113
Location
South london
First Name
Mark
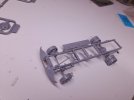
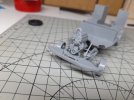
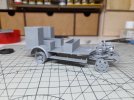
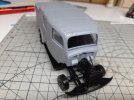
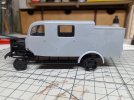
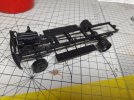
A progress report, so far so good going together pretty quickly , I've got the chassis near complete as well as the engine,as with icm the usual fiddly tiny bits that will probably never be seen, I've also started building up the floorpan to point where I'm gonna have to start some painting soon,engine and body just dry fitted at the moment. 20220612_000759.jpg20220612_000647.jpg20220612_000541.jpg
 

Mini Me

SMF Supporter
Joined
Jun 1, 2018
Messages
10,159
Points
113
First Name
Rick
Nice start on this Mark.......over 4000 of these were manufactured between '41 and '44, some going to civilian fire depts. but also to the Luftwaffe so you may have other painting options. Rick H.
 

Dave Ward

Still Trying New Things
SMF Supporter
Joined
Apr 27, 2018
Messages
8,640
Points
113
Location
South Gloucestershire
First Name
David
Mark,
had a sense of deja vu, when I saw this, but I actually made the ICM L1500S LLG which was the Dark Green variant - no idea if there was any other difference! It was around the time that ICM were really ramping their quality up, especially on the softskins. I found a picture, dated January 2016 of it. Oddly enough it was one of the few models I have ever sold - to a collector of model fire engines..........
Dave
 

Mark1

SMF Supporter
Joined
Apr 17, 2021
Messages
3,553
Points
113
Location
South london
First Name
Mark
Hi all,well I've been making some progress,so far a nice little build,just a couple of small issues first one being is that the propshaft passes through a hole in a chassis crossmember just behind the gearbox,well the hole is to small!! A lot easier to make the hole bigger before fitting the crossmember to late for that so I just cut an end off the prop passed it through the hole and glued back together,job done :thumb2:
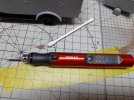
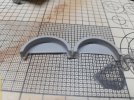
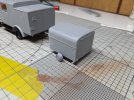
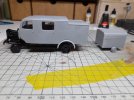
The second issue I've discovered is that the trailer axle could be a fraction wider as the wheels hit against the inside of the wheel arch and not the best fit,not a major job to either widen or just make a new axle but as its fixed in place already I decided to sand down the locators on the back of the arch and it sits closer to the body,also I've tested my new sander and thinned down the inside of the arch to give a bit more room,seems to have done to trick.electric sander was a good buy,would have took me ages by hand.20220614_225138.jpg20220614_225125.jpg20220614_223410.jpg20220614_223305.jpg20220614_223038.jpg20220614_222513.jpg20220614_225421.jpg
 

Tim Marlow

Little blokes aficionado
SMF Supporter
Joined
Apr 27, 2018
Messages
16,771
Points
113
Location
Somerset
First Name
Tim
That’s building up very nicely Mark. Sander looks good as well. Does it have adjustable speed?
 

Mark1

SMF Supporter
Joined
Apr 17, 2021
Messages
3,553
Points
113
Location
South london
First Name
Mark
Thanks Tim, yes the sander has three speeds, a useful tool so far going to see if can get some different attachments for it.
 

Jim R

SMF Supporter
Joined
Apr 27, 2018
Messages
13,717
Points
113
Location
Shropshire
First Name
Jim
Hi Mark
Looks to be going together nicely. That issue with the trailer wheels/axle is an odd one. Well sorted now though :thumb2:
Jim
 

Mark1

SMF Supporter
Joined
Apr 17, 2021
Messages
3,553
Points
113
Location
South london
First Name
Mark
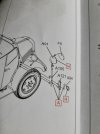
Hi all, I have got the black on the four wings and most of the accessory parts now but had an issue to deal with. That being this,telescopic mount and spotlight20220618_145833.jpg
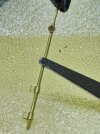
The contact point for gluing the light to the top of the pole was far to small and flimsy,the light was never gonna stay there for long, so gave my self an eyesight test by attempting to scratch build a new pole and drill a hole in the light to mount it,have used slide and fit brass tube with scratched mounting brackets and the locking knob at the top of the pole is a 1/350 porthole window,good at strong now and hopefully looks OK,20220618_144920.jpg
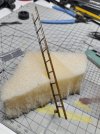
Had a first go at trying to paint some wood grain effect, on the ladders don't think it looks to bad for a first try,a light brown 'wood' base then a gloss coat followed with dark brown enamel and just sort of rubbed it about with a cotton bud.20220618_145439.jpg
 

Tim Marlow

Little blokes aficionado
SMF Supporter
Joined
Apr 27, 2018
Messages
16,771
Points
113
Location
Somerset
First Name
Tim
Super scratch work there Mark. Wood grain is great as well.
I
 

Mark1

SMF Supporter
Joined
Apr 17, 2021
Messages
3,553
Points
113
Location
South london
First Name
Mark
Scale thickness parts are never going to be the strongest! I can't remember any problems with my green goddess, but it was a long time ago!
View attachment 455722
Never really associated green with fire-engines........................
Dave
It seemed OK at first built and painted it no problem but the light just fell off when I went to paint the chrome inside so wanted to make sure it wasn't going to happen again.
 

Jim R

SMF Supporter
Joined
Apr 27, 2018
Messages
13,717
Points
113
Location
Shropshire
First Name
Jim
Hi Mark
Great progress. Excellent scratch work. Often we have to deal with a kit's compromise between strength and scale. Wood looks good. Using an acrylic base and then enhancing the grain with oils or enamel works well as the slow drying time allows plenty of adjusting time.
Jim
 

Mark1

SMF Supporter
Joined
Apr 17, 2021
Messages
3,553
Points
113
Location
South london
First Name
Mark
Hi Mark
Great progress. Excellent scratch work. Often we have to deal with a kit's compromise between strength and scale. Wood looks good. Using an acrylic base and then enhancing the grain with oils or enamel works well as the slow drying time allows plenty of adjusting time.
Jim
Thanks Jim in future i think I'm to try and scratch some of the little bits from the off might save hassle further down the line.
 

Mark1

SMF Supporter
Joined
Apr 17, 2021
Messages
3,553
Points
113
Location
South london
First Name
Mark
Mark.
That's something different and your foing a great job. Some nicely scratched items as well.
Thanks mate,fancied something a bit different and this seemed like a good candidate,I fancy trying to scratch some more bits as I quite enjoy the challenge, I'm starting build up my stocks of materials now so I can do so.
 
Top