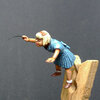
It Started With a Bike.....1/35 Alsace rest stop with playful kids.

rtfoe

SMF Supporter
Joined
Apr 29, 2018
Messages
7,497
Points
113
Location
Malaysia
First Name
Richard
Are these a 'first attempt'? I can't believe how well you're doing with them and the 'basic' putty and tools, another master at work!
In terms of building from scratch, yes especially with heads, Gerry. In the past I usually modify from existing kit figures often remaking the arms or legs positions.

I remember this one Richard. Thought it was brilliant the first time, even better this time round.
John.
Thanks John, this time I'm able to show it in a particular sequence rather than in situ as it was before.

Cheers,
Richard
 

rtfoe

SMF Supporter
Joined
Apr 29, 2018
Messages
7,497
Points
113
Location
Malaysia
First Name
Richard
Five years ago this came out new and was ideal for my little dio. The poses were quite natural and saved a lot of modification. I used three from the is batch and basically just twisted their heads for the right focus. They'll be occasionally seen set in the dio as I planned their positions.

B38.jpg

But certain figures still needed scratching so it's back to the little kids... The girl is tarting to get rudimentary hands and feet.

B39.jpgB40.jpg

Testing the poses again...the newspaper reading Miniart figure is also posed with his head turned as far right as possible.

B41.jpg

The feet are tweaked like the boy on his toes trying to get a better look over the parapet.

B42.jpgB45.jpg

The girl gets a bit of clothing with layers of putty and a bit of sculpting while the putty was still soft.

B46.jpg

Now the boy gets a pair of large shorts and his left hand.

B47.jpg

He now has a vest over his shirt and a rough pair of oversized shoes...His hands are slightly better sculpt.

B48.jpg

I've given bobbysocks for the little girl...

B49.jpgB50.jpg

Little boys shoes are slightly more detailed with the front tongue opened and unlaced...probably a pair he may have found that he could use.

B53.jpg

More later...

Cheers,
Richard
 

Jim R

SMF Supporter
Joined
Apr 27, 2018
Messages
13,694
Points
113
Location
Shropshire
First Name
Jim
Hi Richard
The two childen are coming on nicely. Making them specifically for this dio means that they work perfectly.
Jim
 

rtfoe

SMF Supporter
Joined
Apr 29, 2018
Messages
7,497
Points
113
Location
Malaysia
First Name
Richard
Thanks Jim,
Yes, I'm glad you see the point unless there are figures that are already in the market posed specifically for a scene. But most of the time for an ideal vision of what you want is hard to find so tweaking and switching of limbs just to soften the pose is often required.

Some nice dio scenes are ruined with stiff figures staring at nowhere even if they are facing each other. One has to to be brave to cut or replace limbs or even just move the head slightly to get it right. It's not like a Napoleanic battle scene where everyone stands facing the enemy at attention with musket and cannon balls flying at them...some slight variations of expressions of these soldiers can make a huge improvement to the scene.

Sorry rambling away over badly composed figures I see so often but can only offer encouragement to do better. I don't think mine are perfect either...just slightly better than the last one.:smiling2:

Cheers,
Richard
 

Mini Me

SMF Supporter
Joined
Jun 1, 2018
Messages
10,159
Points
113
First Name
Rick
Yours fit the scene perfectly Richard, I couldn't sculpt my way out of a paper sack and you make it look like you did it in your sleep. :thumb2: Rick H.
 

rtfoe

SMF Supporter
Joined
Apr 29, 2018
Messages
7,497
Points
113
Location
Malaysia
First Name
Richard
Thanks Rick, I ought to sleep more often to improve.:smiling2:

I added volume to the girl by clothing her and gave a her a pleated skirt and a large tied bow...

B65.jpg

She does have thunder thighs so I later whittled her leg down to size...

B66.jpg

Wasn't easy working with the putty as it was similar to hardened wax and brittle but she was done and ready for painting. I hoped the painting would hide some of the faults but I was wishing for miracles. :smiling6:

B67.jpg

I wanted to fill the empty area above the little boy and decided on a GI probably on watch duty peering down at the scene and the Dragon figure on the left fit the bill but with minor alterations.

B61.jpg

He had to be looking right and down. He had to have his body tilted to the right at the waist, his right arm resting on the parapet and still holding the Thompson.

B59.jpg

To hold the Thompson right, his fingers needed alteration and I had to cut away his hand, build his wrist to fit the hole I drilled out at his cuff sleeve.

B71.jpg

I smoothed out the putty in the back of his neck...

B72.jpg

Then I made a strap from left over putty and fitted that on the back of his helmet. His hand was detachable for easy painting of the Thompson and hand.

B54.jpg

More later.

Cheers,
Richard
 

JR

Member of the Rabble and Pyromania Consultant
SMF Supporter
Joined
May 26, 2015
Messages
17,275
Points
113
Location
lincs
First Name
John
Richard I remember this so well , 5 years ago wow , how time flies !:surprised:
Admired the whole build, esp the curved stair case and the construction of the tower. Love the way you finish your builds as well , something I tend to leave :cold-sweat:
Great to see it again.:thumb2::thumb2::thumb2::thumb2::thumb2:
 

rtfoe

SMF Supporter
Joined
Apr 29, 2018
Messages
7,497
Points
113
Location
Malaysia
First Name
Richard
Thanks John, yes time really flies. Although the putty was a pig to work with I enjoyed the build as it was the first time I tried two part putty even for the base cobble stones, stairs and building.

Cheers,
Richard
 

rtfoe

SMF Supporter
Joined
Apr 29, 2018
Messages
7,497
Points
113
Location
Malaysia
First Name
Richard
Just a little more with adjusting figures. The little girl from MB was pretty much standard but had to twist her head to the maximum and just some minor tweaks to the arm positions.

B73.jpg

The skirt ends just needed extra putty so it laid on the stairs better.

B74.jpg

Now it's painting time...base colors were painted over all the figures and some highlights too. You can see I roughly painted the colors in at this stage especially the shoes area.

B80.jpg

Oooh, the close up is horrible. The wash just creeped into all the porous putty around the eyes.

B81.jpg

Goodness me the boy looks like a soft figure that was gotten from a sweet wrapper or cereal box. :tears-of-joy:

B82.jpg

The rest were base painted and let cure before I detail or rescue painted them...

B83.jpgB84.jpgB85.jpgB86.jpg

Cheers,
Richard
 

Mini Me

SMF Supporter
Joined
Jun 1, 2018
Messages
10,159
Points
113
First Name
Rick
Coming along nicely Richard. You should have seen mine, when I did the red cross gal, I had to keep her at the back of the pack so she wouldn't scare the paint of the other figs. :tongue-out3: Rick H.
 

Jim R

SMF Supporter
Joined
Apr 27, 2018
Messages
13,694
Points
113
Location
Shropshire
First Name
Jim
Hi Richard
One thing that I really take onboard from your dios is that for all the elements to fit together everything is brought on at the same time
. Especially true of the figures ....
The skirt ends just needed extra putty so it laid on the stairs better.
Jim
 

rtfoe

SMF Supporter
Joined
Apr 29, 2018
Messages
7,497
Points
113
Location
Malaysia
First Name
Richard
Coming along nicely Richard. You should have seen mine, when I did the red cross gal, I had to keep her at the back of the pack so she wouldn't scare the paint of the other figs. :tongue-out3: Rick H.
Yup, for mine the sleeping GI kept having his eyes shut and the others around him were just waiting for the shock. :tears-of-joy:

Cheers,
Richard
 

rtfoe

SMF Supporter
Joined
Apr 29, 2018
Messages
7,497
Points
113
Location
Malaysia
First Name
Richard
This fun thread really tickles my fancy Richard!
Thanks Steve, glad you're tickled.

Hi Richard
One thing that I really take onboard from your dios is that for all the elements to fit together everything is brought on at the same time
. Especially true of the figures ....

Jim
Jim, yes test fitting just like dry fitting at every opportunity helps with the composition so at the very beginning it has to be worked in the planning. Just like shooting a commercial the Preproduction and Post production take longer than the actual shoot.

Cheers,
Richard
 

rtfoe

SMF Supporter
Joined
Apr 29, 2018
Messages
7,497
Points
113
Location
Malaysia
First Name
Richard
The next set of close ups are second passes with the next layer of highlighting and shadows... looking at the images now make me cringe...was I really on a tight deadline?

B87.jpgB88.jpgB89.jpgB90.jpgB91.jpgB92.jpg

I even missed out the blouse overhang in the front...

B93.jpgB94.jpgB95.jpgB96.jpgB97.jpgB98.jpg

Thank goodness they are viewed from a safe distance. :smiling6:

Cheers,
Richard
 

rtfoe

SMF Supporter
Joined
Apr 29, 2018
Messages
7,497
Points
113
Location
Malaysia
First Name
Richard
To relieve you from those nightmarish close-up of the figures I concentrate on the accessories.

The first were helmet and haversack straps made from thin strips of plastic card and thick foil from a Salmon Paste tube. The foil was easily shaped to flop over the stair edge.

B51.jpg

The upturned helmets were empty on the inside so straps had to be made for the liner and head support.

B52.jpg

The tarp on the floor was made from putty which was rolled flat like making puff pastries using talc instead of flour then cut to shape and as it began to cure just folded to shape.

B76.jpg

I composed two rifles leaning on the wall with a musette bag hung from one of the rifles. The straps were again made from Salmon Paste tube foil.

B77.jpg

The rifle shoulder straps were also made from the same material. I made punched buckle holes with a sharp needle and strap ends from thin wire.

B57.jpg

The Thompson also got the same treatment. I noticed most Thompsons had very long and low hanging straps.

B58.jpg

Tamiya flat black was sprayed as a primer and steel dry brushed for the metal parts.

B104.jpg

Three shades of brown was mixed from a single red brown with black added for the shading and yellow for the highlight. This helped to create a wood grain and not a flat look to the weapons. Notice I have cleaned up the figure and needs just a matt coat to take the shine off.

B105.jpg

All the figures prepped to be matt coated. My pallet was a used pill strip which held very little paint so there wasn't any unnecessary wastage.

B101.jpg

The resting soldiers kit came with a pack of printed cards. I had to make the tin rations and enamel cup from drilled rods and thin foil.

B111.jpg

They were mounted for easy painting. Bottles were from spares.

B114.jpg

Next was piecing everything together...

Cheers,
Richard
 
Top