Italeri 1/48 Douglas P70 by Andrea

Joined
May 5, 2022
Messages
201
Points
63
Location
Lindenwold, New Jersey, USA
First Name
Andrzej
Thank you for the compliments, Andrzej,
The 3 primers was an experiment and the result is partially satisfactory: where I used the white (the tail) the difference is visible while there is not a significant difference between the red primed and the black primed surfaces. Another difference is that Tamiya white primer finish is less smooth than the red and the black ones; I think I will use it for land vehicles in the future and not for aircrafts.

Andrea
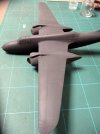
I see, the surface finish difference, that was something hard to predict with the same manufacturer.
But you will paint all and it will be great, I know it. ;)
 

Andy the Sheep

SMF Supporter
Joined
Apr 7, 2019
Messages
1,520
Points
113
Location
North Eastern Italy
First Name
Andrea
This morning I managed to give her a new coat of paint.
IMG_0439.JPG
IMG_0445.JPG
IMG_0447.JPG
The camera is turning the original dark greys into a paler shade of greys; in reality the colour is blacker (no pots or kettles available as benchmark :tongue-out3:).
It came to my mind too late I could have added a point of dark blue to the mix... next time!:rolling:
Tomorrow (if everything is going according to plans) I'll glue some external details and I'll spray a clear gloss coat before decalling. Finger crossed.:cold-sweat:
Andrea
 

Andy the Sheep

SMF Supporter
Joined
Apr 7, 2019
Messages
1,520
Points
113
Location
North Eastern Italy
First Name
Andrea
Thank you Andrzej. Here are the results:
IMG_0448.JPGIMG_0460.JPGIMG_0469.JPG
IMG_0471.JPG
IMG_0463.JPG
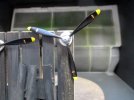
The gloss coat is not completely satisfactory, but I like it so I'll go on. The props and the landing gear doors have been coated with another product, a spray wax for wood (the closest thing I could find similar to Klear here in Italy) and I'm not displeased about the final effect, even if it is not easy to spray a thin and uniform coat (the still wet and uneven coat is clearly visible on the landing gears doors, but when it dries it's not as bad as one could suppose).
Decalling is still ongoing: today I managed to apply the stars and those on the prop blades. The decals are a bit on the thick side, but better thick than fragile.
Probably tomorrow there will be a second, and hopefully final, decalling round with plenty of small, red decals, mainly on the wings and a large nose art.

Thank you for your patience and support.

Andrea
 

yak face

Wossupwidee?
Staff member
Moderator
SMF Supporter
Joined
Jun 13, 2009
Messages
12,387
Points
113
Location
sheffield
First Name
tony
Looking excellent andrea , an all over black scheme is tricky to get looking right but youve nailed it . Cheers tony
 

Andy the Sheep

SMF Supporter
Joined
Apr 7, 2019
Messages
1,520
Points
113
Location
North Eastern Italy
First Name
Andrea
Gents, thank you for the nice comments.
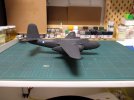
The night lady in her full dress:
IMG_0478.JPGIMG_0479.JPGIMG_0484.JPG
It took me almost 3 hours to stick all those decals on her and some are still wet. I do not think I'll ever try a 1:48 or larger scale modern aircraft kit: too much stencils.:dizzy:
I think next time I'll paint the lines on the wings; using the decals is really a PITA even if precision masking isn't exactly one of my favourite activities :anguished:.
As already said, decals are good but rather thick and the supporting film is still very visible in spite of the gloss undercoat and a liberal use of Decalfix. I've begun to sink them into the fuselage details but they are offering a stiff resistance.
Next step (don't know when): a protective gloss coat, the landing gear, propellers, the radar aerials on and some weathering before the final matt coat. Then the critical moment, unmasking the cockpit...:fearful::cold-sweat::rolling: but I' rather confident about the outcomes of the landing lights, at least...:thinking:

Andrea
 

Allen Dewire

Proud Rabble Member
SMF Supporter
Joined
Apr 27, 2018
Messages
4,105
Points
113
Location
Bamberg
First Name
Allen
Hi Andrea,

Sorry that I'm late to this party and just had a good catch up. Not being a big wing thingy expert, I think you have done a great job despite the problems along the way. The paint turned out well and I feel your pain about the decals and so many of them. Chin up Sir, she will be beautiful when you get her finished, I'm sure of that! Hope you and yours are well in uptown Italy......

Prost
Allen
 

Andy the Sheep

SMF Supporter
Joined
Apr 7, 2019
Messages
1,520
Points
113
Location
North Eastern Italy
First Name
Andrea
Thank you Allen, the advantage of being a slow builder is that those who are late do not have to spend a lot of time to catch up :tongue-out3: .
We are all fine, thanks, in spite of the damp hot weather (sweating while typing!).

Andrea
 

Tim Marlow

Little blokes aficionado
SMF Supporter
Joined
Apr 27, 2018
Messages
16,766
Points
113
Location
Somerset
First Name
Tim
Looks very good to me Andy. Decals, like masking, are a tedious but necessary part of aircraft building. Surprised the decals are a bit thick though. Italeri decals are usually excellent, far better than the stickers that Tamiya supply.
 

Andy the Sheep

SMF Supporter
Joined
Apr 7, 2019
Messages
1,520
Points
113
Location
North Eastern Italy
First Name
Andrea
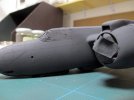
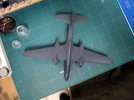
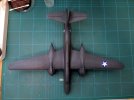
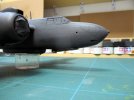
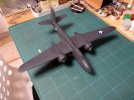
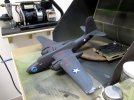
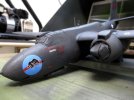
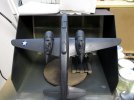
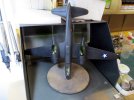
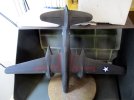
Gloss coat on, some masking off, some colour retouching and front gear added.
The destructions are less than clear about the front landing gear but I hope I put it together correctly.
The landing gear is not very strong: the main legs are fixed to frames instead of being directly connected to the wings or the nose. I hope it won't break when that lady in black will stand on her feet for the first time.
The model is resting "nose down" to allow the front landing gear to cure in the correct position.
IMG_0502.JPG
IMG_0503.JPG

Andrea
 

Tim Marlow

Little blokes aficionado
SMF Supporter
Joined
Apr 27, 2018
Messages
16,766
Points
113
Location
Somerset
First Name
Tim
Blimey, bigger than expected……if you build more like this you will need a bigger spray booth Andy….
 

colin m

Moderator
Staff member
Moderator
SMF Supporter
Joined
Dec 26, 2008
Messages
8,598
Points
113
Location
Stafford, UK
First Name
Colin
Great work Andrea. Sometimes black can be too black, but not here. Your tonal variations are spot on to me.
 

Andy the Sheep

SMF Supporter
Joined
Apr 7, 2019
Messages
1,520
Points
113
Location
North Eastern Italy
First Name
Andrea
Blimey, bigger than expected……if you build more like this you will need a bigger spray booth Andy….
Yes. Tim; me too I thought it was a little smaller than this.
I have a couple of "big" aircrafts in the stash (a P40 N and a Harrier Gr1 in 1:32) but I think they will not be a lot larger than this 1:48 P70. Being more on the 1:35 tank and 1:48 single seat fighter side, I think that this booth is good for painting (as Nancy Sinatra almost sang :tongue-out3:)
Great work Andrea. Sometimes black can be too black, but not here. Your tonal variations are spot on to me.
Thank you, Colin. In fact, there's very little black; German panzer grey and NATO black in various percentages are the main ingredients of that livery; black is present only on the underside but just a pair of drops.
As a first trial in tonal variations, I'm rather satisfied. I'm toying with the idea to go directly to the natural metal finish on my next build (a 1:48 Spit) even if the Centauro 8x8 armoured car is as attractive as the Spit.
Probably I'll toss a coin to decide.:smiling:

Andrea
 

adt70hk

I know its a bit sad but I like quickbuild kits!!!
SMF Supporter
Joined
Sep 4, 2019
Messages
9,496
Points
113
First Name
Andrew
Andy,

That's coming on beautifully!!! I'm about to do black undersides for the first time on my 109s, so have been following this with interest.

ATB.

Andrew
 
Top