- Home
- Forums
- Group Builds
- The New Group Builds (2017 on)
- The User Created Group Builds
- 2022 Builds
- Lee's Soviet Tanks GB: Feb - April 2022
You are using an out of date browser. It may not display this or other websites correctly.
You should upgrade or use an alternative browser.
You should upgrade or use an alternative browser.
Jakko’s Zvezda M4A2 Шерман, 1:35 scale
- Thread starter Jakko
- Start date
Airborne01
SMF Supporter
Or maybe four double Jagermeisters after a couple of beers ... ? Oive nown to becum qwite potato alvelowly fricasee in my time ...
Shteeve
Shteeve
Jim R
SMF Supporter
Nice paint job  Your scratched hatch looks great. You'd think it was a kit part.
Jim
 Your scratched hatch looks great. You'd think it was a kit part.
Jim
- Joined
- Apr 28, 2018
- Messages
- 10,732
- Points
- 113
- First Name
- Jakko
- Joined
- Apr 28, 2018
- Messages
- 10,732
- Points
- 113
- First Name
- Jakko
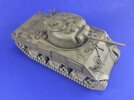
Next was an overall coat of Mig wash for olive drab, which is a green colour that I was not too sure will look good on OD (which, as I’ve mentioned before, is not green), but it worked out OK. The lower hull and suspension instead got a wash of thinned-down Army Painter soft tone:
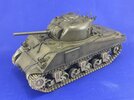
The olive drab wash has given the model a bit of a shine, which I’m not too thrilled with. Once dry, it was followed by drybrushing with two shades of olive drab paint for the upper hull and turret, and two shades of pale sand colour for the underside:
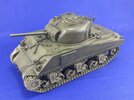
That has taken some of the gloss off, but I may still have to put a matt varnish coat on later, perhaps.

The olive drab wash has given the model a bit of a shine, which I’m not too thrilled with. Once dry, it was followed by drybrushing with two shades of olive drab paint for the upper hull and turret, and two shades of pale sand colour for the underside:

That has taken some of the gloss off, but I may still have to put a matt varnish coat on later, perhaps.
Jim R
SMF Supporter
Hi Jakko
Well that has certainly livened up the olive drab. Looks good but as you say some shiny areas.
Jim
Well that has certainly livened up the olive drab. Looks good but as you say some shiny areas.
Jim
Jakko that is looking great I like the different shades they blended well
Loving that 
Very cool tone effects.... Something I struggle to achieve, especially to that kind of standard !!
Good stuff mate,
Andy

Very cool tone effects.... Something I struggle to achieve, especially to that kind of standard !!
Good stuff mate,
Andy
- Joined
- Apr 28, 2018
- Messages
- 10,732
- Points
- 113
- First Name
- Jakko
Trust me, if I can do it, then so can you  The only real skill involved is enough airbrush practice to be able to spray reasonably finely: I didn‘t do more than put an overall coat of olive drab onto the model, followed by spraying field drab (an ugly greenish-brown colour) in semi-random patterns onto most panels, larger areas of raise detail, the top of the gun barrel, etc. — the idea is to avoid edges with this, so it ends up in the middle of open areas. Then it was just an overall wash with a darker version of the base colour and an overall drybrush with a lighter one of same. No fancy painting techniques involved at all
  Just give it a try on your next model — if it goes wrong, just re-spray the whole thing in the base colour and you’re back to being able to use your normal methods instead
 The only real skill involved is enough airbrush practice to be able to spray reasonably finely: I didn‘t do more than put an overall coat of olive drab onto the model, followed by spraying field drab (an ugly greenish-brown colour) in semi-random patterns onto most panels, larger areas of raise detail, the top of the gun barrel, etc. — the idea is to avoid edges with this, so it ends up in the middle of open areas. Then it was just an overall wash with a darker version of the base colour and an overall drybrush with a lighter one of same. No fancy painting techniques involved at all
  Just give it a try on your next model — if it goes wrong, just re-spray the whole thing in the base colour and you’re back to being able to use your normal methods instead
- Joined
- Apr 28, 2018
- Messages
- 10,732
- Points
- 113
- First Name
- Jakko
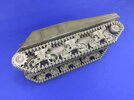
Those tracks are annoying to paint, largely because I already put them on before painting. If I had intended to show the undercarriage as muddy, this wouldn’t have been a problem, but as I want a dusty impression, I need to paint the inside of the track as well as the wheels as fairly clean. This because the wheels would, of course, clean the tracks and themselves of dust just by the tank driving.
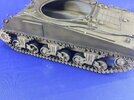
With a fairly fine brush, I first painted the inner surface of the track with gun metal and the roadwheel tyre surfaces (but not their sides) with dark grey:
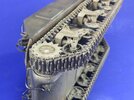
I also drybrushed the outside of the track with the same gun metal, to show the dust being wiped off the profile by the road:
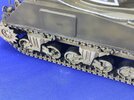
Once this had dried, I painted the tyre surfaces with diluted Indian ink (mixed about 1:1 with water):
The steel surfaces of the return rollers and idlers still need to be painted olive drab for the same reason, and then some more dust added, I think. The metal rims on the roadwheels also need this treatment, because those would probably be wiped clean too.
I also applied the decals, which isn’t much, really:
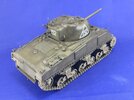
This shows two of the three The third is a similar triangle on the left side of the turret, and that’s it.
With a fairly fine brush, I first painted the inner surface of the track with gun metal and the roadwheel tyre surfaces (but not their sides) with dark grey:

I also drybrushed the outside of the track with the same gun metal, to show the dust being wiped off the profile by the road:

Once this had dried, I painted the tyre surfaces with diluted Indian ink (mixed about 1:1 with water):

The steel surfaces of the return rollers and idlers still need to be painted olive drab for the same reason, and then some more dust added, I think. The metal rims on the roadwheels also need this treatment, because those would probably be wiped clean too.
I also applied the decals, which isn’t much, really:

This shows two of the three
 The third is a similar triangle on the left side of the turret, and that’s it.
GORGEOUS ,
I can't put it any better than that!!
Andy
I can't put it any better than that!!

Andy
Jim R
SMF Supporter
scottie3158
SMF Supporter
Jakko,
That's a cracking result.
That's a cracking result.
- Joined
- Apr 28, 2018
- Messages
- 10,732
- Points
- 113
- First Name
- Jakko
Thanks once more, all 


I must say I prefer touching up glue marks over having a hard time getting a brush into areas that are easily visible between those guide teeth and under the wheels, thoughThe one small advantage of fitting the tracks before painting is there is no danger of chipping paint or glue marks.


