Pete's Heller 1/72 Vampire

stillp

SMF Supporter
Joined
Nov 17, 2016
Messages
7,218
Points
113
Location
Rugby
First Name
Pete
My BV141 is sitting in the spray booth as the last (hopefully) matt coat dries, so I thought I'd start getting ready for the next build. It's a Heller 1/72 Vampire I picked up in a charity shop for £4.99.
According to Scalemates it's a 1979 release, so just 40 years old - practically new compared to my last build.
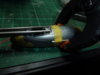
Here's the box and sprue shots:
P1150126.JPGP1150127.JPG
The bag was open, but all the parts seem to be there and undamaged. Shouldn't take long - only 40 parts, same colour nearly all over... what could possibly go wrong?
More later.
Pete
 

stillp

SMF Supporter
Joined
Nov 17, 2016
Messages
7,218
Points
113
Location
Rugby
First Name
Pete
Some progress. First mistake - I had a bit of trouble getting the bulkhead behind the pilot's seat to sit at the correct angle, so I used the RH fuselage side as a jig - then without thinking glued the cockpit floor/seat/bulkhead in place. Not a major disaster But caused some difficulty painting the cockpit interior. Luckily it's all black, and I managed to get in there for a little drybrushing with aluminium. I did have a couple of photos, but the camera I used has swallowed them and won't give them back. I think it's been working on behalf of the carpet monster.
After Dave's warning about needing some weight up front, I glued a few flattened airgun pellets under the floor and behind the bulkhead, then filled in with some steel shot, before closing the fuselage.
P1150150.JPG
I'd thought it would be a good idea to leave the jet pipe out (it's fitted loosely in the photo above, to keep the fuselage halves aligned) so I could stand the fuselage upright, squirt some PVA in and follow it up with some more steel shot.
P1150152.JPG
That seemed to work, it now feels rather heavy at the front end. Also tucked in some more under the floor and in the gun compartment:
P1150153.JPG
P1150154.JPG

Now, have you spotted the second mistake yet? See that collar around the jet pipe?
P1150151.JPG
It should be inside the fuselage, butted up against a ridge there, so has to go in before the fuselage halves are joined! Luckily I was able to ease it out after softening the cement with some Extra Thin, sand off the collar and glue it in again - I had to guess how far in to set it but found some walkrounds online to help. Does this look about right?
P1150155.JPG
Sorry about the state of the keyboard - the cat wanted a cuddle!
Thanks for watching.
Pete
 

Attachments

  • P1150149.JPG
    P1150149.JPG
    72.8 KB · Views: 3

Archetype

FAA plane builder
Joined
Mar 31, 2019
Messages
925
Points
93
Location
Sussex
First Name
Chris
Looks good, and strangely familiar!

What’s modelling without a few tweaks.
Keep up the good work.
 

stillp

SMF Supporter
Joined
Nov 17, 2016
Messages
7,218
Points
113
Location
Rugby
First Name
Pete
Thanks Chris.
The plastic is horrible. It seems to have a hard skin on it that contains most of the silver colour, when you sand it it's black underneath, so it's really hard to tell when you've sanded blemishes off. I think I'll need to brush a this coat of primer on it to show up the seams.
Pete
 

wonwinglo

SMF Supporter
Joined
Apr 18, 2004
Messages
6,754
Points
113
First Name
Barry
It is amazing how many similar kits I have found in charity shops,probably gifts that never got built ? then relegated to a drawer,as expected you have to watch for lost parts that can migrate out of the boxes if not properly sealed but its sometimes a chance you take,neat little Vampire you have certainly maximised the spaces for lead shot !
Heller did some good stuff back in the day,how time flies was it really 40 years ago ! at that time I had my own model shop.
 

JR

Member of the Rabble and Pyromania Consultant
SMF Supporter
Joined
May 26, 2015
Messages
17,275
Points
113
Location
lincs
First Name
John
Seems your having fun Peter.
Had that feeling of "oh damn shouldn't have glued that yet " many times :hungry:
 

Mini Me

SMF Supporter
Joined
Jun 1, 2018
Messages
10,159
Points
113
First Name
Rick
But really at 4pounds 99p you can't go wrong, with or without missing parts! Lucky B****! My sister-in- law is now working at the Goodwill Store downtown and I shall have her on the look out for the bargain kits as they come in! Loverly progress so far and keep us posted Pete,
and Listen to Dave, as I do recognize the voice of experience when I hear it. Cheers, Rick H.
 
Last edited:

stillp

SMF Supporter
Joined
Nov 17, 2016
Messages
7,218
Points
113
Location
Rugby
First Name
Pete
Barry, a lot of my stash came from charity shops. By the way, that's not lead shot, but steel. Sold for weighting teddy bears, much cheaper than Liquid Gravity. Easier to clean up too when it spills over the workspace, a magnet in a plastic bag works wonders! Where was your model shop?

Rick, I do like a bargain! That was one of 4 I bought, and one certainly had missing parts - it was missing the entire plane (Airfix Skyraider), but had 2 sets of underwing stores. Strange though, some charity shops never get any model kits - my neighbour works at one, and she's never seen a kit donated, and she would, her son collects civilian aircraft models. It was a charity shop purchase that drew me back into modelling about 3 years ago. A Revell 1/24 Ferrari for £3.

Pete
 

wonwinglo

SMF Supporter
Joined
Apr 18, 2004
Messages
6,754
Points
113
First Name
Barry
Barry, a lot of my stash came from charity shops. By the way, that's not lead shot, but steel. Sold for weighting teddy bears, much cheaper than Liquid Gravity. Easier to clean up too when it spills over the workspace, a magnet in a plastic bag works wonders! Where was your model shop?

Rick, I do like a bargain! That was one of 4 I bought, and one certainly had missing parts - it was missing the entire plane (Airfix Skyraider), but had 2 sets of underwing stores. Strange though, some charity shops never get any model kits - my neighbour works at one, and she's never seen a kit donated, and she would, her son collects civilian aircraft models. It was a charity shop purchase that drew me back into modelling about 3 years ago. A Revell 1/24 Ferrari for £3.

Pete
My model shop was in Coventry 'Barrys Models' in the Butts,used to be old style shop with proper materials,a meeting place for model builders too,if the internet had been around there then it would have been good but I relied on passing trade on a busy main road,ran it for 14 years then the old story the lease went up double.
Useful tip on the steel shot.
 

stillp

SMF Supporter
Joined
Nov 17, 2016
Messages
7,218
Points
113
Location
Rugby
First Name
Pete
Small world Barry - my job was relocated to Coventry in the early 90s. Presumably you'd closed the shop by then?
Pete
 

wonwinglo

SMF Supporter
Joined
Apr 18, 2004
Messages
6,754
Points
113
First Name
Barry
Small world Barry - my job was relocated to Coventry in the early 90s. Presumably you'd closed the shop by then?
Pete
the shop opened around 1987 closed around 2001,after that I went on to set up another successful model shop in Leamington Spa for the owner.
 

stillp

SMF Supporter
Joined
Nov 17, 2016
Messages
7,218
Points
113
Location
Rugby
First Name
Pete
The upper and lower wing surfaces have no locating pins, so I used the fuselage to align the root end, clamped the tip then removed it from the fuselage and added more clamps.
P1150156.JPG
The intakes, such a prominent feature of the Vampire, need quite a lot of cleaning up. The one in the photo has been partly done.
Pete
 

colin m

Moderator
Staff member
Moderator
SMF Supporter
Joined
Dec 26, 2008
Messages
8,604
Points
113
Location
Stafford, UK
First Name
Colin
If I was a woman, I'd be saying, 'typical bloke, never reads instructions' However, I'm not a woman, but am very guilty of not always reading instructions. Maybe the women folk have a point.
 

stillp

SMF Supporter
Joined
Nov 17, 2016
Messages
7,218
Points
113
Location
Rugby
First Name
Pete
Plodding on... wing sand intakes are now attached, canopy is on and masked, first round of fill/sand started:
P1150159.JPGP1150160.JPG
The fuselage centre seam looks awful in these photos, but actually isn't bad, but sanding this silver plastic leaves a black line.
Heller seem to think it was a good idea to mould half the pitot on each half of the LH tailboom fin, splitting the sub-millimetre pitot along it's length. Of course the two halves don't line up, so I've tried to coax them together with some Extra Thin.
P1150157.JPG
Not entirely successful, but it's too thin and flexible to sand smooth. I'll try to scrape it when fully dry.
The main wheels are separate, but the nosewheel is part of the leg, so I think after the tailboom assembly is attached I'll fit the main gear legs and doors, and the nosewheel bay doors, then get some paint on, and paint the nose leg separately. As far as I can tell the wheels bays and legs are painted silver, to match the airframe, so no masking needed! Just need to decide which silver paint to use - Vallejo Aluminium looks a bit too bright, so I might use thier Steel.

thanks for watching.
Pete
 

Lee Drennen

Box Stock Builder with a Twist/ Rabble Member
SMF Supporter
Joined
Apr 29, 2018
Messages
5,640
Points
113
Location
Wortham Mo
First Name
Lee
Looking good so for Peter the wet stuff is very near looks like
 
Top