You are using an out of date browser. It may not display this or other websites correctly.
You should upgrade or use an alternative browser.
You should upgrade or use an alternative browser.
Richard's Revell Ex-Matchbox 1/72 Victor Resurfaces
- Thread starter rtfoe
- Start date
rtfoe
SMF Supporter
Thanks Herr Rubblemeister, you know that little itch in the most awkward place sometimes needs scratching or it can be excruciatingly irritating. I've always wanted to do that to wing tips.
Now there's another little itch in the shape of blades on the tip of the refueling pod...

The kit blades are just too thick and are not even box like for pre flight covers.
 For reference only
They look like the above that is until I saw the prototype Mk20B 10 bladed constant speed Dowty Rotol version that was briefly used at the beginning and was replaced by the later 2 bladed Mk20B
 For reference only
I'm not into total accuracy and not sure how long it was in service but I am interested in the 10 bladed nose for one as now most turbo props are Rotol designed with 6 or more blades.
So it begins with cutting the knobs off... I'll be using thin pla card for the blades and gluing them all round at an angle.

Cleaned up the point and will essentuate the gap to the pod by sawing it lightly...that's it so far.
Cheers,
Richard
Now there's another little itch in the shape of blades on the tip of the refueling pod...
The kit blades are just too thick and are not even box like for pre flight covers.
For reference onlyThey look like the above that is until I saw the prototype Mk20B 10 bladed constant speed Dowty Rotol version that was briefly used at the beginning and was replaced by the later 2 bladed Mk20B
For reference onlyI'm not into total accuracy and not sure how long it was in service but I am interested in the 10 bladed nose for one as now most turbo props are Rotol designed with 6 or more blades.
So it begins with cutting the knobs off... I'll be using thin pla card for the blades and gluing them all round at an angle.
Cleaned up the point and will essentuate the gap to the pod by sawing it lightly...that's it so far.
Cheers,
Richard
Jim R
SMF Supporter
Hi Richard
Those lights look brilliant - pardon the pun. Drilling the bulb was clever. On with the many blades.
Jim
Those lights look brilliant - pardon the pun. Drilling the bulb was clever. On with the many blades.
Jim
rtfoe
SMF Supporter
Thanks Jim , will get cracking tonight cutting the blades first...20 pieces.
But before that there is something I'd like to share, in my hastiness I applied the stencil decals without a gloss varnish coating so slight silvering occurred after copius amounts of decal softener and set. In the end when it dried I used commercial thinner(cellulose) and applied with a small brush... the silvering disappeared. I'm guessing the paint dissolved and blended with the decal film. I'll take a snap shot of the after effects later.
Cheers,
Richard
, will get cracking tonight cutting the blades first...20 pieces. But before that there is something I'd like to share, in my hastiness I applied the stencil decals without a gloss varnish coating so slight silvering occurred after copius amounts of decal softener and set. In the end when it dried I used commercial thinner(cellulose) and applied with a small brush... the silvering disappeared. I'm guessing the paint dissolved and blended with the decal film. I'll take a snap shot of the after effects later.
Cheers,
Richard
Last edited:
scottie3158
SMF Supporter
Richard,
The lights are a great improvement. Looking forward to see what you do with the propeller
The lights are a great improvement. Looking forward to see what you do with the propeller
The wingtips look great definitely worth the effort Richard.

Good luck with the props on the refuelling pods.
Good luck with the props on the refuelling pods.
rtfoe
SMF Supporter
Hi Guys, thanks for thereply and comments...
Paul and Fernando...I will press on to the propellers for the pods. Have cut the individual props and glued them today...pictures below...
Greg, same principle in building but with wings, flaps and ailerones instead of tracks with a lighter touch on detail and painting. Glad you're with us.
Clean up, slicing of 20 blades and finally assembly...


A while back I mentioned about showing a shot of the decal stencilling after treatment...here it is...

No more silvering and carrier film visible.
Cheers,
Richard
Paul and Fernando...I will press on to the propellers for the pods. Have cut the individual props and glued them today...pictures below...
Greg, same principle in building but with wings, flaps and ailerones instead of tracks with a lighter touch on detail and painting. Glad you're with us.
Clean up, slicing of 20 blades and finally assembly...
A while back I mentioned about showing a shot of the decal stencilling after treatment...here it is...
No more silvering and carrier film visible.
Cheers,
Richard
scottie3158
SMF Supporter
Lovely neat work those impellers are a great improvement.
- Joined
- Apr 28, 2018
- Messages
- 10,727
- Points
- 113
- First Name
- Jakko
That’s because that’s exactly what they arethey kind of look like mini turbines.
 People tend to associate the word “turbine” with something like this:
However, this is also a turbine:
Anything that begins to spin because of a flow of fluid around it (gases like air are a fluid for these purposes), is a turbine. In an application like on your model, the turbine is probably more likely to be called an impeller, but that’s really just a description of its purpose rather than what it is.
- Joined
- May 26, 2009
- Messages
- 12,968
- Points
- 113
- First Name
- Ron
Richard - Turbines, impellers, whatever you care to call them, they are a very neat bit of modelling and improve the detail no end.
Excellent stuff.
Ron
Excellent stuff.
Ron
rtfoe
SMF Supporter
That’s because that’s exactly what they are
However, this is also a turbine:
Anything that begins to spin because of a flow of fluid around it (gases like air are a fluid for these purposes), is a turbine. In an application like on your model, the turbine is probably more likely to be called an impeller, but that’s really just a description of its purpose rather than what it is.
Thanks Guys, I learn something new everyday. The reason I used the word turbine is because the pod propeller was listed as a Ram Air Turbine on the pod instruction manual attached here...and like many people assumed it worked like a turbine...

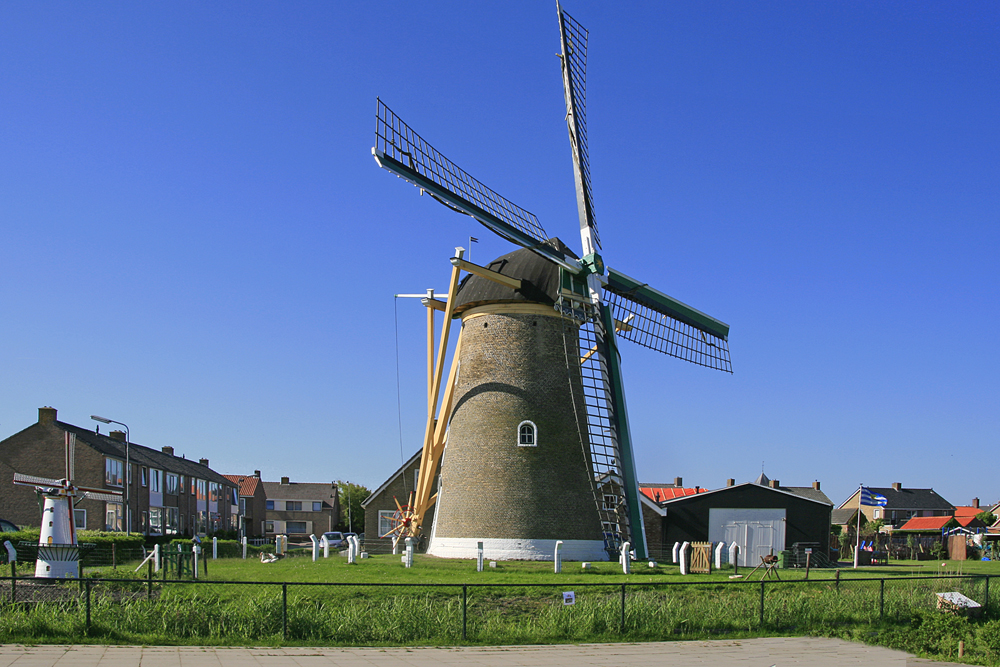
Dowty Ltd were propeller makers and developed the constant propeller adapting the Rotol design which looked like turbine blades. It acts like the windmill you showed that works the hydraulic pump. The impeller would have been used internally to increase the performance and flow of the pump. Interesting that these three, propeller, turbines and impellers work using blades.
Richard - Turbines, impellers, whatever you care to call them, they are a very neat bit of modelling and improve the detail no end.
Excellent stuff.
Ron
Thanks Ron...whatever it is this extra detail shouldn't be on this late a model of the K2 as it was replaced by the two bladed prop at prototype stage. Just thought it looked cool and wanted to be different.
Here it is painted...

Cheers,
Richard
Last edited:
rtfoe
SMF Supporter
Hi Richard
Looks to have worked. No damage to the decals? Did you just apply it to the decal and then allow it to dry naturally or did you rinse it off?
Jim
Hi Jim, with a small amount of thinner at the tip of a small sharp brush, I applied carefully around the edges of the decal film and let the thinner work itself under it. I try as little as possible not to disturb the paint. I leave it and let the thinner evaporate cos its so little...just enough to let it seep in. You may need to use the thinner that's made for the type of paint you use. Mr Color reacts to lacquer thinner easily and maybe thats why it worked.
Cheers,
Richard
Last edited:
rtfoe
SMF Supporter
Ok finally after three years panel wash is applied. I use my very own water colour mix of black and brown with a drop of detergent. With this mix I spread it liberally along the panels...

It looks scary after all the trouble painting the individual panels...after letting it dry for one to two minutes I wipe with a damp cloth in the direction of the airflow.

I did this section by section as can be seen below...

The final outcome only for the top. I will spray a layer of matt varnish to protect the wash from rubbing off before proceeding to the underside.

After this more weathering like chipping, oil stains and streaking. Hope to finish this to start on the Toon build.
Cheers,
Richard
It looks scary after all the trouble painting the individual panels...after letting it dry for one to two minutes I wipe with a damp cloth in the direction of the airflow.
I did this section by section as can be seen below...
The final outcome only for the top. I will spray a layer of matt varnish to protect the wash from rubbing off before proceeding to the underside.
After this more weathering like chipping, oil stains and streaking. Hope to finish this to start on the Toon build.
Cheers,
Richard
scottie3158
SMF Supporter
Richard,
Stunning work mate.
Stunning work mate.
- Joined
- Apr 28, 2018
- Messages
- 10,727
- Points
- 113
- First Name
- Jakko
You’re entirely correct calling it a turbine, because it isThe reason I used the word turbine is because the pod propeller was listed as a Ram Air Turbine on the pod instruction manual attached here...and like many people assumed it worked like a turbine...
It’s driven by airflow resulting from the aircraft’s speed, in the same way a windmill is turned by air blowing past it on its own accord.An impeller is a turbineInteresting that these three, propeller, turbines and impellers work using blades.
The word just means it’s used to drive something, whereas “propeller” means it’s used to move something forward. In both cases (turbines/impellers and propellers), the blades are usually airfoils,* like an aircraft’s wings. In the case of an impeller, the air (or water or hydraulic oil or whatever) flowing past the blades causes them to move, turning the shaft; in case of a propeller, an engine turns the axle that the propeller is on, causing it to move through the air and pull itself forward just like a wing lifts the aircraft up.TL:DR version: you were exactly right in thinking the thing at the front is a turbine
Did I mention you vastly improved it over the kit part, so it looks much better now? I don’t think I did. You vastly improved it over the kit part, so it looks much better now.
* Although, like in all airfoil applications, a flat plate angled upward with respect to its forward direction should also work, but not as well.