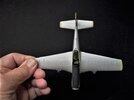
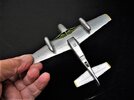
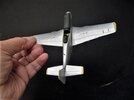
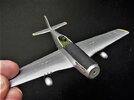
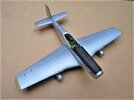
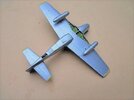
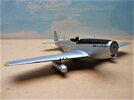
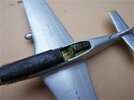
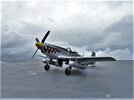
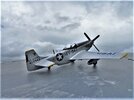
Ron's Academy 1/72 Mustang F-51D.

spanner570

SALAD DODGER
SMF Supporter
Joined
May 26, 2009
Messages
13,006
Points
113
First Name
Ron
Here's my entry. Sorry Lee, no box.
What can you expect for £5 - Delivered....

The Mustang represented by this model, nicknamed "Was that too fast" is an F-51D from the 12th FBSq,, 18th FBGp. based at Chinhae Korea in late 1952.

P1340937.JPGP1340938.JPG

Cheers.
Ron
 
Last edited:

JR

Member of the Rabble and Pyromania Consultant
SMF Supporter
Joined
May 26, 2015
Messages
17,278
Points
113
Location
lincs
First Name
John
570 give some of us time to get here, I've been out all morning .
Very nice, when will the current Mrs Spanner be hurling this for photos ? make haste as the weather is due to change next week..

Yours 453
 

yak face

Wossupwidee?
Staff member
Moderator
SMF Supporter
Joined
Jun 13, 2009
Messages
12,415
Points
113
Location
sheffield
First Name
tony
Fast work that man , these academy kits are usually a clean, trouble free build , very nice to put together . One thing , is the fin fillet a separate piece? I ask because the photo on the instructions and the decal placement drawing both show one but the model hasnt got one .
 

Mini Me

SMF Supporter
Joined
Jun 1, 2018
Messages
10,161
Points
113
First Name
Rick
570!! stop it , you're making me look bad......you've only been at this for about 15 minutes and you went by me like I was sitting on the guard rail! Incidentally I worked with a fella at United Airlines who was a Mechanic in that Group.....showed me pictures of the birds in his outfit that were taken back in the days when I was still filling my britches! :tongue-out3:
 

Ian M

Administrator
Staff member
Administrator
Moderator
SMF Supporter
Joined
Dec 14, 2008
Messages
19,743
Points
113
Location
Falster, Denmark
First Name
Ian
Bugger! I blinked and I missed it. lol
Tony makes a point about the tail filet doo dah. Could it be a loose part or has the seller done a fast one..
 

spanner570

SALAD DODGER
SMF Supporter
Joined
May 26, 2009
Messages
13,006
Points
113
First Name
Ron
Thanks for the nice posts, everyone. The contents of which I've inwardly digested. ;)

Welcome aboard to what looks like a rather short lived flight. Due entirely to the fact that this Academy kit is just superb. All I've had to do is remove the very small bits where the parts join the sprues. First time fit for every single part. One of the best I've come across and very well recommended.


Fast work that man , these academy kits are usually a clean, trouble free build , very nice to put together . One thing , is the fin fillet a separate piece? I ask because the photo on the instructions and the decal placement drawing both show one but the model hasnt got one .

Tony, your post saved the day. I've developed a bad habit of snipping off bits of the sprues that no longer contain parts and binning them. In a pathetic attempt at my own mitigation, I am used to modelling aircraft that have no fillets or which are moulded in, so missed them completely through not reading the instructions properly, Consequently, I threw away what I thought was an empty sprue. On reading your comments, I rooted around in the (Luckily) small bin in my den and there were the two small halves of the tail fillet still attached to the discarded sprue! So thank you loads. :thumb2: Tunnocks on me, if we ever get to Cosford, that is!


On with the build.....
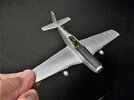
I always brush paint my stuff, so using a nice big flat headed brush, I've first coated the aircraft. I had a choice of ordinance. Drop tanks or Napalm. For a change, I went for those abominations, the napalms. These I painted separately, then stuck on after the overall coat of Vallejo Model Air Aluminium. I then gave the top engine cowl a coat of matt black and before it dried completely, I gently 'Stroked' the damp paint with a wire brush to induce a scratched and slightly worn surface. I've also added some ever so slight streaking to the wing surfaces by laying off the wet paint in the direction of the wind flow. I've also started painting the yellow bits where required.


Here is my Mustang, with it's first coat of Vallejo Air Aluminium.
P1340964.JPG

P1340965.JPG

P1340968.JPG

P1340969.JPG

P1340966.JPG

Second coat to come and then I will touch up any wayward brush marks.

Cheers and once again, a big thank you to Tony!

Ron
 
Last edited:

Jim R

SMF Supporter
Joined
Apr 27, 2018
Messages
13,751
Points
113
Location
Shropshire
First Name
Jim
Looking good Ron. Laying off brush strokes in the wind flow direction is a very effective technique.
rooted around in the (Luckily) small bin in my den and there were the two small halves of the tail fillet still attached to the discarded sprue!
Lucky you're an untidy b****r who doesn't empty the bin until it's overflowing :smiling:
 

spanner570

SALAD DODGER
SMF Supporter
Joined
May 26, 2009
Messages
13,006
Points
113
First Name
Ron
Thanks Jim and Tony.


Although I could have just got away with one coat, I brushed on another!
This was before Tony mentioned the wayward fillet.

P1340970.JPG

P1340971.JPG

P1340974.JPG


The cockpit canopy will be closed, but I thought some sort of excuse for a safety harness would not be out of place, and marginally better than now't. (Comments on a postcard to.....) I made it from the instructions paper, cut into very thin strips and marked with a sharp pencil.
P1340997.JPG


I've also noticed there is a need for some 'Tidying up' of the aloominum....

Cheers.
Ron

P.S. Before I loose it again, the fillet was stuck on today, so rest easy chaps.
 
Last edited:

The Smythe Meister

Born to be WILD....... until about 9pm
SMF Supporter
Joined
Jan 30, 2019
Messages
5,743
Points
113
Location
Devon
First Name
Andy
Oooops,
Another build I've missed until now !! Looking very nice indeed there Ron :smiling3:
Looks strikingly like mine's regalia..... although It's not at your advanced stage yet,good stuff mate :smiling3:
 

adt70hk

I know its a bit sad but I like quickbuild kits!!!
SMF Supporter
Joined
Sep 4, 2019
Messages
9,507
Points
113
First Name
Andrew
Ron

Sorry missed the start of this..... Work has been mental!

Coming on very nicely indeed.

Very well done.

Andrew
 

spanner570

SALAD DODGER
SMF Supporter
Joined
May 26, 2009
Messages
13,006
Points
113
First Name
Ron
Thanks everyone for all your contributions during this rather obscenely quick build.
Such was the excellence of the mould quality, fit and right down to the decals, the kit offered not one ounce of resistance during construction. With the result that is now finished.

All brush painted using Vallejo Air 'Aluminium' and other colours of the same make. As I wrote earlier, I'm too clumsy and impatient to mask stuff, so the cockpit frame, wing tips, etc. are all brush applied freehand.

Minimum weathering. More like staining really!

Here are a couple of pictures to round off the thread.
The rest are posted up in the relevant G.B. 'Completed'

Thank you to Lee for suggesting and running the Mustang G.B.


P1350003.JPG

P1350007.JPG


Thanks for having a look.

Ron
 
Last edited:
Top