I suppose the real thing to get is liquid reamer. Never tried it, but that’s it’s sole purpose. Cleaning airbrushes….
You are using an out of date browser. It may not display this or other websites correctly.
You should upgrade or use an alternative browser.
You should upgrade or use an alternative browser.
Sd.Kfz. 7 half-track, post-war
- Thread starter Jakko
- Start date
scottie3158
SMF Supporter
Looking good mate
Jim R
SMF Supporter
It's good stuff. I only use it when really needed though. Shifts enamels, acrylics and lacquers. If you have a cut on your hand wear a glove 'cause it hurts like hell - like lemon juice doesI suppose the real thing to get is liquid reamer

Jim
Talking of washes have you every tried Flory washes ? Mike Aka Is it me put me on to them . The beauty of using them is once dry you can re wet them and thin down if needed .
- Joined
- Apr 28, 2018
- Messages
- 10,775
- Points
- 113
- First Name
- Jakko
I’ve not come across them, but if I’m honest, then the re-wetting part makes me not really want to … The idea that moisture in the air will eventually dilute them and make them run off the model puts me off — even if that will probably never happen 

- Joined
- Apr 28, 2018
- Messages
- 10,775
- Points
- 113
- First Name
- Jakko
Weathering on this model, I’ve decided, is mostly going to consist of rain streaks. I made them by semi-drybrushing vertically with a few shades of green and brown, which I think has worked fairly well:


I also applied decals, chiefly the number plates, which I think were WH-999731, though it could be I’ve misread the first digit and it was actually an 8. Dragon supplies white backgrounds and separate numbers, which were fun to apply …

The backgrounds need a good amount of Micro Sol to go over the detail on the front bumper.
On the engine, I painted some of the details, then applied an overall coat of Army Painter Dark Tone, followed by Mig Dark Wash:

The intention was to shade the engine, which the first didn’t do sufficiently so I tried the second coat, but it mainly made the engine look dirty, which will do too


I also applied decals, chiefly the number plates, which I think were WH-999731, though it could be I’ve misread the first digit and it was actually an 8. Dragon supplies white backgrounds and separate numbers, which were fun to apply …

The backgrounds need a good amount of Micro Sol to go over the detail on the front bumper.
On the engine, I painted some of the details, then applied an overall coat of Army Painter Dark Tone, followed by Mig Dark Wash:

The intention was to shade the engine, which the first didn’t do sufficiently so I tried the second coat, but it mainly made the engine look dirty, which will do too

Jim R
SMF Supporter
Really getting there now. Looks good. I reckon rain streaks are just right. With it just sitting there any real dirt would have been washed off and it's a newish vehicle so little time to be really bashed up before it's demise.
Jim
Jim
- Joined
- Apr 28, 2018
- Messages
- 10,775
- Points
- 113
- First Name
- Jakko
I have to say like the look of the streaks too, it didn’t go too badly for a first attempt  I did notice today in one of the photos of the real vehicle, though, that the track has about the same colour as the rest of the vehicle, so I suppose there was a fair amount of dirt on the lower parts that I’ll also have to add.
 I did notice today in one of the photos of the real vehicle, though, that the track has about the same colour as the rest of the vehicle, so I suppose there was a fair amount of dirt on the lower parts that I’ll also have to add.
Looking better each time I look in. Great job on the streaking.
- Joined
- Apr 28, 2018
- Messages
- 10,775
- Points
- 113
- First Name
- Jakko
Thanks  I try to avoid overall coats of varnish, because of all the things that can go wrong with them … The model is matt enough for my taste as it is — it looks slightly glossier in the pictures than in the flesh, probably because of the lights I use.
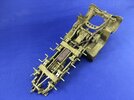
By now I’ve fitted the exhaust pipe:

Dragon’s way of fitting it is just plain stupid. It’s split into two parts: the upper half of the muffler with one of the pipes attached, and the lower half with the other pipe. Dragon wants you to put the upper half into the chassis and then add the lower half. This means that you either need to paint it after installation or will have to deal with seams on the muffler’s sides after it’s gone into the chassis. I wanted to paint it off the model, so I put it together and then cut the front pipe off, drilling holes so I could insert a pin into the rear end of the pipe. That let me fit the whole muffler and rear exhaust pipe into the chassis, and only then insert the front pipe.
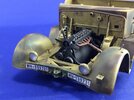
At the front, I put some matt varnish over the license plates, both to get rid of any shine and to glue the numbers down better. I next put a little grime on them by drybrushing a little bit over them, and installed the headlamp glass:

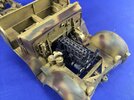
The engine and exhaust manifold are also in, but still loose. I drybrushed the engine with progressively lighter shades of dark to medium grey, to bring out detail and add highlights, but that’s better visible in this picture:

I also repainted some details, as they had gotten washed out by the drybrushing.
 I try to avoid overall coats of varnish, because of all the things that can go wrong with them … The model is matt enough for my taste as it is — it looks slightly glossier in the pictures than in the flesh, probably because of the lights I use.
By now I’ve fitted the exhaust pipe:

Dragon’s way of fitting it is just plain stupid. It’s split into two parts: the upper half of the muffler with one of the pipes attached, and the lower half with the other pipe. Dragon wants you to put the upper half into the chassis and then add the lower half. This means that you either need to paint it after installation or will have to deal with seams on the muffler’s sides after it’s gone into the chassis. I wanted to paint it off the model, so I put it together and then cut the front pipe off, drilling holes so I could insert a pin into the rear end of the pipe. That let me fit the whole muffler and rear exhaust pipe into the chassis, and only then insert the front pipe.
At the front, I put some matt varnish over the license plates, both to get rid of any shine and to glue the numbers down better. I next put a little grime on them by drybrushing a little bit over them, and installed the headlamp glass:

The engine and exhaust manifold are also in, but still loose. I drybrushed the engine with progressively lighter shades of dark to medium grey, to bring out detail and add highlights, but that’s better visible in this picture:

I also repainted some details, as they had gotten washed out by the drybrushing.
Last edited:
- Joined
- Apr 28, 2018
- Messages
- 10,775
- Points
- 113
- First Name
- Jakko
Yes, I can’t figure out the reason either. Once more, just going by the instructions, Trumpeter’s kit is likely better here: it has the front pipe separate, and is in fact where I got the idea that doing it this way would work on the Dragon kit tooNice idea with the exhaust, why they have you to try to fit it the first way is beyond me , typical Dragon mind set .

Thanks. It’s come out better than I expected it to when it was still unpainted, I must say. The saw cuts I made to turn a plastic disc into a cog were barely visible until I put some paint on it, for example.Great looking model and I just love the exposed valve gear.
I'm amazed at how the rockers etc. came out so real. Great finishes overall.
