Looking really good Jakko. Streaks are certainly adding life and realism to the build.
You are using an out of date browser. It may not display this or other websites correctly.
You should upgrade or use an alternative browser.
You should upgrade or use an alternative browser.
Sd.Kfz. 7 half-track, post-war
- Thread starter Jakko
- Start date
- Joined
- Apr 28, 2018
- Messages
- 10,774
- Points
- 113
- First Name
- Jakko
Same. When it was all white plastic it didn’t look that great, and though the misalignments still nag at me a little, the whole thjng has come out far better than I expected it to before I painted them.I'm amazed at how the rockers etc. came out so real. Great finishes overall.
Thanks — now I need to not ruin the whole thing when I dirty up the undercarriageLooking really good Jakko. Streaks are certainly adding life and realism to the build.

- Joined
- Apr 28, 2018
- Messages
- 10,774
- Points
- 113
- First Name
- Jakko
The finish line appears to be in sight now …
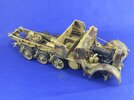
I added some more bits to the engine compartment:
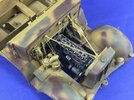
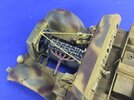
Chiefly a pipe between the compressor on the side of the engine and a filter on the cab wall, as well as the two rods that ran to the carburettor, which is missing here of course, so they hang down instead. Also the grill and the rods linking that to the cab at the top. These still need a bit more painting to tie them into the rest of the vehicle. I also still need to put a bit of matt varnish on the glossy superglue I used to attach these parts.
I also put on most of the wheels:
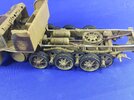
Only the drive sprockets and idlers are left, because the track is impossible to put on unless you do it together with those wheels. Also note the spots in which I scratched off the paint, for the load bed to be glued to later.
Talking of the tracks:
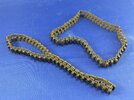
These were first sprayed with a semi-random brown colour, as mentioned before, and then I applied the Mig dark brown wash over them. This didn’t have the intended effect: rather than creating shadows in the deeper parts, it just made the whole track evenly darker. I then drybrushed with an earth colour to add highlights, and painted the track pads with thinned East Indian ink. However, they are too dark, I think. If you look at the photos of the real vehicle, the track is about the same tone as the rest of the suspension, but it’s clearly not all covered in dirt because you can clearly see the tyres and the camouflage on the wheels.
Here’s a quick demonstration:


This is a simple black-and-white version without trying to emulate the properties of the film likely used to take the picture, but I think it shows well enough that the track is a fair degree darker than the wheels. I think I’ll have to highlight it more, that will probably work to get them closer.

I added some more bits to the engine compartment:


Chiefly a pipe between the compressor on the side of the engine and a filter on the cab wall, as well as the two rods that ran to the carburettor, which is missing here of course, so they hang down instead. Also the grill and the rods linking that to the cab at the top. These still need a bit more painting to tie them into the rest of the vehicle. I also still need to put a bit of matt varnish on the glossy superglue I used to attach these parts.
I also put on most of the wheels:

Only the drive sprockets and idlers are left, because the track is impossible to put on unless you do it together with those wheels. Also note the spots in which I scratched off the paint, for the load bed to be glued to later.
Talking of the tracks:

These were first sprayed with a semi-random brown colour, as mentioned before, and then I applied the Mig dark brown wash over them. This didn’t have the intended effect: rather than creating shadows in the deeper parts, it just made the whole track evenly darker. I then drybrushed with an earth colour to add highlights, and painted the track pads with thinned East Indian ink. However, they are too dark, I think. If you look at the photos of the real vehicle, the track is about the same tone as the rest of the suspension, but it’s clearly not all covered in dirt because you can clearly see the tyres and the camouflage on the wheels.
Here’s a quick demonstration:


This is a simple black-and-white version without trying to emulate the properties of the film likely used to take the picture, but I think it shows well enough that the track is a fair degree darker than the wheels. I think I’ll have to highlight it more, that will probably work to get them closer.
Jim R
SMF Supporter
Hi Jakko
Great work all round but that engine is superb. I think you're probably right, the tracks are uniformly a bit dark.
Jim
Great work all round but that engine is superb. I think you're probably right, the tracks are uniformly a bit dark.
Jim
- Joined
- Apr 28, 2018
- Messages
- 10,774
- Points
- 113
- First Name
- Jakko
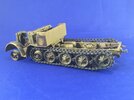
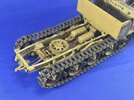
After a quick wash over the rods etc., I drybrushed the tracks and rubber parts of the wheels with a sand colour to highlight them, and then installed the tracks:
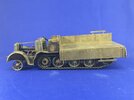
Then all that remained was adding the load bed and steering wheel, and it’s almost done:
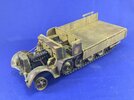
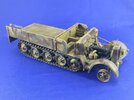
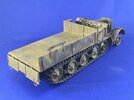
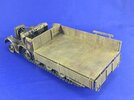
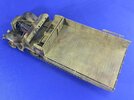
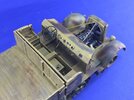
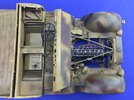
I’m waiting for the order that also includes the Zvezda M4A2 kit, as that includes a figure set that I want to use one of to add a figure to this vehicle, and I also still need to make the junk in the back before it will really be finished.


Then all that remained was adding the load bed and steering wheel, and it’s almost done:


I’m waiting for the order that also includes the Zvezda M4A2 kit, as that includes a figure set that I want to use one of to add a figure to this vehicle, and I also still need to make the junk in the back before it will really be finished.
Last edited:
therapy
SMF Supporter
That looks superb Jakko...
Nick
Nick
Jim R
SMF Supporter
Hi Jakko
The tracks and wheels have definitely benefitted from the dry brushing.
A stunning piece of modelling.
Jim
The tracks and wheels have definitely benefitted from the dry brushing.
A stunning piece of modelling.
Jim
- Joined
- Apr 28, 2018
- Messages
- 10,774
- Points
- 113
- First Name
- Jakko
Thanks, all  Here’s the figure to give the model a sense of scale:
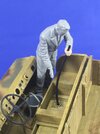
One from the MiniArt Auto Travellers set, the man intended to be stowing a suitcase in a car. I’ve turned his head and left arm a bit as well as replaced his left hand, so he can hold a length of rubber hose with which to try and get the last bit of fuel from the tank I think I’ll still turn his right hand a bit so he’ll be able to hold the hose better, and add copper wire inside the hose to have it hang a bit more convincingly. The bucket he’s going to collect the fuel in, is from the Tamiya Churchill Mk. VII, I think.
 Here’s the figure to give the model a sense of scale:
One from the MiniArt Auto Travellers set, the man intended to be stowing a suitcase in a car. I’ve turned his head and left arm a bit as well as replaced his left hand, so he can hold a length of rubber hose with which to try and get the last bit of fuel from the tank
 I think I’ll still turn his right hand a bit so he’ll be able to hold the hose better, and add copper wire inside the hose to have it hang a bit more convincingly. The bucket he’s going to collect the fuel in, is from the Tamiya Churchill Mk. VII, I think.
Last edited:
It's not stealing Andy....the new term is "entitlement".Looks great Jakko, typical, you look away for five minutes and somebody is stealing something!
Andy.
scottie3158
SMF Supporter
Jakko,
That looks great mate and has turned out really well. The only thing I would say and I am probably wrong, would the front wheel rims be yellow or would they be red primer. Would the wheels have been sprayed in top coat before the tyres were fitted?
That looks great mate and has turned out really well. The only thing I would say and I am probably wrong, would the front wheel rims be yellow or would they be red primer. Would the wheels have been sprayed in top coat before the tyres were fitted?
- Joined
- Apr 28, 2018
- Messages
- 10,774
- Points
- 113
- First Name
- Jakko
Somehow, I think he won’t find much, given that somebody else has already taken things like wheels and spark plugs … I suppose he’s desperate enough to try anyway, thoughtypical, you look away for five minutes and somebody is stealing something!

I thought about that too, but:—The only thing I would say and I am probably wrong, would the front wheel rims be yellow or would they be red primer. Would the wheels have been sprayed in top coat before the tyres were fitted?
… I think the rims on the ground are those of the Sd.Kfz. 7, and they’re certainly not in red primer. Not sure they are in dark yellow, though bare metal seems unlikely too.
- Joined
- Apr 28, 2018
- Messages
- 10,774
- Points
- 113
- First Name
- Jakko
After studying the photo some more, I came to the conclusion that the stuff in the back was a wooden crate/box and a length of barbed wire. There are two rolls of what I think is almost certainly barbed wire on the ground beside the vehicle, so a piece left in the load bed would not be strange.
The box was easily made from plastic card:
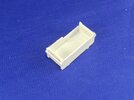
Though I took off the handles again because you can’t see anything like them on the photo, but the verticals are visible. I added some damage to show a reason why nobody has taken it
The barbed wire was fairly laboriously made. I first twisted two lengths of about 0.25 mm copper wire together, then wound 0.1 mm wire around it to form the barbs (this because German barbed wire often had thicker main wires than that used for the barbs, to make it harder to cut). Rather than wrapping each barb individually, it’s simpler to use a single piece of wire, and use something like a cocktail stick as a spacer between them, forming loops around that:
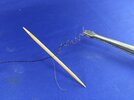
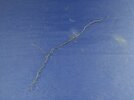
This is not a job you’ll be doing for fun, I have to say … but it produces far more realistic-looking barbed wire than using etched stuff does. Once I had wrapped the whole length, I had this:
I then painted the whole wire in a gun metal colour, and cut off the loops on both sides, leaving short barbs sticking out.
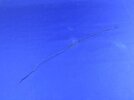
Though it looks a bit yellow here for some reason, it didn’t in the flesh when I took that photo. Up close:
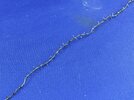
The reason for painting before cutting the barbs to length, by the way, was to hopefully use the paint to glue the barbs to the wires This seems to have worked, so after that, I added a wash of thinned brown ink and then drybrushed with a light metal colour to bring out the detail.
And then it was just a matter of putting everything together
The box was easily made from plastic card:

Though I took off the handles again because you can’t see anything like them on the photo, but the verticals are visible. I added some damage to show a reason why nobody has taken it

The barbed wire was fairly laboriously made. I first twisted two lengths of about 0.25 mm copper wire together, then wound 0.1 mm wire around it to form the barbs (this because German barbed wire often had thicker main wires than that used for the barbs, to make it harder to cut). Rather than wrapping each barb individually, it’s simpler to use a single piece of wire, and use something like a cocktail stick as a spacer between them, forming loops around that:

This is not a job you’ll be doing for fun, I have to say … but it produces far more realistic-looking barbed wire than using etched stuff does. Once I had wrapped the whole length, I had this:

I then painted the whole wire in a gun metal colour, and cut off the loops on both sides, leaving short barbs sticking out.

Though it looks a bit yellow here for some reason, it didn’t in the flesh when I took that photo. Up close:

The reason for painting before cutting the barbs to length, by the way, was to hopefully use the paint to glue the barbs to the wires
 This seems to have worked, so after that, I added a wash of thinned brown ink and then drybrushed with a light metal colour to bring out the detail.
And then it was just a matter of putting everything together

Jim R
SMF Supporter
A really enjoyable build to follow and judging by 200+ posts others thought so too.
Jim
Jim
