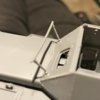
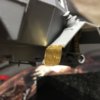
SimonT - 1/35 Miniart Dingo - Rons Recon GB

JR

Member of the Rabble and Pyromania Consultant
SMF Supporter
Joined
May 26, 2015
Messages
17,275
Points
113
Location
lincs
First Name
John
Morning Simon !
I see you woke up rather late according to the clock this time , either that or you were just starting !
Agree those springs look far better than the kit offerings.
 

SimonT

Rest in Peace
Rest In Peace
Joined
Apr 27, 2018
Messages
2,448
Points
113
Location
Yorkshire
First Name
Simon
I was just going to bed John :sleeping::sleeping: - don't forget site time is an hour out so it was only 2am or thereabouts
 

Steve Jones

Steve Jones Scale Modelling Site
Joined
Apr 27, 2018
Messages
6,698
Points
113
Location
Plymouth
First Name
Steve
Nice attention to detail with the internal springs Mr T. Luvin the build
 

SimonT

Rest in Peace
Rest In Peace
Joined
Apr 27, 2018
Messages
2,448
Points
113
Location
Yorkshire
First Name
Simon
Thanks Scottie - always worth doing springs as they just can’t mould them
 

Graeme C.

SMF Supporter
Joined
Apr 29, 2018
Messages
1,485
Points
113
First Name
Graeme
Nice work Simon, we could do with a step by step on making springs, yours are a big improvement on the kit parts.
 

SimonT

Rest in Peace
Rest In Peace
Joined
Apr 27, 2018
Messages
2,448
Points
113
Location
Yorkshire
First Name
Simon
Thanks Graeme

Not much to tell really - select some copper or brass wire of the right diameter to match the kit spring coils

find a drill bit or other metal rod/tube that is the correct diameter for the spring - when the wire is wrapped around it the resulting outer diameter should match that of the kit part

tightly wrap the wire around the drill bit to create a coil

slide coil off the drill bit

count the number of complete turns on the kit spring, match this number on the wire coil and cut the wire coil

space out the wire coils until the length matches the kit part - pushing a knife blade between coils usually works

you now have a replacement spring

that ok?
 

Graeme C.

SMF Supporter
Joined
Apr 29, 2018
Messages
1,485
Points
113
First Name
Graeme
Sounds good to me Simon, will have to give it a try. :thumb2:
 

SimonT

Rest in Peace
Rest In Peace
Joined
Apr 27, 2018
Messages
2,448
Points
113
Location
Yorkshire
First Name
Simon
Graeme, here are a couple of in progress pics I took when making the springs for the other side

dingo-049_2019-11-25.jpg
dingo-045_2019-11-25.jpg

As well as winding and adding the springs to the other side I have been adding all kinds of small and tricky little bits and pieces

dingo-042_2019-11-25.jpg
these tiny etch brackets each got a microscopic plastic bump stop (I think) added to the top, after numerous attempts punctuated by periods of scouring the floor for them

dingo-041_2019-11-25.jpg
here they are installed on the sides of the suspension turrets - no location points provided and just a vague sketch in the instructions so had to guesstimate a position and then make them all match
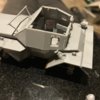
dingo-043_2019-11-25.jpg
jack added to front right wing

angled lifting eyes added to each wing

tiny hinges added to the hull side windows

rail added to rear deck for the open roof to sit on
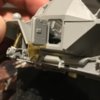
dingo-044_2019-11-25.jpg
exhaust pipe added

mudflats added to front wings

hinges added for side door and then side door hung in place
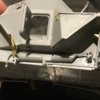
dingo-047_2019-11-25.jpg
etch locks added to side bins

end of exhaust drilled out

dingo-048_2019-11-25.jpg
headlights in place - unfortunately the right side had drooped unseen
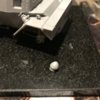
dingo-046_2019-11-25.jpg
tried to correct it but of course it sheared off so this will now need drilling and pinning
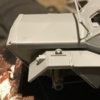
dingo-040_2019-11-25.jpg
rear lights add to rear wings

dingo-051_2019-11-25.jpg
side window hinges on other side

dingo-052_2019-11-25.jpg
another shot of the roof rest

dingo-053_2019-11-25.jpg
dingo-050_2019-11-25.jpg
there are still lots of small fiddly bits to fit - the GB finishes next Sunday - this will not be finished on time
 

Jim R

SMF Supporter
Joined
Apr 27, 2018
Messages
13,718
Points
113
Location
Shropshire
First Name
Jim
Hi Simon
You really do excel at this kind of work. The research you do and then having the skill to add the detail - impressive :thumb2:
Jim
 

Steve Jones

Steve Jones Scale Modelling Site
Joined
Apr 27, 2018
Messages
6,698
Points
113
Location
Plymouth
First Name
Steve
Stunning work Mr T. I would have been surprised if you had made the deadline with all those builds on the go. All great things are worth waiting for.
 

rtfoe

SMF Supporter
Joined
Apr 29, 2018
Messages
7,507
Points
113
Location
Malaysia
First Name
Richard
Beautiful Simon...if yours is not going to finish, mine is still at the interior bottom half. Doesn't help if the cat has run off with the other GB's propeller.:disappointed2:

Cheers,
Richard
 

SimonT

Rest in Peace
Rest In Peace
Joined
Apr 27, 2018
Messages
2,448
Points
113
Location
Yorkshire
First Name
Simon
Thanks Scottie - most of the detail is down to the kit

Jim - only really added the springs on this one as all other detail is in the kit. It must be the fiddliest kit I have ever assembled due to the small nature of the parts

Steve - have been concentrating on this one and the Sturmtiger. Doesn't really matter if it is late though on here

Hi Richard - I may finish the assembly by the weekend but the painting will take it past the deadline. The cat's run off with my propeller is nearly as good as the dog ate my homework :smiling5:

Had an eye scan appointment this afternoon so took day off work which meant I could get a bit more completed

dingo-055_2019-11-26.jpg
dashboard installed

dingo-054_2019-11-26.jpg
British flimsy type petrol cans installed in the racks - added a few dents here and there

dingo-057_2019-11-26.jpg
roof added in the open position

dingo-058_2019-11-26.jpg
left side visor added with etched stay (you get open and closed position stays)

dingo-059_2019-11-26.jpg
jack clamp added

right headlight drilled and pinned back in place

dingo-056_2019-11-26.jpg
a couple of Petes friends from the pewter mine then took it for a test drive.......
 
D

Deleted member 7237

Guest
Thanks Scottie - most of the detail is down to the kit

Jim - only really added the springs on this one as all other detail is in the kit. It must be the fiddliest kit I have ever assembled due to the small nature of the parts

Steve - have been concentrating on this one and the Sturmtiger. Doesn't really matter if it is late though on here

Hi Richard - I may finish the assembly by the weekend but the painting will take it past the deadline. The cat's run off with my propeller is nearly as good as the dog ate my homework :smiling5:

Had an eye scan appointment this afternoon so took day off work which meant I could get a bit more completed

View attachment 364549
dashboard installed

View attachment 364548
British flimsy type petrol cans installed in the racks - added a few dents here and there

View attachment 364551
roof added in the open position

View attachment 364552
left side visor added with etched stay (you get open and closed position stays)

View attachment 364553
jack clamp added

right headlight drilled and pinned back in place

View attachment 364550
a couple of Petes friends from the pewter mine then took it for a test drive.......
Hi Simon cracking work on the Dingo, love all the up grade work you have done, that is not a road test that's a drive to freedoom

drive.....drivee.................driveeeeeeee..............................ddrriivvvveeeeeeeee........my little friends...........................farsstttteeeerrrrr...........

Pete.
 
D

Deleted member 7237

Guest
They assured me it was just once around the block - does seem to be taking them a while..........
And you would believe what a 100% what a mechanic told you, I was one for 28 years in different positions and franchises so I think I can speak on their behalf it's gone..
Pete
 
Joined
Apr 27, 2018
Messages
736
Points
93
Location
London/Surrey
First Name
Andrew
I hope Pete's friends bring it back soon, so we can carry on enjoying this tale too!
Lovely work as usual Mr T!
Andy
 
Top