C
Charles the Modeller
Guest
I’m more of a wargamer than a precision modeller but I thought this post from my blog might be of interest to those building dioramas.
According to Wikipedia;
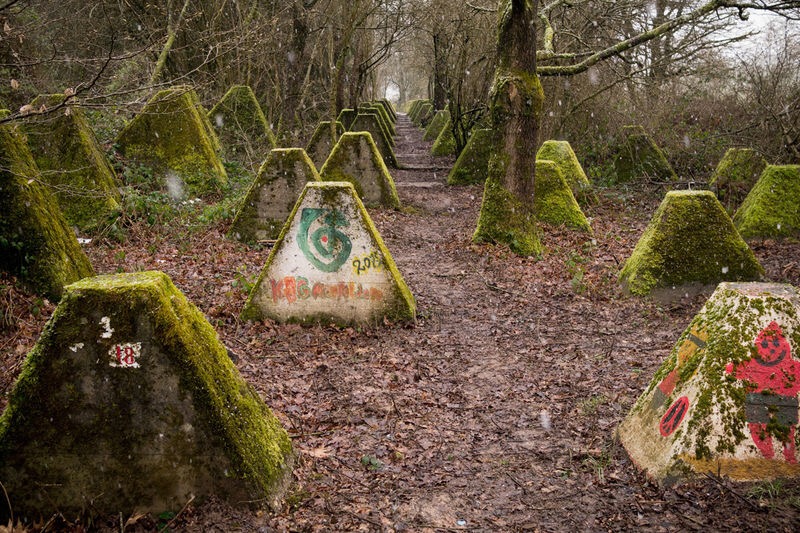
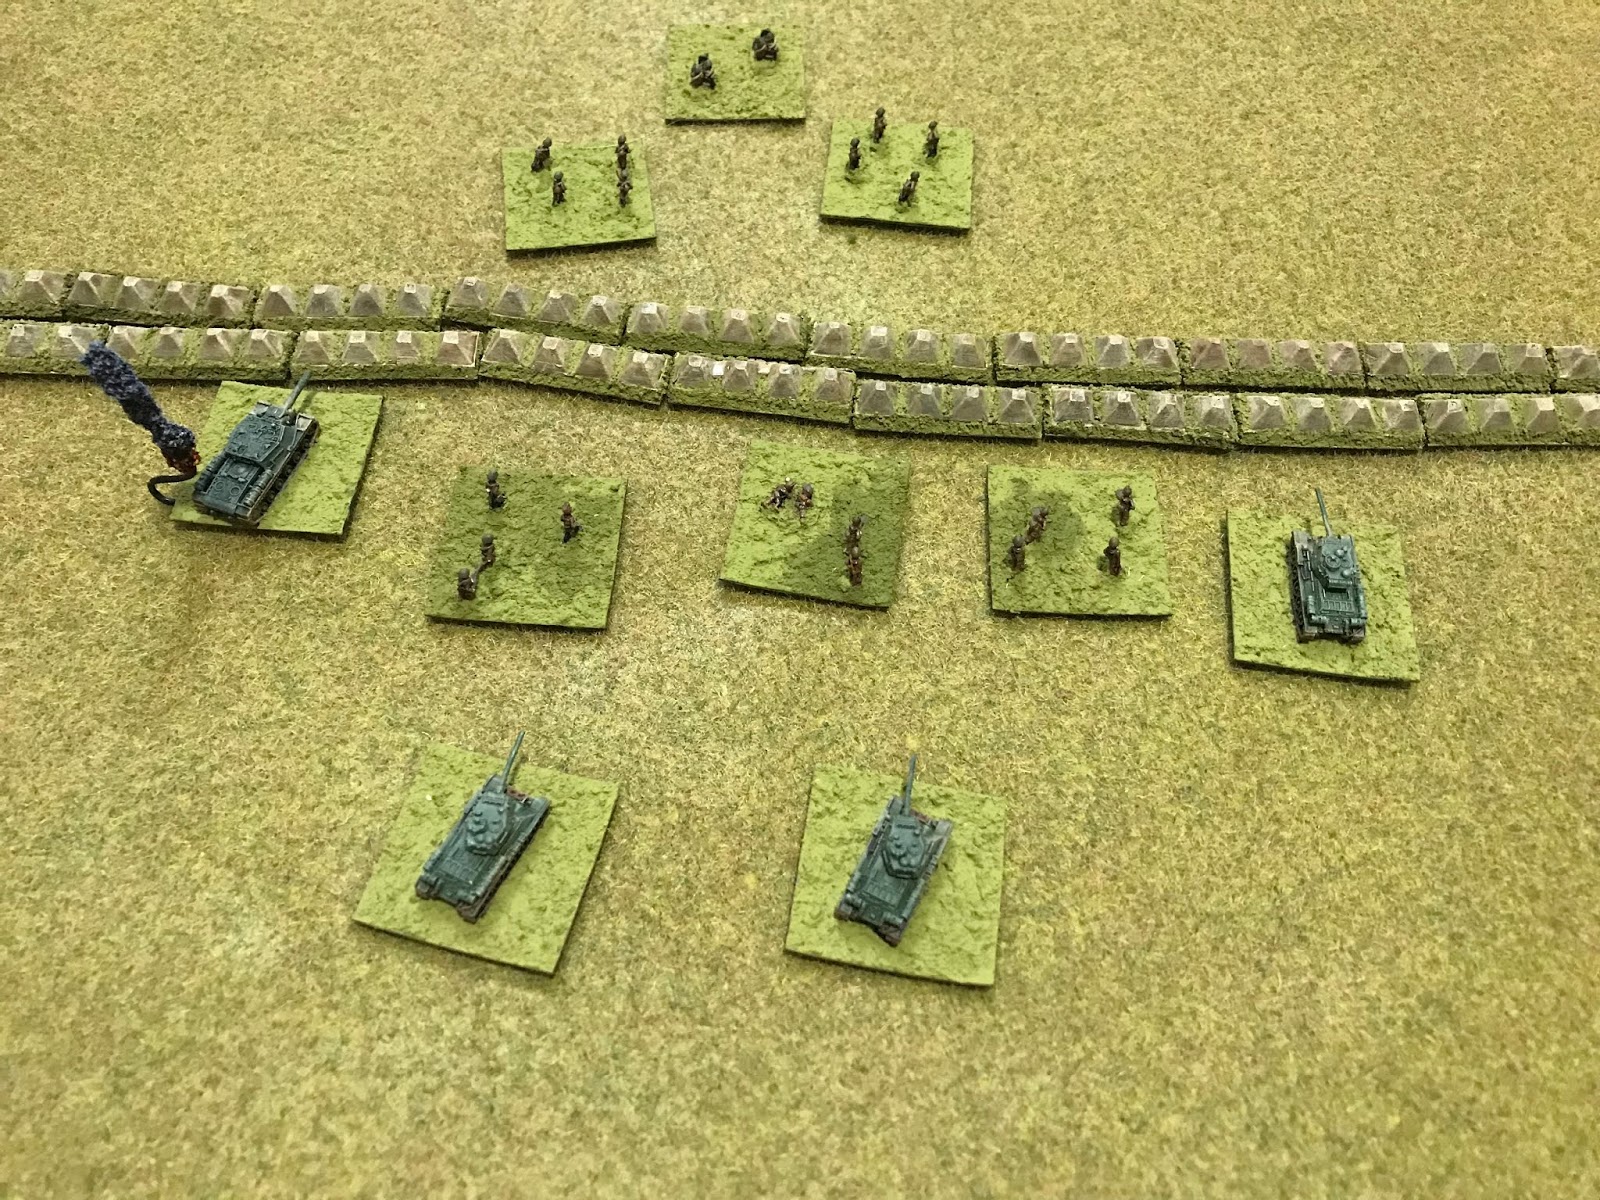
Dragon's teeth (German: Drachenzähne) are square-pyramidal fortifications of reinforced concrete first used during the Second World War to impede the movement of tanks and mechanised infantry. The idea was to slow down and channel tanks into killing zones where they could easily be disposed of by anti-tank weapons.
They were employed extensively, particularly on the Siegfried Line.
I’ve wanted to use these on the tabletop for ages. I searched the web and could only find one manufacturer selling them, perfect six miniatures. I wanted to put a lot of them on the table and I just couldn’t justify the expense. So I decided to scratch build them instead.
I decided to go for the square pyramid shapes. The trick was to find something that I could cut up, that had lots of pyramids already. Trying to cut the shapes by hand just wasn't going to be practical. I googled around for anything that I could use to get that shape. It took a while but I finally found something on eBay that looked like it would do the job. Six weeks later and direct from China it arrived. It cost me £6.24 including postage, or about $10.


It’s a reflexology/ massage/ acupuncture therapeutic foot mat. Dig the propaganda: designed by an internationally famous doctor. No hospital. No side effects.
Well it’s made from a soft plastic, it has lots of pyramids and it was cheap.
Step 1 - Cutting it up
I tried using my Dremel to cut it using a rotary blade but soon gave up. The plastic melted and roughed up. However reverting to a sharp, strong craft knife turned out to be the solution. The knife can be fairly easily pushed through with a bit of pressure.
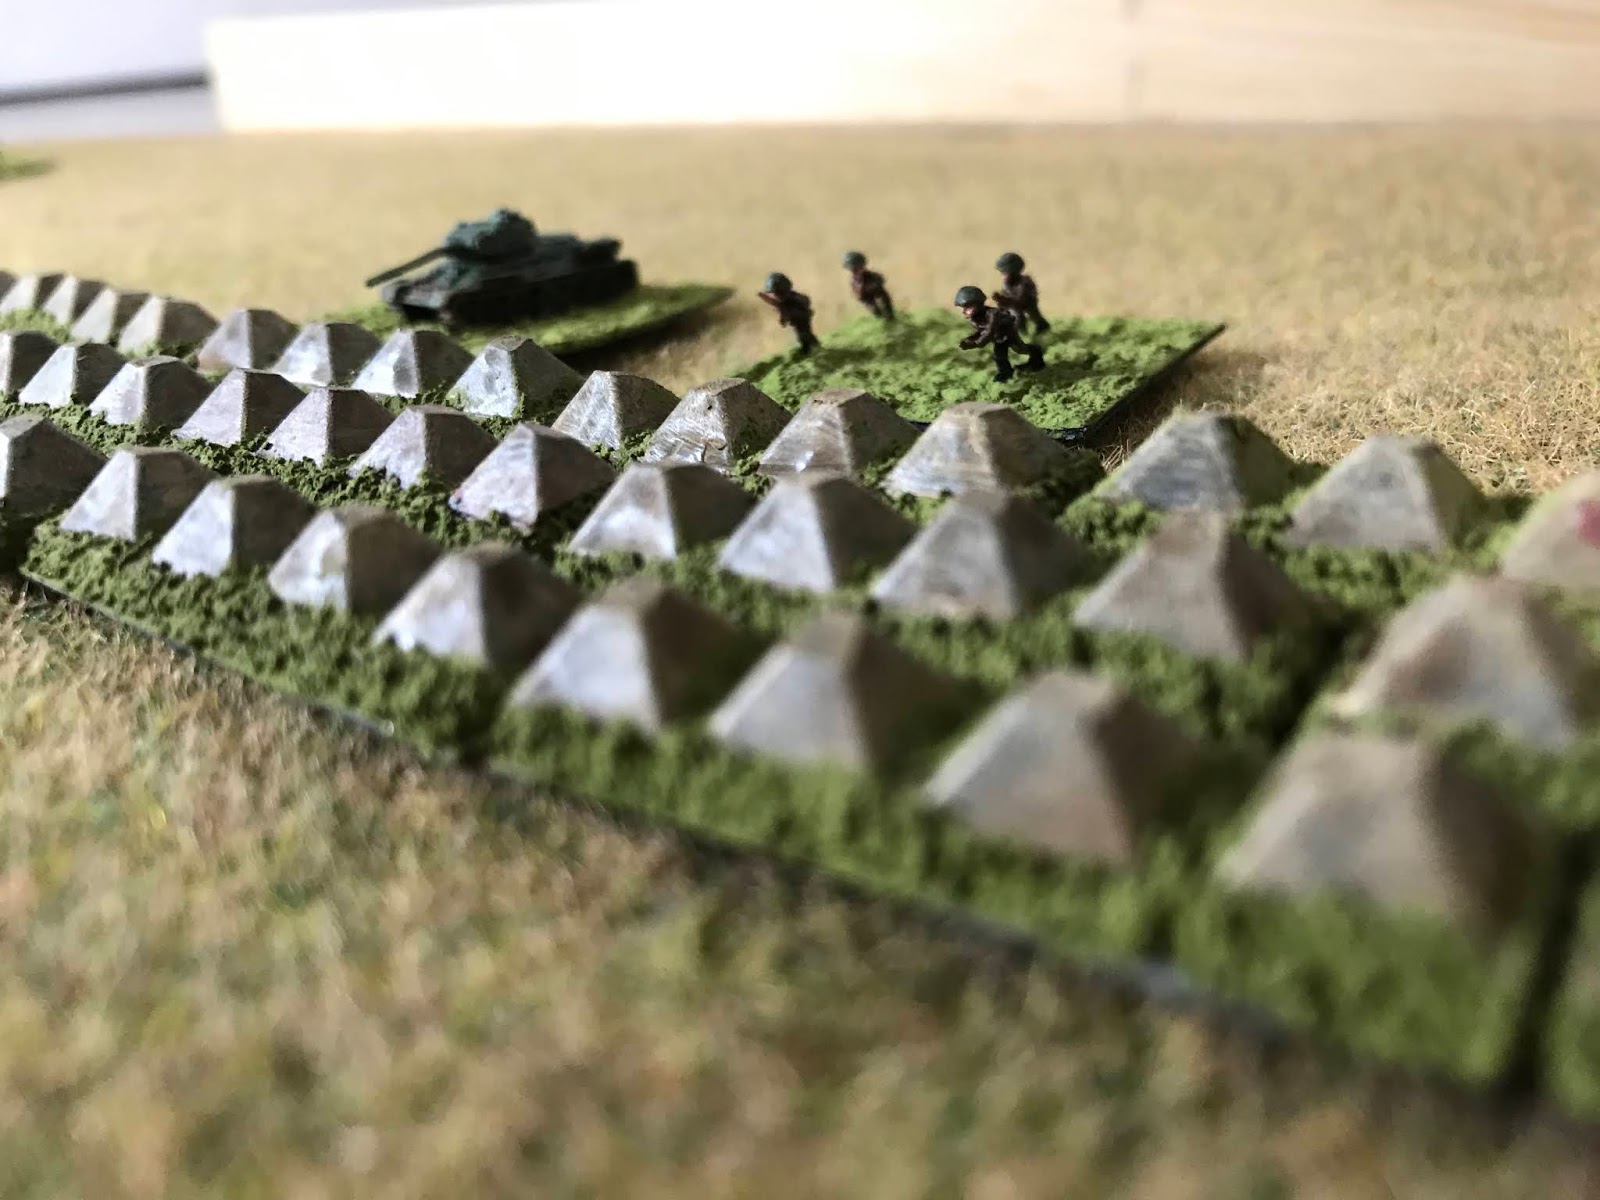
The mat is essentially divided into 9. The 4 side sections were easiest. I cut large squares first, stripping the edging and supporting strips from underneath before cutting the board into strips 4 pyramids long.
There are hundreds of them. I stopped after I’d cut 73. That gives me about 9 feet of dragons teeth 1 wide or 4.5 feet doubled up.
I still have more than half the board left but the remaining bits require more cutting and the middle is just not usable.
I then used the knife to cut the top off the pyramids to square them off.

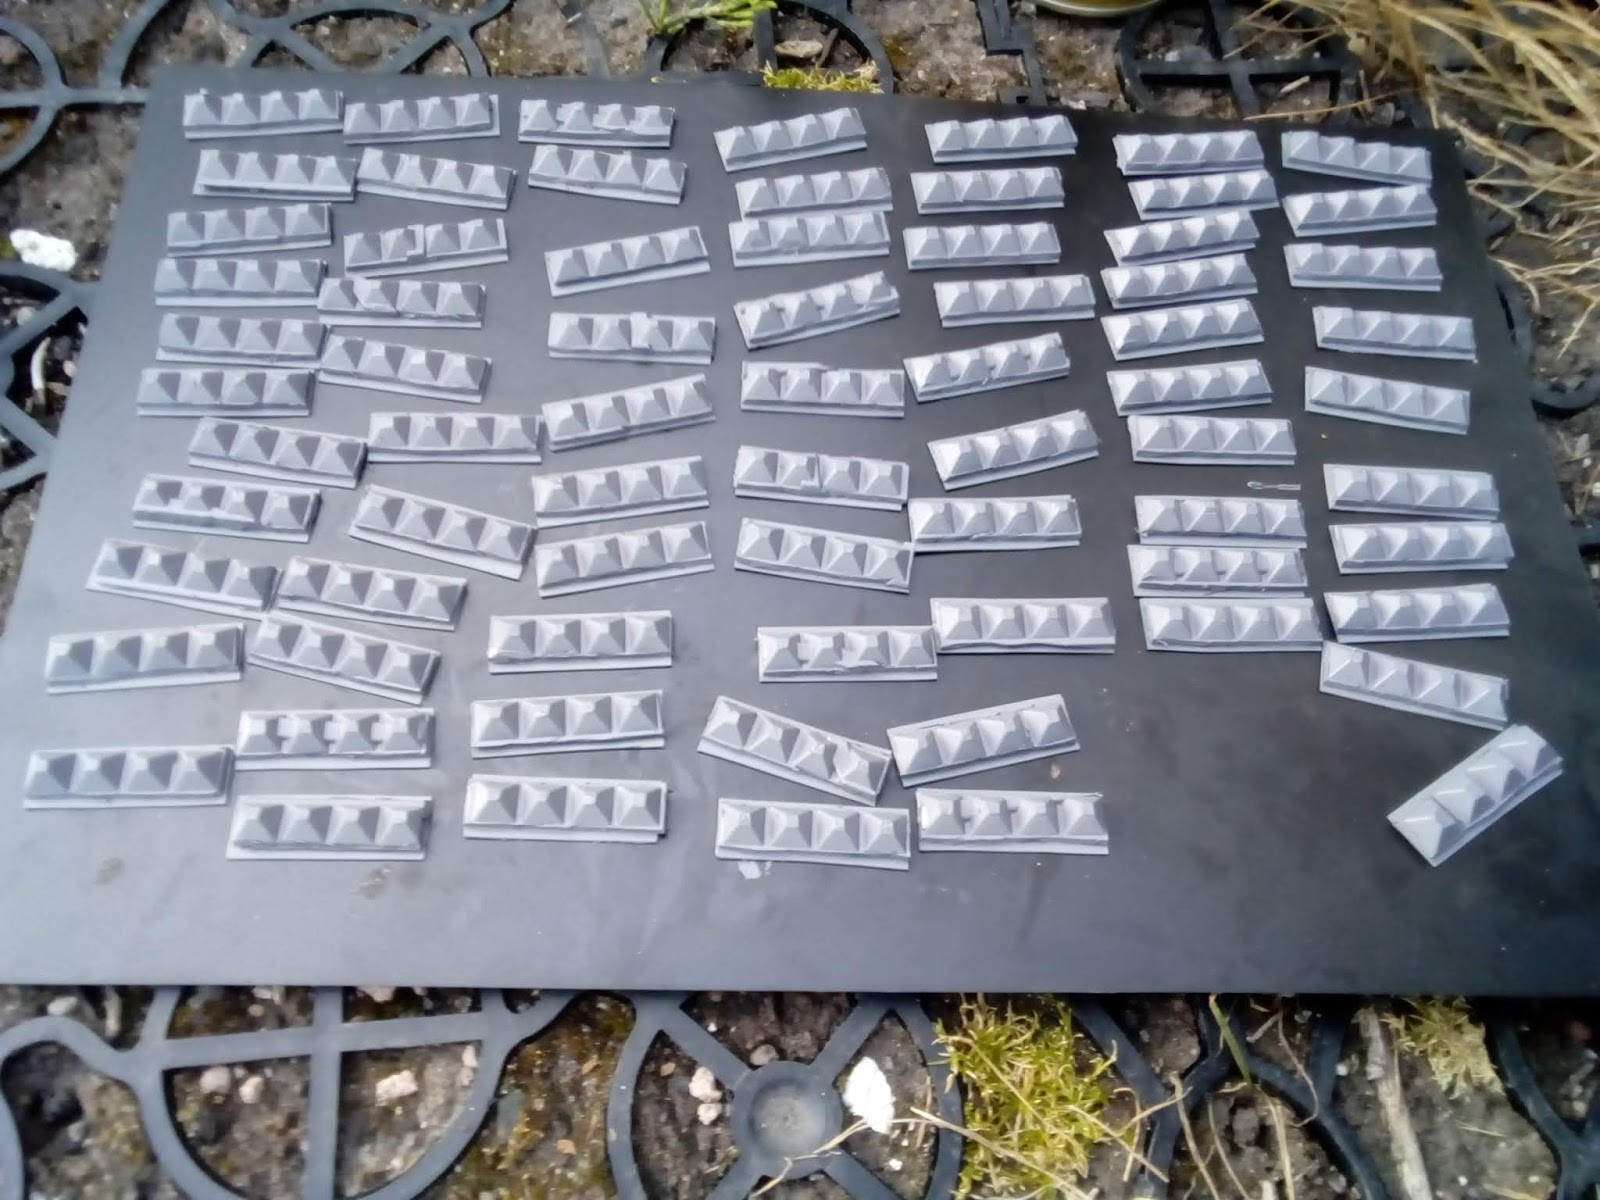
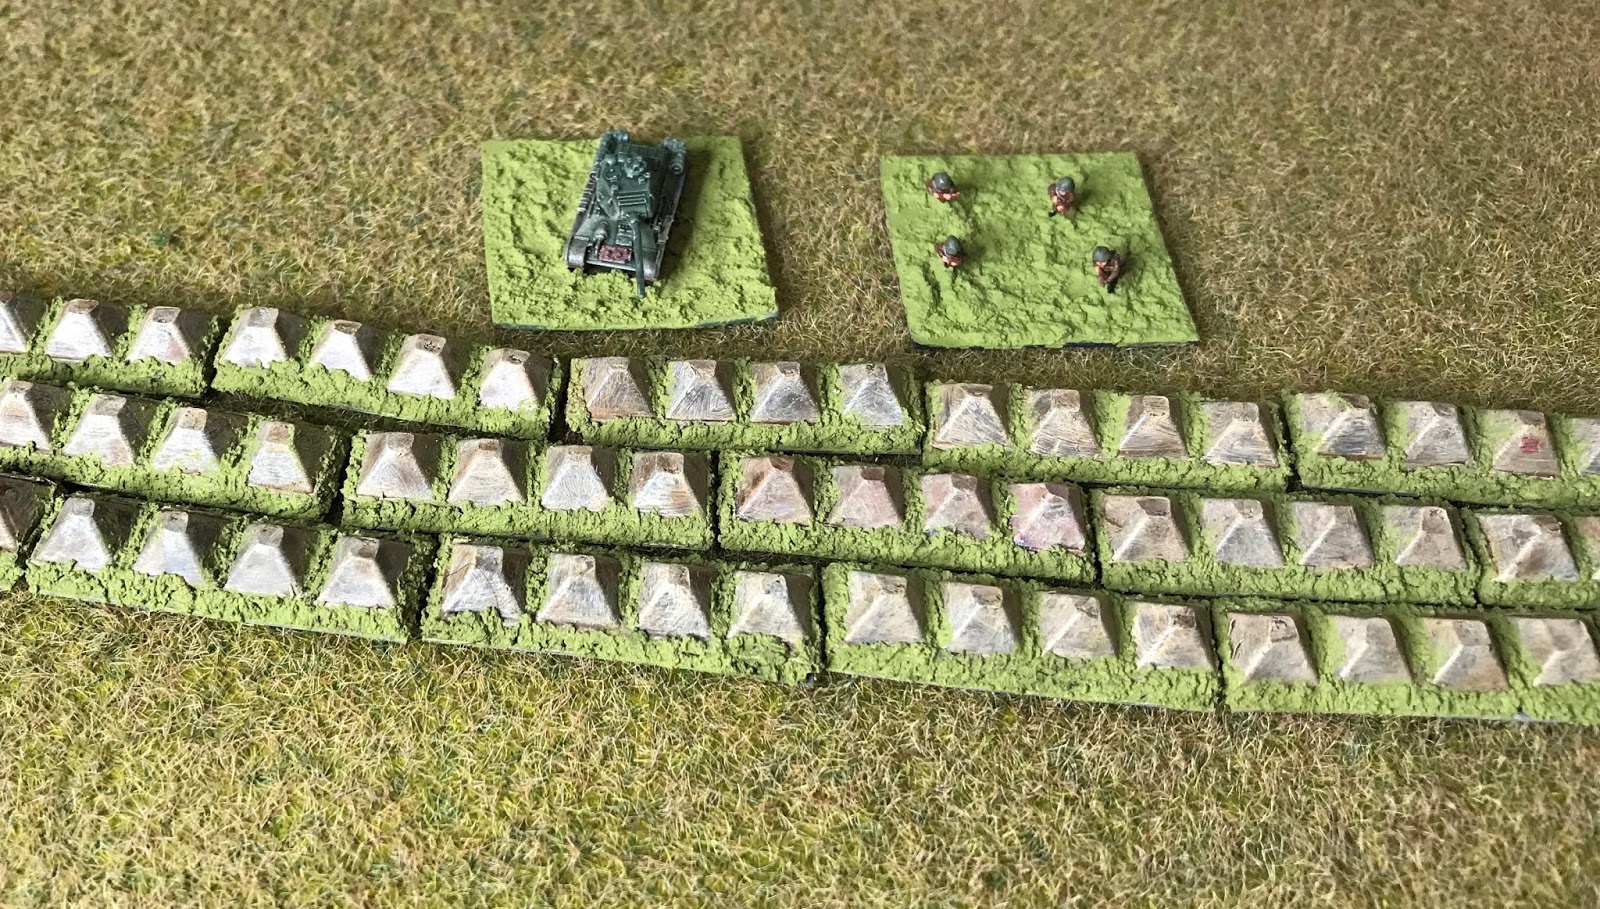
Step 2 - Basing and Undercoat
I superglued the strips onto bases each about 4cm long and about 1cm wide and then sprayed them with a base grey undercoat.

Step 3 - Painting
I tend to use Army Painter paints and inks, but any decent acrylic paint would work as well. Painting consisted of a first coat of Dark Tone ink wash, then a light dry brush of Desert Yellow followed by another lighter dry brush of Skeleton Bone. Finally a Soft Tone ink wash to finish it off.
Step 4 - Basing
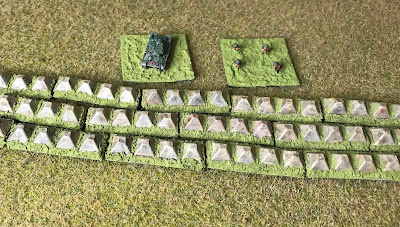
I used Basetex for a quick finish which I could sculpt around the dragons teeth. And that’s it. Job done.


Different variants
There were cuboid obstacle variants as well. I haven't tried modelling those but if I get around to it this bar drip mat looks like just the ticket.

Let me know what you think. Have you tried anything similar?
Happy modelling.
Charles the Modeller
According to Wikipedia;
Dragon's teeth (German: Drachenzähne) are square-pyramidal fortifications of reinforced concrete first used during the Second World War to impede the movement of tanks and mechanised infantry. The idea was to slow down and channel tanks into killing zones where they could easily be disposed of by anti-tank weapons.
They were employed extensively, particularly on the Siegfried Line.
I’ve wanted to use these on the tabletop for ages. I searched the web and could only find one manufacturer selling them, perfect six miniatures. I wanted to put a lot of them on the table and I just couldn’t justify the expense. So I decided to scratch build them instead.
I decided to go for the square pyramid shapes. The trick was to find something that I could cut up, that had lots of pyramids already. Trying to cut the shapes by hand just wasn't going to be practical. I googled around for anything that I could use to get that shape. It took a while but I finally found something on eBay that looked like it would do the job. Six weeks later and direct from China it arrived. It cost me £6.24 including postage, or about $10.
It’s a reflexology/ massage/ acupuncture therapeutic foot mat. Dig the propaganda: designed by an internationally famous doctor. No hospital. No side effects.
Well it’s made from a soft plastic, it has lots of pyramids and it was cheap.
Step 1 - Cutting it up
I tried using my Dremel to cut it using a rotary blade but soon gave up. The plastic melted and roughed up. However reverting to a sharp, strong craft knife turned out to be the solution. The knife can be fairly easily pushed through with a bit of pressure.
The mat is essentially divided into 9. The 4 side sections were easiest. I cut large squares first, stripping the edging and supporting strips from underneath before cutting the board into strips 4 pyramids long.
There are hundreds of them. I stopped after I’d cut 73. That gives me about 9 feet of dragons teeth 1 wide or 4.5 feet doubled up.
I still have more than half the board left but the remaining bits require more cutting and the middle is just not usable.
I then used the knife to cut the top off the pyramids to square them off.
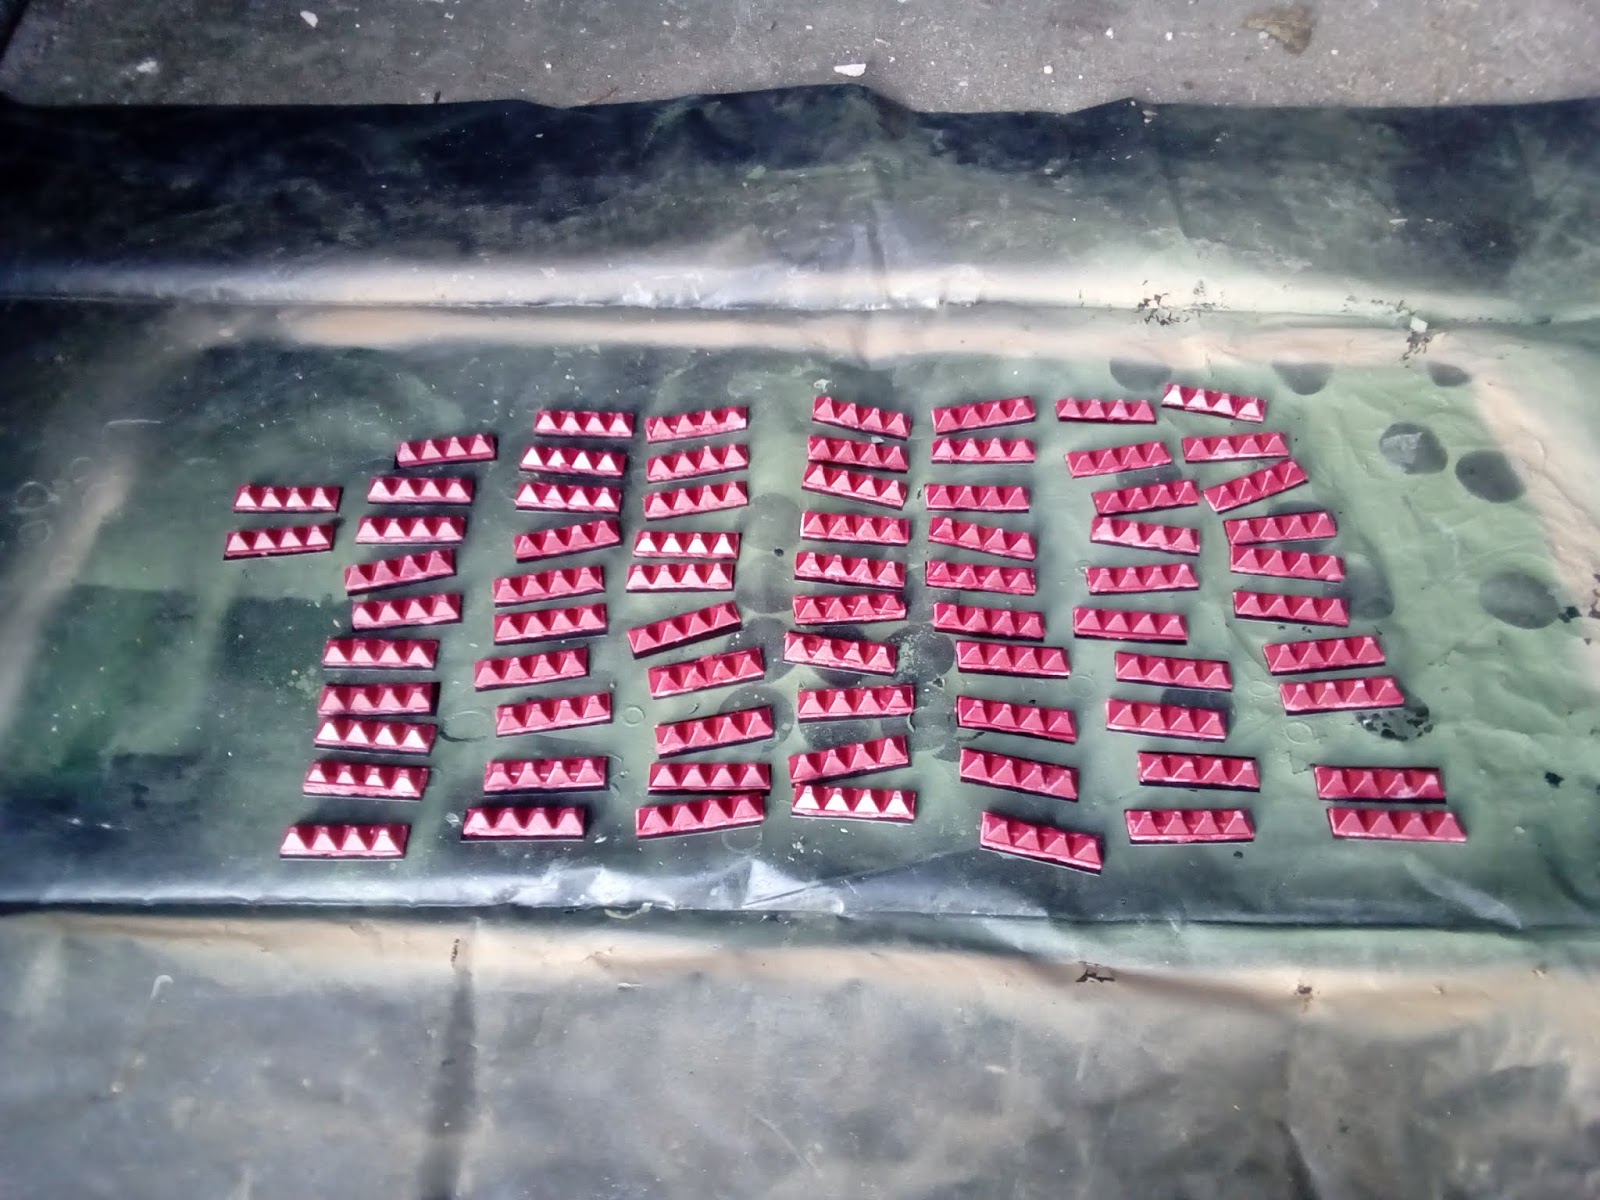
Step 2 - Basing and Undercoat
I superglued the strips onto bases each about 4cm long and about 1cm wide and then sprayed them with a base grey undercoat.
Step 3 - Painting
I tend to use Army Painter paints and inks, but any decent acrylic paint would work as well. Painting consisted of a first coat of Dark Tone ink wash, then a light dry brush of Desert Yellow followed by another lighter dry brush of Skeleton Bone. Finally a Soft Tone ink wash to finish it off.
Step 4 - Basing
I used Basetex for a quick finish which I could sculpt around the dragons teeth. And that’s it. Job done.
Different variants
There were cuboid obstacle variants as well. I haven't tried modelling those but if I get around to it this bar drip mat looks like just the ticket.
Let me know what you think. Have you tried anything similar?
Happy modelling.
Charles the Modeller