Sukhoi Su-27 Flanker B Trumpeter Scale 1:32

Jakko

Way past the mad part
SMF Supporter
Joined
Apr 28, 2018
Messages
10,737
Points
113
First Name
Jakko
Even with 1:32 scale there are parts of the missiles I do not know how I am going to handle, so small.
Generally, it doesn’t really matter which scale you pick, the smallest parts in the kit will be roughly the same size. This is simply because there is a minimum practical size they can be moulded at, and so manufacturers will make some parts that small. The main difference in scales here is that a larger-scale kit will have more small parts than a small-scale kit. On a Su 27 in 1:72, probably the smallest parts will be things like the control stick, some antennas, that sort of stuff, but there will be maybe half a dozen of them instead of several tens like you probably have in this 1:32 scale version.

I believe that a lot comes to just thinking before gluing as I try to do.
Very much so. If you immediately glue things down, you’ll end up making mistakes you can’t correct. But by first thinking about it and dry-fitting parts (possibly with the help of some tape or something), you can work out which parts need to be fixed before which other ones, or which ones you may not be able to get paint onto later on, so you will need to paint them first.

I am thinking what to glue on first, wings or nose cone???? :cold-sweat: :tongue-out3:
I would probably go with the nose myself. The nose and wings don’t interfere with each other, but a model this big will be harder to handle and maneuver with the wings on, so it’s probably better to put the nose on first.
 
Joined
May 5, 2022
Messages
201
Points
63
Location
Lindenwold, New Jersey, USA
First Name
Andrzej
Thank you, Jakko!

I did not know about the scale thing; I understand what you explained. Makes sense. But these missiles little parts are so tiny, I will handle them but still....

Gluing parts, actually if one follows manual, these major mistakes of gluing something in wrong order will be avoided.
But now with painting, now after I watched few videos and read, I see the major trend in building aircraft models.
Anyway, it is a learning process all the time, at least for me.

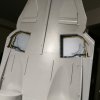
Glued the nose, not touching till tomorrow.
 
Joined
May 5, 2022
Messages
201
Points
63
Location
Lindenwold, New Jersey, USA
First Name
Andrzej
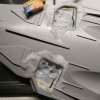
Today, I made an experiment.
I did not like old wash as it was erased from the flat surface too much and I want some areas to be more "dirty"
I learned that it was because I used very glossy surface for Flory Wash.
What I love about Flory Wash is that you can almost entirely remove it except where there was very rough surface and then the wash will stay there.

I cleaned main wheel wells with warm water with soap gently and put a coat of the satin Vallejo Varnish.
I will try to wash again in 2 -3 days and we will see if it comes out better. ;)

I also glued in the nose cone, not getting near it till tomorrow night. :tears-of-joy:

01.jpg02.jpg03.jpg04.jpg
 

Jakko

Way past the mad part
SMF Supporter
Joined
Apr 28, 2018
Messages
10,737
Points
113
First Name
Jakko
these missiles little parts are so tiny, I will handle them but still....
Start by building one completely, so you can work out the best way to hold parts, put them in place, etc. You can then do the others as on an assembly line :smiling3:

if one follows manual, these major mistakes of gluing something in wrong order will be avoided.
Hopefully :smiling3: Sometimes, though. instructions seem to have been designed by someone who never built a kit at all. Many AFV kits would have you fit all the details to the upper and lower hulls before joining those two — meaning you have to glue the two largest parts of the kit together after all the small, delicate and vulnerable bits have been added to them. Much more sensible is to start with the parts that you can’t reach anymore when the two hull pieces are together, then glue those hull halves together, and add all the other stuff last. Aircraft kits don’t suffer from this as much, though, I think: they usually have you build the cockpit etc., glue the fuselage together and then add the exterior details.

Anyway, it is a learning process all the time
I’ve been building models for about 40 years and I usually learn something new with each kit :smiling3:
 
Last edited:
Joined
May 5, 2022
Messages
201
Points
63
Location
Lindenwold, New Jersey, USA
First Name
Andrzej
Start by building one completely, so you can work out the best way to hold parts, put them in place, etc. You can then do the others as on an assembly line :smiling3:


Hopefully :smiling3: Sometimes, though. instructions seem to have been designed by someone who never built a kit at all. Many AFV kits would have you fit all the details to the upper and lower hulls before joining those two — meaning you have to glue the two largest parts of the kit together after all the small, delicate and vulnerable bits have been added to them. Much more sensible is to start with the parts that you can’t reach anymore when the two hull pieces are together, then glue those hull halves together, and add all the other stuff last. Aircraft kits don’t suffer from this as much, though, I think: they usually have you build the cockpit etc., glue the fuselage together and then add the exterior details.


I’ve been building models for about 40 years and I usually learn something new with each kit :smiling3:

Will do one complete missile and post here. :smiling:

Even being a total newbie, I have to agree 100% about SOME instructions. Yes, by now I have a general idea of the order of gluing things, I wish I knew about painting some of them before gluing. :tears-of-joy:

Wow, 40 years of experience, my hat off to you, Jakko!!! :cool::thumb2::tongue-out3:
 
Joined
May 5, 2022
Messages
201
Points
63
Location
Lindenwold, New Jersey, USA
First Name
Andrzej
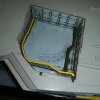
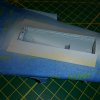
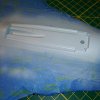
Today I decided to repaint the air brake cavity and nose wheel well with PROPER color.
I does not look too bad, I like it.
After it dries, I am going to put Satin coat, let it dry and wash with Flory Dark Dirt Wash.
Maybe it will look better than first time.

20220610_200345.jpg20220610_200402.jpg
 
Joined
May 5, 2022
Messages
201
Points
63
Location
Lindenwold, New Jersey, USA
First Name
Andrzej
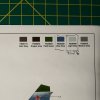
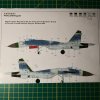
Hello again, I was trying really hard, but I CAN NOT figure it out.
I tried to use some conversion charts but no luck.

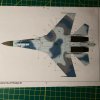
I want to use Vallejo Acrylic Paint on SU-27 Flanker B by Trumpeter 1:32 scale.

Could you tell me a Vallejo numbers for at least the main camo colors, light grey, dark grey and blue-grey?

I have tried for an hour, when I opened FS26329 it did not even look like a blue from Trumpeter brochure.

1.jpg2.jpg3.jpg
 

Ian M

Administrator
Staff member
Administrator
Moderator
SMF Supporter
Joined
Dec 14, 2008
Messages
19,691
Points
113
Location
Falster, Denmark
First Name
Ian

Ian M

Administrator
Staff member
Administrator
Moderator
SMF Supporter
Joined
Dec 14, 2008
Messages
19,691
Points
113
Location
Falster, Denmark
First Name
Ian
Never look at the colours on printed images or computer screens they hardly ever look like they should.
 

Jakko

Way past the mad part
SMF Supporter
Joined
Apr 28, 2018
Messages
10,737
Points
113
First Name
Jakko
The mistake you’re making is to compare paint colours to printed colours :smiling3: It’s (just about) impossible to reproduce paint colours accurately using ink, so if you want colours to be accurate, then never use printed material — whether it’s swatches like here, or photographs of the real thing — as a colour reference.

Painting instructions like these are intended to show the pattern, not the real colours. Because they’re printed in colour, though, Trumpeter has made an effort to approximate the real colours, but they will never be accurate. The same goes for colours on computer screens.

Your best option here is to trust that the paint manufacturer did get it right — this is more likely than that the printer did :smiling3:

(As an aside, one of the symptoms that you have caught AMS¹ is realising that trusting in the kit manufacturer to recommend accurate paint colours is also not a safe option :smiling3:)


¹ Advanced Modeller Syndrome.
 
Joined
May 5, 2022
Messages
201
Points
63
Location
Lindenwold, New Jersey, USA
First Name
Andrzej
Never look at the colours on printed images or computer screens they hardly ever look like they should.
Thank you very much, Jan. :cool:

I kind of expected it but did not realize how things differed until I started looking and images and pictures.

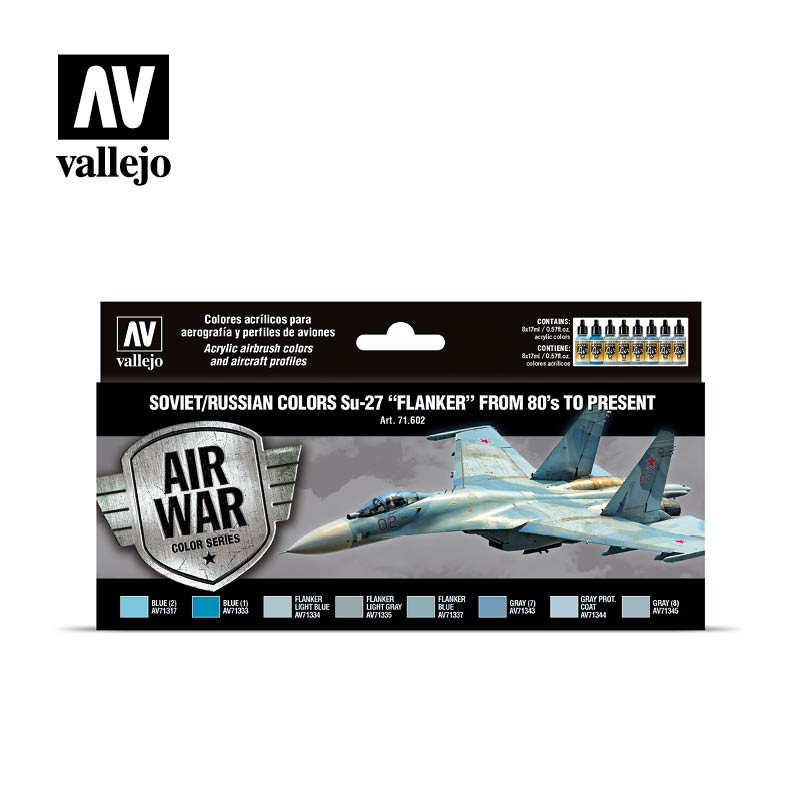
I ordered Vallejo paint set for Russian aircraft you linked. Looks like just what I need. :tongue-out3:
 
Joined
May 5, 2022
Messages
201
Points
63
Location
Lindenwold, New Jersey, USA
First Name
Andrzej
The mistake you’re making is to compare paint colours to printed colours :smiling3: It’s (just about) impossible to reproduce paint colours accurately using ink, so if you want colours to be accurate, then never use printed material — whether it’s swatches like here, or photographs of the real thing — as a colour reference.

Painting instructions like these are intended to show the pattern, not the real colours. Because they’re printed in colour, though, Trumpeter has made an effort to approximate the real colours, but they will never be accurate. The same goes for colours on computer screens.

Your best option here is to trust that the paint manufacturer did get it right — this is more likely than that the printer did :smiling3:

(As an aside, one of the symptoms that you have caught AMS¹ is realising that trusting in the kit manufacturer to recommend accurate paint colours is also not a safe option :smiling3:)


¹ Advanced Modeller Syndrome.

This is only one of hundreds mistakes I made and will make as the project goes on. :tears-of-joy:

I would add that not only printed references but also images looked at on computer, TV etc. (I just read you mentioned it as well)
Actually, I should know better, the pictures have colors depending on so many factors that it is crazy to even try to compare.

I understand about painting instructions perfectly now.

I would love to catch one day AMS, love it. :tongue-out3:

Thank you, Jakko!!!!!
 

Jakko

Way past the mad part
SMF Supporter
Joined
Apr 28, 2018
Messages
10,737
Points
113
First Name
Jakko
Actually, I should know better, the pictures have colors depending on so many factors that it is crazy to even try to compare.
A lot of people don’t know this at all, which is not a problem in daily life. But a fair number of modellers have ended up choosing or mixing paints based on photographs printed in reference books in an attempt to get accurate colours …

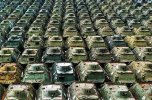
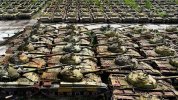
All this, BTW, is aside from the question of, “What is an accurate colour for my subject?” If you’re building something like a civilian car, that will be fairly straightforward — just buy paint intended for touching up the real thing. For military stuff, it’s a little more … complicated :smiling3: Not only might it be difficult to find out what the colour on the real thing actually is (either because this is kept secret or because no true, colour-correct sample of the original paint is known), but you may not be able to buy original paint, and if you can, it will not usually be suitable for using on a model anyway (far too thick, probably). Also, in service the colours tend to fade, weather, discolour, get touched up with new paint, etc. @Tim Marlow likes to post a picture of a field full of 1960s Russian armoured cars, no two of which are the same shade of military green :smiling3: This F/A-18 Super Hornet is a good aircraft example:

US NAVY F18 Hornet Running through Rainbow Canyon 14th March 2018 by JC96 Photography, on Flickr

The whole underside should be a single colour grey …

And then we get into ”scale effect”, which some modellers contend should be taken into account while others claim it doesn’t exist. Scale effect is the theory that a model painted in the exact same colour as the original will look darker than the original, because the model reflects less light due to being smaller. Therefore, the proponents say, you should start with the real colour and then lighten it to compensate. Some people who adhere to this theory add as much as 30–40% white to the base colour for small-scale models.

My own thoughts on the matter are that if you want an accurate colour, it’s best to research what the real thing was/is painted in, and then pick a model colour that seems to fit. No need to go for 100% accuracy, but if, for example, you find out that the light grey paint on your aircraft has a distinct blue tinge to it, then select (or mix) a light grey model paint that is slightly blue — not a light brown grey or a light grey-green.
 
Last edited:

Valeron

SMF Supporter
Joined
Jan 7, 2022
Messages
609
Points
93
Location
St Albans, Hertfordshire
First Name
Mike
Very interesting read Jakko.

I must admit that I've struggled matching colours since I restarted modelling earlier this year.

For now I've tended to go for what looks about right. Once I get better skills I'll start researching more.
 

Tim Marlow

Little blokes aficionado
SMF Supporter
Joined
Apr 27, 2018
Messages
16,726
Points
113
Location
Somerset
First Name
Tim
OK, here’s the picture, though it’s getting a bit worn now….
08603771-3B87-4952-AC80-52980530FD35.jpeg
…and another one….
6D024A2E-27AB-461D-A1F5-5ED3C135A508.jpeg
“Scale colour” is a flawed idea, by the way. It doesn’t matter about the size of the object. If light intensity and wavelength is constant, then light reflection per unit area remains the same, no matter what the size of the thing being observed. A larger object will reflect more light, simply because it’s larger. It won’t look “lighter” though, you’ll just see a bigger area of the same colour…..Light absorption (which actually gives the item its colour) is dependent upon the interaction between the incident light photon and the electrons in the pigment molecules, not the size of the object.
What doesn’t get taken into account is atmospheric haze. If you paint a model and an actual object the same colour they will be identical close up. However, if you need to look at a model and an actual object side by side, so they appear the same size, the real object needs to be much further away.

See here for an explanation

The atmospheric haze experienced by the real object at that distance will tend to desaturate the colour so it appears muted and less vibrant. The objects will therefore look to be different colours. At a distance you are looking through an appreciable amount of dust, moisture, and airborne detritus that scatters light and diffuses colour. The trouble is, this effect isn’t scaleable. As you approach the real object the colours will regain their vibrancy as you look through less of the airborne curtain. A model, on the other hand, will look the same over the short distances it is viewed because it doesn’t experience atmospheric haze to any discernible degree.

To me, your best bet is pick a colour you are happy with and run with it.
 
Joined
May 5, 2022
Messages
201
Points
63
Location
Lindenwold, New Jersey, USA
First Name
Andrzej
A lot of people don’t know this at all, which is not a problem in daily life. But a fair number of modellers have ended up choosing or mixing paints based on photographs printed in reference books in an attempt to get accurate colours …

All this, BTW, is aside from the question of, “What is an accurate colour for my subject?” If you’re building something like civilian car, that will be fairly straightforward — just buy paint intended for touching up the real thing. For military stuff, this is a little more … complicated :smiling3: Not only might it be difficult to find out what the colour on the real thing actually is (either because this is kept secret or because no true, colour-correct sample of the original paint is known), but you may not be able to buy original paint, and if you can, it will not usually be suitable for using on a model anyway (far too thick, probably). Also, in service the colours tend to fade, weather, discolour, get touched up with new paint, etc. @Tim Marlow likes to post a picture of a field full of 1960s Russian armoured cars, no two of which are the same shade of military green :smiling3: This F/A-18 Super Hornet is a good aircraft example:

US NAVY F18 Hornet Running through Rainbow Canyon 14th March 2018 by JC96 Photography, on Flickr

The whole underside should be a single colour grey …

And then we get into ”scale effect”, which some modellers contend should be taken into account while others claim it doesn’t exist. Scale effect is the theory that a model painted in the exact same colour as the original will look darker than the original, because the model reflects less light due to being smaller. Therefore, the proponents say, you should start with the real colour and then lighten it to compensate. Some people who adhere to this theory add as much as 30–40% white to the base colour for small-scale models.

My own thoughts on the matter are that if you want an accurate colour, it’s best to research what the real thing was/is painted in, and then pick a model colour that seems to fit. No need to go for 100% accuracy, but if, for example, you find out that the light grey paint on your aircraft has a distinct blue tinge to it, then select (or mix) a light grey model paint that is slightly blue — not a light brown grey or a light grey-green.

This was a VERY interesting read, Jakko! Thank you. :smiling:

That really sets my mind to a thinking that color would be really a personal preference within, of course, obvious margins as in real life they will not be the same looking airplanes (in my case).

Interesting concept about Scale Effect" but in my opinion it is a bit overrated.
When I look at my model, in different location and light settings, it looks just different.
If in real life, we would look at things always in the same lighting conditions, going to extremes picking the "right" color would make more sense.

Thank you, now I will be able to sleep at night without "is it a right color?" nightmares. :tears-of-joy::tears-of-joy::tears-of-joy::tears-of-joy::tears-of-joy::tears-of-joy::tears-of-joy::tears-of-joy::cool::cool::cool:
 
Joined
May 5, 2022
Messages
201
Points
63
Location
Lindenwold, New Jersey, USA
First Name
Andrzej
OK, here’s the picture, though it’s getting a bit worn now….

…and another one….

“Scale colour” is a flawed idea, by the way. It doesn’t matter about the size of the object. If light intensity and wavelength is constant, then light reflection per unit area remains the same, no matter what the size of the thing being observed. A larger object will reflect more light, simply because it’s larger. It won’t look “lighter” though, you’ll just see a bigger area of the same colour…..Light absorption (which actually gives the item its colour) is dependent upon the interaction between the incident light photon and the electrons in the pigment molecules, not the size of the object.
What doesn’t get taken into account is atmospheric haze. If you paint a model and an actual object the same colour they will be identical close up. However, if you need to look at a model and an actual object side by side, so they appear the same size, the real object needs to be much further away.

See here for an explanation

The atmospheric haze experienced by the real object at that distance will tend to desaturate the colour so it appears muted and less vibrant. The objects will therefore look to be different colours. At a distance you are looking through an appreciable amount of dust, moisture, and airborne detritus that scatters light and diffuses colour. The trouble is, this effect isn’t scaleable. As you approach the real object the colours will regain their vibrancy as you look through less of the airborne curtain. A model, on the other hand, will look the same over the short distances it is viewed because it doesn’t experience atmospheric haze to any discernible degree.

To me, your best bet is pick a colour you are happy with and run with it.

Hi Tim,
Thank you a GREAT explanation and I have to say you hit the nail in the head as they say. :cool: :smiling:
I loved the explanation, and it makes perfect sense from physics standpoint.
Summarizing, comparing real objects (which are much bigger most of the times) to scale models of them is just a wrong comparison as the CONDITIONS are totally different.
I like and agree, I will pick the color I like the most and will go with it.
Thank you again for a great read!

P.S. Father Tim's explanation is great by the way!!!! :tears-of-joy: :tears-of-joy: :tears-of-joy: :tears-of-joy:
 

Jakko

Way past the mad part
SMF Supporter
Joined
Apr 28, 2018
Messages
10,737
Points
113
First Name
Jakko
OK, here’s the picture, though it’s getting a bit worn now….
:smiling3:

“Scale colour” is a flawed idea, by the way.
That’s my point of view, too.

To me, your best bet is pick a colour you are happy with and run with it.
In the end you only have to please yourself, yep. IMHO, if a realistic colour is what you want, do it like I said: try to find out what the real colour is supposed to be, and choose a model paint that you think works for that.

Father Tim
That was Father Ted, not Tim, doing the explaining :smiling3:
 
Top