Tamiya 1:48 Lancaster

Ancientmariner

SMF Supporter
Joined
Feb 11, 2018
Messages
662
Points
93
Location
United Kingdom
First Name
James
Afternoon all,

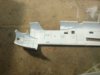
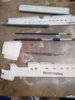
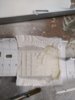
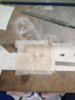
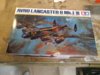
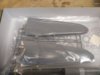
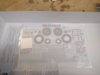
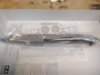
Just started unboxing this project which is to be my second aircraft build.
Last was a 1:72 Jaguar, hoping the larger parts will make this easier for me.......
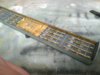
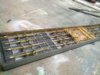
Anyway unboxing as as expected kit seems high quality. I am not adding an interior detailing kit as I think this is far beyond my current skill set.
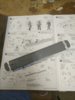
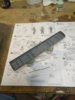
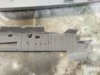
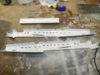
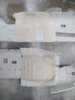
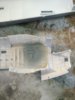
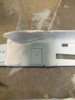
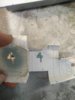
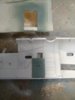
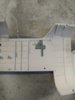
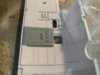
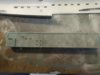
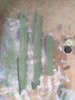
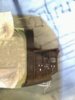
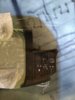
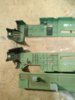
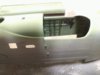
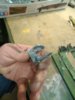
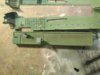
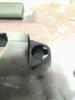
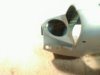
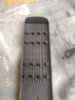
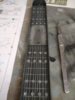
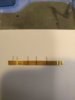
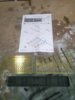
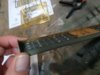
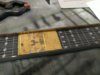
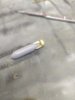
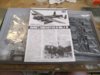
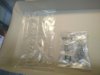
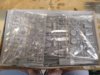
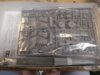
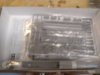
Photos below show boxed kit as it arrives.

Has anyone built this before and from that did they do anything particularly different to the way the instructions suggest this should be built?

I am intending to build as a specific aircraft my great uncle was a tail gunner in so hoping to get a reasonable result.

James
 

Attachments

  • IMG_20200405_135839.jpg
    IMG_20200405_135839.jpg
    119.8 KB · Views: 63
  • IMG_20200405_135849.jpg
    IMG_20200405_135849.jpg
    123.4 KB · Views: 62
  • IMG_20200405_135902.jpg
    IMG_20200405_135902.jpg
    75.8 KB · Views: 55
  • IMG_20200405_135912.jpg
    IMG_20200405_135912.jpg
    119.2 KB · Views: 53
  • IMG_20200405_135919.jpg
    IMG_20200405_135919.jpg
    94.8 KB · Views: 52
  • IMG_20200405_135924.jpg
    IMG_20200405_135924.jpg
    67 KB · Views: 49
  • IMG_20200405_135930.jpg
    IMG_20200405_135930.jpg
    71.7 KB · Views: 48
  • IMG_20200405_135937.jpg
    IMG_20200405_135937.jpg
    80 KB · Views: 49
  • IMG_20200405_135945.jpg
    IMG_20200405_135945.jpg
    74.2 KB · Views: 46

AlanG

Moderator
Staff member
Moderator
SMF Supporter
Joined
Dec 2, 2008
Messages
7,485
Points
113
Location
Scotland
First Name
Alan
Will be watching this build with interest as i really would love to have a bigger Lanc on the shelf,but cannot afford the HKM/WNW kits.

The only real issue i know with these kits is the canopy being wrong. But you can easily fix that with an aftermarket bit.
 

Ancientmariner

SMF Supporter
Joined
Feb 11, 2018
Messages
662
Points
93
Location
United Kingdom
First Name
James
So made a start this evening,

Thought I'd put the ends on the bomb bay and then under coat interior and also inside of the Bombay (inner body). Went with a basic white under coat and was then intending on cockpit green for the interior but Tamiya seen to suggest RAF grey? Though I may have misread instructions. Anyway what ever colour I am wondering how I'm going to pick out the instruments moulded on the inside of the fuselage? Any ideas? Also the framing and wiring? I am probably going to spray and then dry brush a lighter mixed base to pick out highlights.

James
 

Attachments

  • IMG_20200405_190632.jpg
    IMG_20200405_190632.jpg
    107.1 KB · Views: 33
  • IMG_20200405_190957.jpg
    IMG_20200405_190957.jpg
    121 KB · Views: 35
  • IMG_20200405_191503.jpg
    IMG_20200405_191503.jpg
    126.2 KB · Views: 36
  • IMG_20200405_192952.jpg
    IMG_20200405_192952.jpg
    109.4 KB · Views: 40
  • IMG_20200405_193012.jpg
    IMG_20200405_193012.jpg
    102.2 KB · Views: 38

Ancientmariner

SMF Supporter
Joined
Feb 11, 2018
Messages
662
Points
93
Location
United Kingdom
First Name
James
Good afternoon fellow modellers! I trust everyone has enjoyed the reasonable weather today, I opted to avoid the sun and head for the shed.

I decided to start playing with ideas for masking the details on the inside of the fuselage for spraying as these are going to be sprayed black before highlighting and washing.
I personally hate masking and am not very good at it. A lot of this is because I am lazy at changing my scalpel blades mainly but I wanted an easier way. I watched a YouTube video of a chap who masks his cockpits without canopies using wet kitchen towel.

I started having a play with this idea and while at it thought about using dilute PVA and water instead of just water to give some more structure, almost like papier mache.
I have done one side with one layer of kitchen towel and one with two. Putting on in squares, painting solution on and badding the kitchen towel flat over structure with a brush and am now waiting for it to dry after which I shall cut out the required areas. This may well be a disaster and is only an experiment as I will spray green first on the inner fuselage but am going to do a grey coat over these details so I don't waste time later if it turns out it's a bad idea. Will update when done.

James
 

Attachments

  • IMG_20200409_162702.jpg
    IMG_20200409_162702.jpg
    118.4 KB · Views: 38
  • IMG_20200409_163305.jpg
    IMG_20200409_163305.jpg
    95.7 KB · Views: 38
  • IMG_20200409_162922.jpg
    IMG_20200409_162922.jpg
    98.8 KB · Views: 37

Ancientmariner

SMF Supporter
Joined
Feb 11, 2018
Messages
662
Points
93
Location
United Kingdom
First Name
James
Will be watching this build with interest as i really would love to have a bigger Lanc on the shelf,but cannot afford the HKM/WNW kits.

The only real issue i know with these kits is the canopy being wrong. But you can easily fix that with an aftermarket bit.

You need a big shelf to fit the HKM Lanc' on Alan!
 

AlanG

Moderator
Staff member
Moderator
SMF Supporter
Joined
Dec 2, 2008
Messages
7,485
Points
113
Location
Scotland
First Name
Alan
Wish i could afford the HKM Lanc. But it looks like Wing Nut Wings (WNW) might be going under (if you read their Facebook comment) so the HKM will be the only game in town in the big scale. I can still dream of one day getting one.
 

Ancientmariner

SMF Supporter
Joined
Feb 11, 2018
Messages
662
Points
93
Location
United Kingdom
First Name
James
So played about this afternoon and the paper towel masking has worked a treat. I found 1 layer of kitchen towel, wetted down and then with 50/50 PVA water mixed painted over the top has worked best and just pulls off as a sheet.
Sprayed two coats on as a test, Tamiya XF mixed 50/50 with Tamiya thinner. I will be using this technique again.

Also sprayed the inner floor second coat and trying to get some mottling effect as can be seen in pic.
 

Attachments

  • IMG_20200410_085838.jpg
    IMG_20200410_085838.jpg
    90.7 KB · Views: 45
  • IMG_20200410_190233.jpg
    IMG_20200410_190233.jpg
    101.8 KB · Views: 45
  • IMG_20200410_190229.jpg
    IMG_20200410_190229.jpg
    128 KB · Views: 45
  • IMG_20200410_190300.jpg
    IMG_20200410_190300.jpg
    97.4 KB · Views: 42
  • IMG_20200410_190329.jpg
    IMG_20200410_190329.jpg
    94.9 KB · Views: 42
  • IMG_20200410_190309.jpg
    IMG_20200410_190309.jpg
    98.1 KB · Views: 42
  • IMG_20200410_190350.jpg
    IMG_20200410_190350.jpg
    74.2 KB · Views: 42
  • IMG_20200410_190237.jpg
    IMG_20200410_190237.jpg
    84.6 KB · Views: 39

Ancientmariner

SMF Supporter
Joined
Feb 11, 2018
Messages
662
Points
93
Location
United Kingdom
First Name
James
Have gone for two tone interior, cockpit green with 4 undercoats working up from grey with framing picked out in black) and Matt black forward of cockpit.

Am not overly thrilled wit of the black section. Have dry brushed framing but think I am going to further detail it in a darker grey to define it more. I am also wondering how to go about washing it but I think I will start with brown and go from there to try and add more depth.

Found a book today that my great uncle wrote the prologue for (Last of the Lancasters) which I wasn't aware he had which I enjoyed reading. Helped with aircraft info anyway.

Hope all have had a good weekend modelling.
 

Attachments

  • IMG_20200412_120351.jpg
    IMG_20200412_120351.jpg
    116.8 KB · Views: 37
  • IMG_20200412_181126.jpg
    IMG_20200412_181126.jpg
    97.4 KB · Views: 40
  • IMG_20200412_181130.jpg
    IMG_20200412_181130.jpg
    93.5 KB · Views: 40
D

Deleted member 7181

Guest
Coming along nicely James.

A 1/72 was big enough for me so this must be quite a size!
 

Ancientmariner

SMF Supporter
Joined
Feb 11, 2018
Messages
662
Points
93
Location
United Kingdom
First Name
James
Main body interior is pretty much done and have done flooring, attempting to put in dirty boot marks.

Also added 1 run of 0.16mm stainless wore, just to see how it looked along the Port side.
Waiting for detailing PE kit as interior seats and fittings are V V basic. Arriving Wednesday.
 

Attachments

  • IMG_20200413_205821.jpg
    IMG_20200413_205821.jpg
    121 KB · Views: 50
  • IMG_20200413_210010.jpg
    IMG_20200413_210010.jpg
    69.3 KB · Views: 51
  • IMG_20200413_205837.jpg
    IMG_20200413_205837.jpg
    78.1 KB · Views: 49
  • IMG_20200413_205828.jpg
    IMG_20200413_205828.jpg
    116.5 KB · Views: 49
  • IMG_20200413_205958.jpg
    IMG_20200413_205958.jpg
    85.9 KB · Views: 48
  • IMG_20200413_210035.jpg
    IMG_20200413_210035.jpg
    63.5 KB · Views: 45

Ancientmariner

SMF Supporter
Joined
Feb 11, 2018
Messages
662
Points
93
Location
United Kingdom
First Name
James
So a quick update.

Received the PE retailing kits today. Having never used one before this was an experience. Watched a bit of YouTube and cracked on starting with bomb bay which was ok but I found my tools to be lacking a lot as parts are so fine. Need better tweezers and also super glue with a much much finer applicator.

Have removed all bomb lugs on original cast, put in 6 side pieces, bottom plate and will do wiring tomorrow. Not amazing but I'm reasonably happy for a first attempt. Couldn't have done it with my modellers magnifying glasses!

Thanks for all your positive comments by the way, makes it feel worth while after the occasional disasters I have!
 

Attachments

  • IMG_20200415_152621.jpg
    IMG_20200415_152621.jpg
    157.3 KB · Views: 41
  • IMG_20200415_153519.jpg
    IMG_20200415_153519.jpg
    77.8 KB · Views: 43
  • IMG_20200415_160731.jpg
    IMG_20200415_160731.jpg
    98.6 KB · Views: 42
  • IMG_20200415_185559.jpg
    IMG_20200415_185559.jpg
    55.6 KB · Views: 40
  • IMG_20200415_152724.jpg
    IMG_20200415_152724.jpg
    119.8 KB · Views: 41
  • IMG_20200415_202701.jpg
    IMG_20200415_202701.jpg
    80.5 KB · Views: 43
  • IMG_20200415_202651.jpg
    IMG_20200415_202651.jpg
    108.3 KB · Views: 43

colin m

Moderator
Staff member
Moderator
SMF Supporter
Joined
Dec 26, 2008
Messages
8,595
Points
113
Location
Stafford, UK
First Name
Colin
Interesting work James. Should be quite special with all the extras.
 

Ancientmariner

SMF Supporter
Joined
Feb 11, 2018
Messages
662
Points
93
Location
United Kingdom
First Name
James
Made some reasonable progress this weekend. Decided to complete bomb bay before installing it. After removing studs for bombs to go on I then had to cut back around the frames to get a better look so round bits can't be seen.

Bomb racks have come out ok, though I left some detail off them.
Will fit into aircraft and then paint once it is all in place.

Also included a completed bomb though I doubt I shall use these.
 

Attachments

  • IMG_20200419_101757.jpg
    IMG_20200419_101757.jpg
    73.1 KB · Views: 40
  • IMG_20200419_151329.jpg
    IMG_20200419_151329.jpg
    125.1 KB · Views: 46
  • IMG_20200419_151336.jpg
    IMG_20200419_151336.jpg
    119.1 KB · Views: 46

Jack L

SMF Supporter
Joined
Jul 25, 2018
Messages
1,003
Points
113
First Name
Jack
So a quick update.

Received the PE retailing kits today. Having never used one before this was an experience. Watched a bit of YouTube and cracked on starting with bomb bay which was ok but I found my tools to be lacking a lot as parts are so fine. Need better tweezers and also super glue with a much much finer applicator.

Have removed all bomb lugs on original cast, put in 6 side pieces, bottom plate and will do wiring tomorrow. Not amazing but I'm reasonably happy for a first attempt. Couldn't have done it with my modellers magnifying glasses!

Thanks for all your positive comments by the way, makes it feel worth while after the occasional disasters I have!
That is a lot of extra bling. My biggest lesson with PE was not to use the glue applicator...use a cocktail stick or similar. I pop a drop of CA into an old contact lens case, and insert a staple into a drilled out but of sprue. Gives me something to hold with a fine tip so I don't get glue everywhere. Bomb racks look great though!
 

stona

SMF Supporter
Joined
Jul 22, 2008
Messages
11,470
Points
113
First Name
Steve
Need better tweezers and also super glue with a much much finer applicator.

I use an old sewing needle, but not the sharp end!

Cut the top off the eye, leaving a U shape. Stick the sharp end in to a cork or anything else suitable which you can safely hold without impaling yourself. You will find that the U will hold a little drop of CA, perfect for photo-etch and other fiddly bits.

Don't let the glue set in your new applicator! I just wipe it clean and rarely have an issue.

Cheers

Steve
 

Ancientmariner

SMF Supporter
Joined
Feb 11, 2018
Messages
662
Points
93
Location
United Kingdom
First Name
James
Thanks for all your tips, I shall certainly be trying them out. I was a little trial and error with what has been done so far and used a thin applicator nozzle from Roket glues though I am now using 30G needles which seem ok. I have had to use a fair bit of glue as the first few racks weren't great though they have got better as I've gone alone and I'm getting used to the PE. I have used the Roket Hot extra thin glue and this seems pretty good actually.
 

HAWKERHUNTER

SMF Supporter
Joined
Feb 29, 2012
Messages
572
Points
63
First Name
Steve
Looks like a great kit. Those pre painted canopies are going to save you a whole load of grief. Good luck with the rest of the build.
 
Top