dalej2014
SMF Supporter
My first build in several decades! If you've come expecting a masterpiece, you may have wandered into the wrong thread!
This will be (mostly) a straight out of the box build. I'm weaning myself back into modelling gently, having been away many years. This is my first build thread, so forgive me if it seems patronising. That's not intended. This is an "aide memoir" for me, with any issues, and solutions. I'm kind of thinking out loud. Enough, onward!
Before I begin I assemble all the bits and bobs I'll need (I think!):

I don't have a workbench, so am building on my living room table. I do have a daylight lamp, used throughout. Having checked all the sprues for missing parts etc. I'm good to go. I did find I was missing the instructions for this kit. Fortunately Scalemates to the rescue!. I have pre-painted a few parts that will build up the interior (much easier to do that on the sprue first).
As an interesting aside, and a "blast from the past", check out the price of the kit - 99 pence! My dad (RIP) bought this kit from a local shop, probably on release, and it's sat nearly half a century waiting to be built. I had to look, and in today's money that's about £11.50. I found a similar (same?) kit on Amazon for about £15. There are a few of these original boxes for sale online, ranging from 28 euro to about £45!

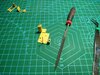
Anyway, I digress. Next I set up my cutting/painting mat (don't want to ruin the table!), and get started. I use some decent "snips" to remove parts from their sprues (being careful not to "ping" any tiny ones!
Here you can see the "bench" ready to go. The bottle of cement is blue tacked to the cutting mat, to avoid any disastrous mishaps:

Next I start assembling the pieces, beginning with step 1 of the instructions. I have read these through a few times, and assembled reference materials before I begin (I'll try to remember to link these at the end. Remind me if I forget).
At this point I realise pre-painting all those interior parts is a double edged sword. Some of them need bare plastic to be glued together|:

The solution - cocktail stick scraper to the rescue. This let me scrape the paint off without damaging the plastic:

The extra thin cement is great! It's a vast improvement, even over the liquid cement of days gone by ( i know you can still get it).
I also needed to clean up some of those sprue snips; fortunately I got a cheap tool set from an auction site, with all the basics. Most of it is pretty good. I will need to buy better tweezers. The ones in this kit are a bit rubbish. Too thin, and prone to bending:

If you spotted these were'nt in the first pic, congratulations - you are very observant. All of my other kit though, is in the next room, so not too far. The files are good though, and worked great for tidying up the sprue marks:

Before I go any further I realise there's little bits that will need painting now, for ease. So it's out with the paints:

I got these sets knowing I'd be building some Allies and Axis armour kits, and thought I'd have all I needed. I already have flesh colours and so on from my miniature painting days. Alas, not so. On reading Mike Starmer's excellent material on AFv colours (here) I found that actually "buff" was nearer the colour of British desert vehicles, so another pot was purchased. OK, I'm almost ready to paint. Before I do though, I make sure I've got synthetic brushes (best for acrylics), clean and ready to go. I also have brush cleaner to hand, to keep them tip top:

Before I put any paint on I decant a drop into a small palette and add a drop of water, to get the right consistency. I want a good coverage and "flow". Interesting aside - I saw a Youtube video which claims that adding glycerin works as a flow improver for paint! I have not tried this myself yet. If you do, or ahve, please let me know if it works? (It was aimed at airbrushes though, and I still use a "hairy stick"). The mini coffee jars are great for holding water and oil/enamel thinners - in different bottles, of course!

Great, so I can now paint the back of the seat! (All that for this!). I'll want to use some ink, and or gloss (oil/enamel?) later on, to give this a "sheen" since it's leather. I'll probably go orange or red, because the brown doesn't seem quite right to me yet:

That's the interior floor fairly well assembled, Onto the hull:

Again, snipped from the sprue and filed to remove "flash" points. Speaking of flash though, I can see this an old kit, by the amount still on some of the sprue parts. It required a bit of fiddly cutting and filing to remove it all (note parts 44 and 46):

So with all the bits ready, it's time to begin assembly:

Or is it? Here again I've had to remove some paint to allow for parts to be glued together (note the section where the steering wheel will go, on the bottom part):

Now that steering wheel can be glued in. Without scraping the paint there'd be nothing for the glue to "bite":

OK, so now it's ready to assemble (always reminds me of Avengers these days, that word. Avengers Assemble!. I digress...) Here it is for a rough fit. I always dry fit the parts before gluing. That way I discover any fitting issues before it's too late. I'm glad I do too, since I'm not quite happy with the fit. Maybe it's because it's an old kit? Maybe I was too agresssive with the filing? Whatever the reason the two halves don't quite line up with the plastic pin as is. So I get a small drill and very carefully lengthen the hole by gently enlarging the fitting hole:

It's still not perfect, but will do OK. If need be I can come back and do some remedial work to correct the fit later. Pressing on I keep offering up the parts for fit, and gently filing away a tiny bit at a time, until I'm fairly satisfied with the fit of the two halves. That done. it's time to stick and sit:

I've also painted a base coat on the ammo boxes (front left of chassis), before gluing the halves together.
That centre line still looks ugly to me. If it's visible in the final build I'll use filler or plastic card to cover it, since I think that should be a single panel? Need to check my references on that floor:

Continued...
This will be (mostly) a straight out of the box build. I'm weaning myself back into modelling gently, having been away many years. This is my first build thread, so forgive me if it seems patronising. That's not intended. This is an "aide memoir" for me, with any issues, and solutions. I'm kind of thinking out loud. Enough, onward!
Before I begin I assemble all the bits and bobs I'll need (I think!):
I don't have a workbench, so am building on my living room table. I do have a daylight lamp, used throughout. Having checked all the sprues for missing parts etc. I'm good to go. I did find I was missing the instructions for this kit. Fortunately Scalemates to the rescue!. I have pre-painted a few parts that will build up the interior (much easier to do that on the sprue first).
As an interesting aside, and a "blast from the past", check out the price of the kit - 99 pence! My dad (RIP) bought this kit from a local shop, probably on release, and it's sat nearly half a century waiting to be built. I had to look, and in today's money that's about £11.50. I found a similar (same?) kit on Amazon for about £15. There are a few of these original boxes for sale online, ranging from 28 euro to about £45!
Anyway, I digress. Next I set up my cutting/painting mat (don't want to ruin the table!), and get started. I use some decent "snips" to remove parts from their sprues (being careful not to "ping" any tiny ones!
Here you can see the "bench" ready to go. The bottle of cement is blue tacked to the cutting mat, to avoid any disastrous mishaps:
Next I start assembling the pieces, beginning with step 1 of the instructions. I have read these through a few times, and assembled reference materials before I begin (I'll try to remember to link these at the end. Remind me if I forget).
At this point I realise pre-painting all those interior parts is a double edged sword. Some of them need bare plastic to be glued together|:
The solution - cocktail stick scraper to the rescue. This let me scrape the paint off without damaging the plastic:
The extra thin cement is great! It's a vast improvement, even over the liquid cement of days gone by ( i know you can still get it).
I also needed to clean up some of those sprue snips; fortunately I got a cheap tool set from an auction site, with all the basics. Most of it is pretty good. I will need to buy better tweezers. The ones in this kit are a bit rubbish. Too thin, and prone to bending:
If you spotted these were'nt in the first pic, congratulations - you are very observant. All of my other kit though, is in the next room, so not too far. The files are good though, and worked great for tidying up the sprue marks:
Before I go any further I realise there's little bits that will need painting now, for ease. So it's out with the paints:
I got these sets knowing I'd be building some Allies and Axis armour kits, and thought I'd have all I needed. I already have flesh colours and so on from my miniature painting days. Alas, not so. On reading Mike Starmer's excellent material on AFv colours (here) I found that actually "buff" was nearer the colour of British desert vehicles, so another pot was purchased. OK, I'm almost ready to paint. Before I do though, I make sure I've got synthetic brushes (best for acrylics), clean and ready to go. I also have brush cleaner to hand, to keep them tip top:
Before I put any paint on I decant a drop into a small palette and add a drop of water, to get the right consistency. I want a good coverage and "flow". Interesting aside - I saw a Youtube video which claims that adding glycerin works as a flow improver for paint! I have not tried this myself yet. If you do, or ahve, please let me know if it works? (It was aimed at airbrushes though, and I still use a "hairy stick"). The mini coffee jars are great for holding water and oil/enamel thinners - in different bottles, of course!
Great, so I can now paint the back of the seat! (All that for this!). I'll want to use some ink, and or gloss (oil/enamel?) later on, to give this a "sheen" since it's leather. I'll probably go orange or red, because the brown doesn't seem quite right to me yet:
That's the interior floor fairly well assembled, Onto the hull:
Again, snipped from the sprue and filed to remove "flash" points. Speaking of flash though, I can see this an old kit, by the amount still on some of the sprue parts. It required a bit of fiddly cutting and filing to remove it all (note parts 44 and 46):
So with all the bits ready, it's time to begin assembly:
Or is it? Here again I've had to remove some paint to allow for parts to be glued together (note the section where the steering wheel will go, on the bottom part):
Now that steering wheel can be glued in. Without scraping the paint there'd be nothing for the glue to "bite":
OK, so now it's ready to assemble (always reminds me of Avengers these days, that word. Avengers Assemble!. I digress...) Here it is for a rough fit. I always dry fit the parts before gluing. That way I discover any fitting issues before it's too late. I'm glad I do too, since I'm not quite happy with the fit. Maybe it's because it's an old kit? Maybe I was too agresssive with the filing? Whatever the reason the two halves don't quite line up with the plastic pin as is. So I get a small drill and very carefully lengthen the hole by gently enlarging the fitting hole:
It's still not perfect, but will do OK. If need be I can come back and do some remedial work to correct the fit later. Pressing on I keep offering up the parts for fit, and gently filing away a tiny bit at a time, until I'm fairly satisfied with the fit of the two halves. That done. it's time to stick and sit:
I've also painted a base coat on the ammo boxes (front left of chassis), before gluing the halves together.
That centre line still looks ugly to me. If it's visible in the final build I'll use filler or plastic card to cover it, since I think that should be a single panel? Need to check my references on that floor:
Continued...
Attachments
Last edited:


 (JK I hope!) Appreciate any critique, comments or advice, from yourself or anyone else. You're never too old to learn. All the best.

 ,
,
")


