Tamiya Supermarine Spitfire Mk 1 - 1/48

Joined
Jan 4, 2020
Messages
576
Points
63
Location
Bramley, Hampshire
First Name
Gary
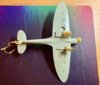
Taking it steady as I'm airbrushing for the first time. Enjoying it a lot but update is only the underside in Sky Type S. Picture doen't do it anything like justice though as the colour is even and solid without affecting any of the detail. The picture looks patchy and uneven which it's not in reality. Un reduced images look fine . Panel lines are all there and will be highlighted later. I will try a new picture in natural daylight tomorrow but I am making progress be it all slowly and at my pace. Next up is the topside in brown and green camo

spit bottom.jpg

Thats better
 

Attachments

  • Spit Under.jpg
    Spit Under.jpg
    56.2 KB · Views: 17
Last edited:
Joined
Jan 4, 2020
Messages
576
Points
63
Location
Bramley, Hampshire
First Name
Gary
Slow progress but I'm taking my time as I collect paints etc

However I have just done the top and I did get a bit of masked paint coming off just in front of the cockpit. Wonder if thats because I don't usually prime even though I cleaned the plane before spraying ? But otherwise I'm delighted with the result and I can touch up the bare area. The actual edges of the camo, I used BluTack are really nice, better than in the picture. Clean edges with a tiny bit of fade in places which looks realy nice in real life

Spit Painted.jpg

Really not having much luck with the quality of my pictures and having spent £20k plus over the last 20 years and hours taking all sorts of pictures of high quality I should know what I'm doing. But I have had a good clear out and only have the 3 cameras left...... ah well. I did get rid of all my lighting gear so just using candles and burning some old underpants now
 
Last edited:
Joined
Jan 4, 2020
Messages
576
Points
63
Location
Bramley, Hampshire
First Name
Gary
I was going to try that Pete. Really enjoyable build for my first one. Learnt a couple of things, do's and don'ts and in the flesh it looks really good. nice to spend time doing small bits and not rushing so it becomes a pleasurable way to spend my time.
 
Last edited:

Steven000

WWII and nuts.
SMF Supporter
Joined
Aug 29, 2018
Messages
1,945
Points
113
Location
Belgium
First Name
Steven
Looks good indeed :thumb2:
I'm not sure, but wouldn't it be possible to remove the matt finish from the canopy with alcohol or so? Never tried it with a finish-layer but if it hasn't harden yet I would think it could work.
Cheers, Steven
 
Joined
Jan 4, 2020
Messages
576
Points
63
Location
Bramley, Hampshire
First Name
Gary
Thanks.
I'm very pleased and have already noted things I will do differently to improve models. I do like the shiny new with a touch of panel line and a tiny smidgen of exhaust dirt.

I'll have a go with IPA which shouldn't harm the perspex.
 

colin m

Moderator
Staff member
Moderator
SMF Supporter
Joined
Dec 26, 2008
Messages
8,595
Points
113
Location
Stafford, UK
First Name
Colin
Well that turned out aright Gary. Bad luck with the canopy, but, that's not something you'll do again. We all improve with every build.
 
Joined
Jan 4, 2020
Messages
576
Points
63
Location
Bramley, Hampshire
First Name
Gary
Thanks Colin it looks like he's been doing some heavy breating in there. But it's not horrible. But I'm quite pleased for my first build in 40 years. And key is that I enjoyed it a lot. Much more than I remember my glue smeared models as a teen.

It looks OK but I'll keep an eye out for any spare or replacement front screen and canopies as I'm pretty certain I can carefully remove and replace them
 
Last edited:
Top