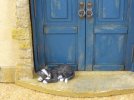
The refreshment stop

adt70hk

I know its a bit sad but I like quickbuild kits!!!
SMF Supporter
Joined
Sep 4, 2019
Messages
9,480
Points
113
First Name
Andrew
Sorry for being late to the party.... That's looking very good already Jim!!!

Can't wait to see this finished.

ATB.

Andrew
 

Jim R

SMF Supporter
Joined
Apr 27, 2018
Messages
13,695
Points
113
Location
Shropshire
First Name
Jim
Thanks guys for your very kind comments.
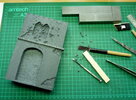
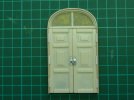
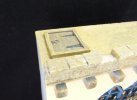
I want the main door and the window above to be set back into the wall. That meant hollowing out the foam. What a messy job. The foam bits gets static electricity in them and stick to everything :sad:

P1060974.JPG

When the cut out is roughly the right depth I used a piece of wood to press the area flat. The door is done and the window is nearly done, ready to press flat.

Jim
 

JR

Member of the Rabble and Pyromania Consultant
SMF Supporter
Joined
May 26, 2015
Messages
17,275
Points
113
Location
lincs
First Name
John
Thank you for mentioning the inspiration I gave you Jim. It's being part of the forum that pushes us to try to achieve better results, your figures are brill, nice shades in the materials. Looks like you've done some very thin layers and not obliterated the detail as well .
Form board and the new dark grey foam which used to be blue XPS ( all down to the manufacturer DuPoint moving towards a less less global warming ) work is spot on .Slow but sure , measure countless times before the cut !

Nice wood bending there Jim, impressive stuff .
 

rtfoe

SMF Supporter
Joined
Apr 29, 2018
Messages
7,497
Points
113
Location
Malaysia
First Name
Richard
Fantastic Jim, one of the ways to combat the foam bits is to have a vacuum at the ready and clear at every stage of cutting and sanding.

Cheers,
Richard
 

Jim R

SMF Supporter
Joined
Apr 27, 2018
Messages
13,695
Points
113
Location
Shropshire
First Name
Jim
Thanks John and Richard for your posts. Sorry I'm so late replying.
A fair bit of progress really.
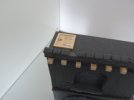
I decided the main building needed a roof trap door for access.
P1060975.JPG

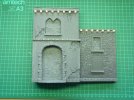
The two sections of the building were primed with grey Stynylrez and then because the foam board I've used seemed very porous I gave the whole thing a couple of coats of dilute PVA.
P1060976.JPG

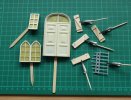
All the doors and windows etc were masked and prepared for paint.
P1060977.JPG

Hinges and handles were added to the doors.
P1060978.JPG

Both building sections were painted using Vallejo Model Color. I deliberately made it brighter with more contrast as my experiments with the mortar tones everything down and there will be some weathering etc.
P1060979.JPG

The door, windows and shutters were given a blotchy brown and grey. I'll use chipping fluid to show paint worn back to this.
P1060980.JPG

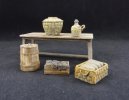
In between I've been painting up the arab boy's food stall. Still a way to go with that.
P1060981.JPG

Getting there slowly. Thanks for all your continued support.
Jim
 

adt70hk

I know its a bit sad but I like quickbuild kits!!!
SMF Supporter
Joined
Sep 4, 2019
Messages
9,480
Points
113
First Name
Andrew
Jim,

That's brilliant. Very well done so far!

ATB.

Andrew
 

boatman

SMF Supporter
Joined
Nov 8, 2018
Messages
12,853
Points
113
Location
NORFOLK UK
First Name
christopher
DITTO like says Jim very well done ive enjoyed your build so far :thumb2:
chrisb
 

JR

Member of the Rabble and Pyromania Consultant
SMF Supporter
Joined
May 26, 2015
Messages
17,275
Points
113
Location
lincs
First Name
John
Wow most impressive Jim, this is going really well.
 

Jim R

SMF Supporter
Joined
Apr 27, 2018
Messages
13,695
Points
113
Location
Shropshire
First Name
Jim
Andrew, Chris, John and Paul - thanks very much for your positive posts. Nice to know I'm heading in the right direction.
Jim
 

Jim R

SMF Supporter
Joined
Apr 27, 2018
Messages
13,695
Points
113
Location
Shropshire
First Name
Jim
A bit more progress.
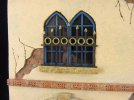
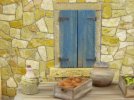
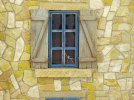
I put in all the mortar between the stones and the bricks. A mix of fine sand (that kiln dried stuff used on block paving), plaster and some powdered grey pastel chalk was brushed in dry and then fixed with VMS Ballast Freeze. Took a lot of sessions as with the powder being brushed in dry I could only work on a horizontal surface otherwise it all feel out :rolling: The faded door was done with a grey and brown base and AK Worn Effects with a Vallejo blue top coat. The AK stuff works like hairspray but is much more controllable and consistent.
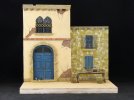
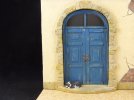
I added a layer of cork to the base although it will all need texture and paint but the cork will make it easier to pin the figures in place.
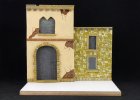
So a rough idea of where we're heading, nothing is fixed yet. A fair bit more to go on the stall and the figures and jeep to add.
P1060982.JPG

P1060983.JPG

P1060984.JPG

P1060985.JPG

P1060986.JPG

P1060987.JPG

P1060988.JPG

P1060989.JPG

Thanks again for your kind posts and your patient support.
Jim
 

adt70hk

I know its a bit sad but I like quickbuild kits!!!
SMF Supporter
Joined
Sep 4, 2019
Messages
9,480
Points
113
First Name
Andrew
A bit more progress.
I put in all the mortar between the stones and the bricks. A mix of fine sand (that kiln dried stuff used on block paving), plaster and some powdered grey pastel chalk was brushed in dry and then fixed with VMS Ballast Freeze. Took a lot of sessions as with the powder being brushed in dry I could only work on a horizontal surface otherwise it all feel out :rolling: The faded door was done with a grey and brown base and AK Worn Effects with a Vallejo blue top coat. The AK stuff works like hairspray but is much more controllable and consistent.
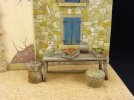
I added a layer of cork to the bas although it will all need texture and paint but the cork will make it easier to pin the figures in place.
So a rough idea of where we're heading, nothing is fixed yet. A fair bit more to go on the stall and the figures and jeep to add.
View attachment 452056

View attachment 452057

View attachment 452058

View attachment 452059

View attachment 452060

View attachment 452061

View attachment 452062

View attachment 452063

Thanks again for your kind posts and your patient support.
Jim

Jim

That's coming on beautifully. I love the cork idea but in terms of pinning the figures but also the texture it might add.

Keep up the great work.

Andrew
 

Steve Jones

Steve Jones Scale Modelling Site
Joined
Apr 27, 2018
Messages
6,698
Points
113
Location
Plymouth
First Name
Steve
High quality work Jim. Wonderful attention to detail. There is more to come!? You are spoiling us ;) :thumb2: :cool:
 
Top