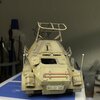
Tim’s Sd.Kfz 263 started Autumn 2014

adt70hk

I know its a bit sad but I like quickbuild kits!!!
SMF Supporter
Joined
Sep 4, 2019
Messages
9,480
Points
113
First Name
Andrew
Well, this thing is really giving me the hump now…….not only is detail painting really hard because there are so many sticking out bits making it really fragile, but this just happened!

Remember me saying why I abandoned this build seven years ago…..I lost a rear hatch door, couldn’t find it, then got angry with it and stuck it on the shelf of doom…... I stripped the then man cave twice but it never appeared. Nothing rattled when I shook the model violently so it hadn’t got inside……so as you can see from the start of the thread when I restarted this build I scratched and fitted a new one.

Well, I’ve been unable to get on it much in the last couple of weeks due to a bad RA flare than made my knuckles swell like a cage fighter…..

Started the detail painting this morning. I was doing the wheel brake hubs, holding it in various orientations to get at everything and guess what….

The missing bloody hatch fell out of the inside……
View attachment 436456
Here it is……I am absolutely amazed….missing for six years and never moved when I shook the build during the searches…..
Well it’s not going back on after the effort of scratching a replacement, even if I have missed off the closing flange!

Must be some sort of record for a missing part! I think it’s time for a cuppa and a calm down!
Now that is bad luck......
 

Jim R

SMF Supporter
Joined
Apr 27, 2018
Messages
13,695
Points
113
Location
Shropshire
First Name
Jim
Hi Tim
You found the kit door - I shouldn't laugh but .... The Carpet Monster put it inside when you were sleeping at night.
Scratched door looks fine.
Measuring using dividers is a great idea. Much better than trying to get my ruler into awkward places and then read it. I rather like the sanding board too. Like so many ideas it's obvious when you see it.
Jim
 

Tim Marlow

Little blokes aficionado
SMF Supporter
Joined
Apr 27, 2018
Messages
16,726
Points
113
Location
Somerset
First Name
Tim
Hi Tim
You found the kit door - I shouldn't laugh but .... The Carpet Monster put it inside when you were sleeping at night.
Scratched door looks fine.
Measuring using dividers is a great idea. Much better than trying to get my ruler into awkward places and then read it. I rather like the sanding board too. Like so many ideas it's obvious when you see it.
Jim
Worth a laugh Jim, I certainly did (when I stopped swearing) :tongue-out3: The carpet monster is in for a shock when he tries to visit his stash though, I moved two years ago LOL…..
Glad you liked the scratched door. I’ve used the divider trick for years and years, but have never seen it used elsewhere, so passed it on hoping someone would find it useful. Same with the sanding board. I like simple and obvious, suits my view on life LOL………..
 

Allen Dewire

Proud Rabble Member
SMF Supporter
Joined
Apr 27, 2018
Messages
4,105
Points
113
Location
Bamberg
First Name
Allen
Evening Tim,

That's always the way these things go. I don't worry about the carpet monster as I don't have any carpets. I worry about the other modelling problem that plagues the masses. It's called Marlow's Murphy's Law.............The part flies or falls in the model. You turn it all around and upside down, shake the hell out of it and.........nothing moves or comes out.....Doesn't happen very often, but :poop: happens!!! Your story gave me a really good chuckle too my friend. Been there, done that and never got a T-shirt either....................

Prost
Allen (Ret.)
 

JR

Member of the Rabble and Pyromania Consultant
SMF Supporter
Joined
May 26, 2015
Messages
17,275
Points
113
Location
lincs
First Name
John
Missed the start so apologies Tim .
Glad to see you write all over the instruction with ticks and notes. As for finding the hatch after all the effort and time, well it had to happen. Still shows you can still scratch well .
Must feel odd building something like this these days .
 

Tim Marlow

Little blokes aficionado
SMF Supporter
Joined
Apr 27, 2018
Messages
16,726
Points
113
Location
Somerset
First Name
Tim
Missed the start so apologies Tim .
Glad to see you write all over the instruction with ticks and notes. As for finding the hatch after all the effort and time, well it had to happen. Still shows you can still scratch well .
Must feel odd building something like this these days .
Nothing to apologise for John. Yep, I always make notes on the instructions. It seems the logical place to do it. As to that hatch….I’m still amazed!
It does feel a little odd. I’d forgotten how awkward they are to hold. Mind you, they don’t all have this many bits sticking out….it’s like an armoured porcupine. I did “big” armour like this for a few years before I joined Milmod. By the time I joined that site i was mostly making 1/48 aircraft, then back on to the little guys. In between I have done large scale figures and busts, along with a couple of cars and motor bikes. What would feel really weird now is scratch building 4mm railways stuff. That’s something I haven’t done since I returned to the hobby seven years ago. I think this was the third or fourth kit I built after restarting modelling.
 

grumpa

SMF Supporter
Joined
Jan 14, 2015
Messages
4,690
Points
113
First Name
Jim
Very nice work so far Tim, I built the old Tamiya version many years ago, it lies in obscurity in the attic...poor thing.
I should take her out and spruce her up a bit and put her out, maybe over the winter.

I've always loved the big German "wheelers" from WW2 especially this one.
Will keep an eye on;)

Jim.
 

Tim Marlow

Little blokes aficionado
SMF Supporter
Joined
Apr 27, 2018
Messages
16,726
Points
113
Location
Somerset
First Name
Tim
Very nice work so far Tim, I built the old Tamiya version many years ago, it lies in obscurity in the attic...poor thing.
I should take her out and spruce her up a bit and put her out, maybe over the winter.

I've always loved the big German "wheelers" from WW2 especially this one.
Will keep an eye on;)

Jim.
Thanks Jim. I always liked the look of this version as well. It’s a great kit, but is actually quite fragile to work on because of the extensive surface detail. I’m almost at the end of the detail painting stage, and will have to weather it soon. I’m not going overboard with the dust though, so it will probably just get a light dusting of pastel chalks and some desert pigments.
 

Tim Marlow

Little blokes aficionado
SMF Supporter
Joined
Apr 27, 2018
Messages
16,726
Points
113
Location
Somerset
First Name
Tim
Not posted on this for a while because I had a bad RA flare and couldn’t model for a couple of weeks. Still, onwards and upwards…..I have now completed the detail painting and done a bit of grubbing up with pastel chalks…..
96C403A6-980C-422C-ADA2-D9016A67BFDB.jpeg
2396301F-1FD1-45E1-BF43-5B97C7244CB5.jpeg
A549B7C7-512B-4B60-8931-55F0AA9FE527.jpeg
1764F6F4-9DBC-4D85-8EA4-AEBE90ED6FAE.jpeg
2E6B389B-7A0C-4EAF-ABE4-661EA436B339.jpeg
B3E3A86C-6D1B-42D5-BAF4-8E06705F1998.jpeg

….and these are the bits that fell off……
2C7E387C-5466-4A04-8F56-2BE799A8DC89.jpeg

Some of the pictures show the effect more clear than others….

This thing is too fragile for much more dusty work…..I’m not using pastels or pigment underneath because it simply isn’t visible when she’s on the shelf. I’ll probably just complete the assembly now and call that it!

Hope you like it, nearly there now and hopefully not that long before she’s all done……
 

Tim Marlow

Little blokes aficionado
SMF Supporter
Joined
Apr 27, 2018
Messages
16,726
Points
113
Location
Somerset
First Name
Tim
Oh, and I will finish the metal bits as well…..if you see anything I’ve missed please sing out!
 

Tim Marlow

Little blokes aficionado
SMF Supporter
Joined
Apr 27, 2018
Messages
16,726
Points
113
Location
Somerset
First Name
Tim
Finally finished the big pig…….

97BB191F-17F7-4D13-9113-99C161C21B2B.jpeg
B9B3A2B6-A190-4B92-8FCF-92B8082CAB03.jpeg
C4A0FE86-9C35-4256-9282-A2385C892CC2.jpeg
DFA824F4-8680-4B36-8A36-30D789A7CB91.jpeg
28C57C87-E6D4-4C40-B380-8012D7C43DF2.jpeg
8041E7AB-61A5-4402-B89C-700AE096D93A.jpeg
10346078-E3FB-4CE4-A9B0-58FA3270BA2E.jpeg
A6980D98-44E9-42DD-9877-C86DDE3A3A0A.jpeg
That’s the all around shots. The finish has been bleached out a little, so I took some close ups to try and show the finish I got in a little more detail…
94409D39-4148-4814-9D04-B6344A7EF2E4.jpeg
E5411928-45D6-4283-B801-35060DA4E9E6.jpeg
E929C493-899D-493F-87E1-FBF4DC2CF617.jpeg
3BD65529-70A7-4A33-8F82-9E7C16BA8A32.jpeg
Shows it a little better I think. It also shows that the replacement hatch door fits in pretty well.
Over all, I’m quite happy with her now. I can see bits that could be improved, but I got fed up sticking bits back on LOL….I’ve also lost a bit of my weathering technique skills because I haven’t used them for quite a while.
Hope she passes muster!

Thanks to this GB, it got her over the line after so many years……back to my comfort zone now……
 

Tim Marlow

Little blokes aficionado
SMF Supporter
Joined
Apr 27, 2018
Messages
16,726
Points
113
Location
Somerset
First Name
Tim
Strikes me that some might be interested in what I’ve used to finish her….
basically I completed the basic paint in Matt varnish, then broke out these things….
78BC6DC8-05E7-4EEF-A655-28A819F40FD9.jpeg
Pastel chalks…..great for varying a finish as they subtly tint a Matt surface……not so good if you handle your stuff a lot though, they wear off and subsequent varnishes can obliterate them. Very fine textured, they stick well to Matt finishes…..the fine Emery paper is used to grind them up before use.

BCD98EC8-0253-42C3-8335-CC6AECD72DC5.jpeg
Cares weathering powders…..I’ve had these since Pontius was a pilot, bought well back in my railway days at least twenty five years ago….……they were around many years before Mig et al reinvented the wheel. They are coarser than the pastels, but not huge grained like the modern pigments. It means they are more in scale for dust and rust effects. They also stick well to a Matt surface so don’t need additional fixative unless you are going to handle your toys a lot….unfortunately I don’t think they are still in production anymore…..
I do have modern Mig pigments, but save them for really heavy deposits….

Hope this is of interest….
 

AlanG

Moderator
Staff member
Moderator
SMF Supporter
Joined
Dec 2, 2008
Messages
7,485
Points
113
Location
Scotland
First Name
Alan
I've looked into getting some pastels before and was told to get a metal fine tea strainer to 'grind' down the pastels into a powder. I've used pastels before for exhaust stains but as you say. It can become 'lost' when a varnish is applied.
 
Top