Caustik Filth
SMF Supporter
Keep on the build and you can call me whatever you like me ol' mucker....

Coolthis opens up a whole new level of modeling ! I'm eager to pursue this technique, not as difficult as I'd always assumed.
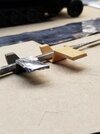
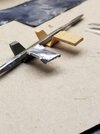
What you made looks great, like I said it’s a simple shape so ideal for a first attempt, and you seem to have nailed it. If you want more strength you can also use brass, for example to replace an over-thick kit part.Thank You Jim !Hi Ron
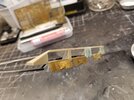
Damage looks good. I have seen Jakko's idea of replacing mudguards and the like with pewter sheet used very successfully. The late Simon T used pewter sheet a lot.
Jim
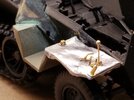
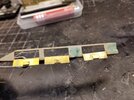
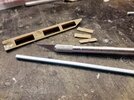
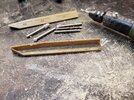
Thanks Richard that is an interesting technique that I will definitely try, perhaps with the side storage lockers on this build !Hibernation did you say Ron? I've resurrected some of my projects too. Mean interior add ons there and nice fender benders. One trick I do is using a large bur on the drill I bounce off edges and gorge deep wedges on fender surfaces then sanding and applying wet cement to create soft damage to thin metal. This way I don't have to scratch the whole fender.
Cheers,
Richard
Thanks Paul ! I'm posting today's work, hopefully it will have your favor !Ron,
It is a very useful item to have in the spares box I have used it to great effect in previous builds and as you rightly said it isn't as hard as you would think. Which you have shown to great effect.
Thanks Jakko yep I see where a lot of finesse and developed technique are needed with this type of work, hopefully I will get there. I do have the desire to pursue this new skillset !Cool
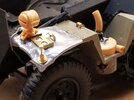
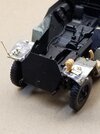
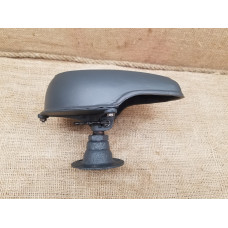
You mean the headlight? The Notek light is the one with the coal scuttle on top:the Notek light
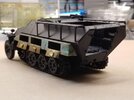
I don’t have an extensive library on this vehicle, but from a bit of browsing it seems the cable ran much as you have it, except that instead of bending towards the back under the mudguard, it went vertically down along the armour plate and then under, towards the centreline of the vehicle.generally confused me , regarding the routing of the supply cable. I (think) that my guesstimate is okay enough.
You mean the headlight? The Notek light is the one with the coal scuttle on top:
Uhuun
I don’t have an extensive library on this vehicle, but from a bit of browsing it seems the cable ran much as you have it, except that instead of bending towards the back under the mudguard, it went vertically down along the armour plate and then under, towards the centreline of the vehicle.
Also holds true for front line repair units I should think Jakko?Restored vehicles are always suspect, if you ask me. You never know what shortcuts, substitutions or misunderstandings the restorer took/made/had, so much better to look at photos of the vehicle in real use, or at the factory.


For FULL Forum access you can upgrade your account here UPGRADE