Zvezda 1/35 BT 5 TANK

JR

Member of the Rabble and Pyromania Consultant
SMF Supporter
Joined
May 26, 2015
Messages
17,275
Points
113
Location
lincs
First Name
John
Hi.
While waiting for Bob's group build to start and waiting for some paint to dry on the Bike dio I decided to crack on with some more from the stash
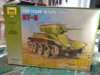
First off I drew out a Hobby Boss 1/35 Russian .
2019_2.jpg
Once the box was opened I began to have my doubts. 2019_3.jpg

2019_4.jpg2019_5.jpg
2019_6.jpg
2019_7.jpg

As you can see , some very small parts, even with an optovisor it look daunting. Even section 2 , just those small pins proved to be troublesome, as to the next part of section 2 those wheels, with two very small locating pins was enough. I went on to try the tracks, couldn't see to get the pins in, and then they didn't go in easily. That was it, pack it up and put it back along with the other Hobby Boss

2019_8.jpg

Don't like to admit defeat but not worth getting upset about it, I just can't manage those Hobby Boss.Too detailed and small parts for me.
Really wanted to build them as part of my complete WW2 Russian and pre war armour.

Out with the Zvezda, a much more simpler model, with those wrap around tracks, as haven't any Fruils.

2019_12.jpg

Very uncluttered instructions, a bit too plain at times.
in two hrs I had this done.

2019_13.jpg

Some history tomorrow if any one is interested.
Tickets from Mrs Jones Management.
John.
 

Attachments

  • 2019_10.jpg
    2019_10.jpg
    136.4 KB · Views: 5

Jim R

SMF Supporter
Joined
Apr 27, 2018
Messages
13,696
Points
113
Location
Shropshire
First Name
Jim
Hi John
No point in struggling. Some manufacturers love to use 10 parts when 3 would do.
This looks a nice kit. Building something Russian will make a nice change :smiling5:

Jim
 

Steve Jones

Steve Jones Scale Modelling Site
Joined
Apr 27, 2018
Messages
6,698
Points
113
Location
Plymouth
First Name
Steve
Looking forward to this one mate. Not many wheels though :smiling2: :cool: :thumb2:

I have a book all about the BT. I have dropboxed it over to you
 
  • Like
Reactions: JR

Dave Ward

Still Trying New Things
SMF Supporter
Joined
Apr 27, 2018
Messages
8,625
Points
113
Location
South Gloucestershire
First Name
David
John,
nice! The BT series of tanks are an attractive range - never too sure of the wheels OR tracks suspension!
Dave
 
  • Like
Reactions: JR
D

Deleted member 7181

Guest
I've just been up into the loft and got the emergency chairs out. We don't want to run out of seats gain.
 

JR

Member of the Rabble and Pyromania Consultant
SMF Supporter
Joined
May 26, 2015
Messages
17,275
Points
113
Location
lincs
First Name
John
Thanks Jim, Steve ,Dave and Andy
:upside:
 

JR

Member of the Rabble and Pyromania Consultant
SMF Supporter
Joined
May 26, 2015
Messages
17,275
Points
113
Location
lincs
First Name
John
Just start the front and came a cropper. Stud snapped off, because it was over right.Redrilled it out and found a section of plastic covered wire
IMG_20191130_152856936_HDR.jpg

IMG_20191130_152912741.jpg
Section drilled out.

IMG_20191130_152946473.jpg
The snapped stud being removed!
IMG_20191130_154241421.jpg

C10 is the problem ( well the whole assembly is for me I just can't imagine how they should fit :cold-sweat:)

IMG_20191130_154305349.jpg
I can't see if this is the correct way for C10 to be .The drawing looks as if I'm right, but I don't want to mess it up.
So any help really appreciated.
John .
 

Fernando N

Aviation fan and the Roadrunner, meep meep!
SMF Supporter
Joined
Apr 27, 2018
Messages
1,889
Points
113
Location
Almere, Netherlands
First Name
Fernando
Nice and simple indeed John, I built a BT-7 from them once and construction was straight forward.

Seems the c10 bit is a suspension part to connect the first road to the idler wheel, maybe this pic can help you see how the wheels are meant to end up, it’s only the other side:
1575133652374.png
Decals were rubbish on mine, hope yours are better.
 
  • Like
Reactions: JR

Steve Jones

Steve Jones Scale Modelling Site
Joined
Apr 27, 2018
Messages
6,698
Points
113
Location
Plymouth
First Name
Steve
From what I can tell John your C10 is on its leading edge. You need to turn it another 90 degrees so its flat and the bend is on the L/H side. This will allow C12 to lie flat on top of it with its end on top of the other part of the boggie. Also the long nut on top of the other bit of boggie needs to attach to the moulded part on the hull wall. Should have stuck to German tanks mate :smiling5: :cool: :thumb2:
 
  • Like
Reactions: JR

Dave Ward

Still Trying New Things
SMF Supporter
Joined
Apr 27, 2018
Messages
8,625
Points
113
Location
South Gloucestershire
First Name
David
John,
a bit vague!bt05 st.jpg
These are from the Italeri instructions - looking at the right hand assembly - part 10C passes through the hole in 8C, and locates in the hole in 3C/4C. Part 12C round stub sits on 10C, and the other ( square ) end sits on top of 3C/4C - I think! The other side is a mirror..............
Dave
 
  • Love
Reactions: JR

Jakko

Way past the mad part
SMF Supporter
Joined
Apr 28, 2018
Messages
10,737
Points
113
First Name
Jakko
Seems the c10 bit is a suspension part to connect the first road to the idler wheel
I think it’s part of the steering mechanism. Remember BT tanks could be driven without their tracks, in which case the front set of wheels steered like in a car.
 

Fernando N

Aviation fan and the Roadrunner, meep meep!
SMF Supporter
Joined
Apr 27, 2018
Messages
1,889
Points
113
Location
Almere, Netherlands
First Name
Fernando
I think it’s part of the steering mechanism. Remember BT tanks could be driven without their tracks, in which case the front set of wheels steered like in a car.
Ah yes forgot about that, thanks Jakko.

Steering mechanism just like a WWII truck is a better match looking at the parts, sorry John..:rolling:
 
  • Like
Reactions: JR

JR

Member of the Rabble and Pyromania Consultant
SMF Supporter
Joined
May 26, 2015
Messages
17,275
Points
113
Location
lincs
First Name
John
Morning gents, Fernando ,Steve, Dave, & Jakko thank you for the help.
With Steve and Dave's kind input I think I have the right angle of that part. Unfortunately I seem to have trouble understanding some drawings in kits.

IMG_20191202_113252064.jpg

This appears to be correct, if any of you could confirm I can carry on , thanks again for your help. Much appreciated.
John.
 
D

Deleted member 7181

Guest
Looking at the diagrams above, that's how I'd align it John. Maybe a few degrees either way depending on how it lines up to the other part (C12), but that looks close enough for a starting point.
 
  • Like
Reactions: JR

JR

Member of the Rabble and Pyromania Consultant
SMF Supporter
Joined
May 26, 2015
Messages
17,275
Points
113
Location
lincs
First Name
John
Thanks Andy I' ll and have a go:thumb2:
 

Dave Ward

Still Trying New Things
SMF Supporter
Joined
Apr 27, 2018
Messages
8,625
Points
113
Location
South Gloucestershire
First Name
David
John,
some of the drawings can be a bit vague/confusing - add to that the likes of Dragon proof reading, and you can end in a mess!. I spent several years creating engineering drawings, and when 3D CAD developed - I also did assembly drawings, and the technical text to accompany them. I can see the shortcomings of many instructions! All I do is sit there, and dry fit the bits every which way they can be! Eventually the correct way will be found!
Dave
 
  • Like
Reactions: JR

JR

Member of the Rabble and Pyromania Consultant
SMF Supporter
Joined
May 26, 2015
Messages
17,275
Points
113
Location
lincs
First Name
John
John,
some of the drawings can be a bit vague/confusing - add to that the likes of Dragon proof reading, and you can end in a mess!. I spent several years creating engineering drawings, and when 3D CAD developed - I also did assembly drawings, and the technical text to accompany them. I can see the shortcomings of many instructions! All I do is sit there, and dry fit the bits every which way they can be! Eventually the correct way will be found!
Dave

Dave part success ! the steering parts fitted perfectly , then it went a bit pear shaped. Those front light parts didn't fit , again the crappy drawing defeated me. I tried them every and each way, if they fitted the front track guard didn't , so left them off.
2019_9.jpg

2019_10.jpg

the light fell off as soon as I tried to slip into place, it just wouldn't fit.

2019_8.jpg
Normal glue every where shot :cold-sweat:.


2019_7.jpg

Wheels on, tracks , well I don't like these one bit, cheap and nasty, hardly fit together I can see this turning into a wreak !

John , some what p****d off .
 

Steve Jones

Steve Jones Scale Modelling Site
Joined
Apr 27, 2018
Messages
6,698
Points
113
Location
Plymouth
First Name
Steve
Step away mate. Theres nothing there that cant be fixed. Have another look at it tomorrow.

I can see those tracks are going to be a bugger to bend around the wheels. The Master from t'north may be able to come up with a good idea on how to bend them around the wheels but I fear it may involve strong glue, clamps and a lot of patience.
 

JR

Member of the Rabble and Pyromania Consultant
SMF Supporter
Joined
May 26, 2015
Messages
17,275
Points
113
Location
lincs
First Name
John
Step away mate. Theres nothing there that cant be fixed. Have another look at it tomorrow.

I can see those tracks are going to be a bugger to bend around the wheels. The Master from t'north may be able to come up with a good idea on how to bend them around the wheels but I fear it may involve strong glue, clamps and a lot of patience.
Hi mate, really fed up with this, so much so that it nearly end up in the bin. Those internal things just won't fir, and as they tracks are beyond me I think a burnt out wreak, any photos would be helpful as I'm starting to want to go this way in future. Using a photo and modelling from it.

As for the track though about using some heat ! ( NOT FIRE )
 

Steve Jones

Steve Jones Scale Modelling Site
Joined
Apr 27, 2018
Messages
6,698
Points
113
Location
Plymouth
First Name
Steve
Here is link for a walk around of a BT 5

HERE

Looking at those tracks again - if you cut each link in half, (or did they come as single links and you have stuck them all together?) to make a single link, that go around the front and rear wheels, and then reglue each single link one at at a time in place, that might do it with a bit of filler/pigments???
 
Top