Rotor blade question.

Waspie

SMF Supporter
Joined
Mar 13, 2023
Messages
2,480
Points
113
Location
Portland - Dorset
First Name
Doug
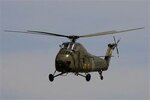
As most folk are aware, rotors are not rigid. When the rotors are not spinning they droop! When rotating they are either straight when power is not applied. However when power is applied, Collective lever raised for lift, the blades 'cone', ie they are bending upwards.
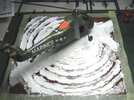
My question to the forum is; How do you achieve the droop or upwards bend if in flight on your models. The rigid plastic has to be bent to achieve this. What I don't want to do is turn the electric paint stripper on them and have five piles of molten plastic!!!! :worried: My initial thought was soak in hot water and lightly bend until I get the correct amount of droop!
Any suggestions gratefully received.:thumb2:
 

Jim R

SMF Supporter
Joined
Apr 27, 2018
Messages
13,729
Points
113
Location
Shropshire
First Name
Jim
Make a simple jig to hold the rotor in the curve you want. Put the rotor in very hot water. Take out rotor, put in jig and pour over cold water. You may have to vary the heat, increase the time and repeat the process. I'd make the curve of the jig slightly more curved than you want as the rotor may spring back slightly??
It may work. Good luck.
 

rickoshea52

SMF Supporter
Joined
Dec 20, 2011
Messages
3,973
Points
113
Location
North West
First Name
Rick
If you’re referring to the Airfix Sea King kit the blades are moulded with a droop.
If you want them straight or with the cone from collective input then hot water might help and reshape by holding at the blade root then drawing your fingers along the blade length and gently applying force to reverse the droop. This may take some time.
 

eddiesolo

It's a modelling time!
SMF Supporter
Joined
Jul 2, 2013
Messages
11,070
Points
113
First Name
Si.
Never use a flame or high heat on styrene, it goes from soft to melted in a nano-second.

As the guys have mentioned, hot water is a fave for bending-leave for a while, take out and gently bend or, as Jim points out using a jig would mean you could achieve the right shape. You can also use a hairdryer to warm up, do not leave in one spot but play over the whole area and then shape with your fingers. Do one and when happy, repeat until you gat the shape for all the blades.
 

Waspie

SMF Supporter
Joined
Mar 13, 2023
Messages
2,480
Points
113
Location
Portland - Dorset
First Name
Doug
Make a simple jig to hold the rotor in the curve you want. Put the rotor in very hot water. Take out rotor, put in jig and pour over cold water. You may have to vary the heat, increase the time and repeat the process. I'd make the curve of the jig slightly more curved than you want as the rotor may spring back slightly??
It may work. Good luck.
Ah ha, I was on the right tack with hot water. The jig is something I can work on, shouldn't be too difficult. Thanks for that.
If you’re referring to the Airfix Sea King kit the blades are moulded with a droop.
If you want them straight or with the cone from collective input then hot water might help and reshape by holding at the blade root then drawing your fingers along the blade length and gently applying force to reverse the droop. This may take some time.
The blades, all ten of them appear quite straight. I'm assuming five spread and five folded. No way would I scratch build a forth road bridge for a folded version!!!!
 

Waspie

SMF Supporter
Joined
Mar 13, 2023
Messages
2,480
Points
113
Location
Portland - Dorset
First Name
Doug
Bet you can guess why I mentioned that...yep, numb-nuts here has tried it.
During my early days making Airfix kits I did a lot of experimenting with heat!!!!!
(Thats teen talk for setting fire to them!!!!!)
Yeah - they're very reactive to naked flames!!!!!
Hopefully - hopefully I have grown out of my pyro mania stage!!!!!
 

rickoshea52

SMF Supporter
Joined
Dec 20, 2011
Messages
3,973
Points
113
Location
North West
First Name
Rick
The blades, all ten of them appear quite straight. I'm assuming five spread and five folded.
I’m sure there are nine blades in the kit. Only four blades fold so the fifth blade has no plumbing. I had a go at detailing the rotor head on an Airfix Sea King HC4, they’re the same as the HAR3.
Have a look here - https://www.scale-models.co.uk/threads/rick’s-airfix-sea-king-hc4-1-72-operation-mikado-falklands-war.38941/
 

Airborne01

SMF Supporter
Joined
Mar 30, 2021
Messages
3,162
Points
113
Location
Essex
First Name
Steve
Sadly, that was my poor attempt at humour!!!!!! I'll sit on the naughty step for a minute for that one!!!! :smiling5: :smiling5:
You think your attempt was bad - I went into shock at the mention of the word 'droop' ...
Steve
 

Jakko

Way past the mad part
SMF Supporter
Joined
Apr 28, 2018
Messages
10,809
Points
113
First Name
Jakko
The simple way to bend rotor blades is with your fingers. Hold a blade between thumb and index finger of both hands, close together and near the hub, then bend it carefully and just a small amount. Move outward by maybe 5 to 10 mm and repeat. You probably won’t need to bend the outer third or quarter or so for the blade to look good.

Though it doesn’t show it well, here’s the Hughes 500 I’ve been working on recently:

9d831030-2904-45b2-9a73-d323d423a8a5-jpeg.476863


If you look closely at the rotor blades, you can see lighter areas on each of them, which is where I bent them in the way I attempted to describe above.

BTW, since your kit seems to have spare blades (for folded and non-folded positions), you can even practice whichever technique you choose on some you’re not going to use before doing it for real on the others.
 

Waspie

SMF Supporter
Joined
Mar 13, 2023
Messages
2,480
Points
113
Location
Portland - Dorset
First Name
Doug
The simple way to bend rotor blades is with your fingers. Hold a blade between thumb and index finger of both hands, close together and near the hub, then bend it carefully and just a small amount. Move outward by maybe 5 to 10 mm and repeat. You probably won’t need to bend the outer third or quarter or so for the blade to look good.

Though it doesn’t show it well, here’s the Hughes 500 I’ve been working on recently:

9d831030-2904-45b2-9a73-d323d423a8a5-jpeg.476863


If you look closely at the rotor blades, you can see lighter areas on each of them, which is where I bent them in the way I attempted to describe above.

BTW, since your kit seems to have spare blades (for folded and non-folded positions), you can even practice whichever technique you choose on some you’re not going to use before doing it for real on the others.
Now that's a grand plan! :thumb2:
 

rtfoe

SMF Supporter
Joined
Apr 29, 2018
Messages
7,509
Points
113
Location
Malaysia
First Name
Richard
The simple way to bend rotor blades is with your fingers. Hold a blade between thumb and index finger of both hands, close together and near the hub, then bend it carefully and just a small amount. Move outward by maybe 5 to 10 mm and repeat. You probably won’t need to bend the outer third or quarter or so for the blade to look good.

Though it doesn’t show it well, here’s the Hughes 500 I’ve been working on recently:

9d831030-2904-45b2-9a73-d323d423a8a5-jpeg.476863


If you look closely at the rotor blades, you can see lighter areas on each of them, which is where I bent them in the way I attempted to describe above.

BTW, since your kit seems to have spare blades (for folded and non-folded positions), you can even practice whichever technique you choose on some you’re not going to use before doing it for real on the others.
Jakko they still look bent downwards at the tips which is not what is needed when showing flight so I guess it needs bending all the way. Doing the "jiggy with it" as mentioned in hot water is an option. Both are applicable but if you're impatient and heavy handed when bending then expect some snapping or breakage depending on the rigidity of the plastic. Try bending the sprue first to see how pliable the plastic is, then work on the prop.

Cheers,
Wabble
 

rtfoe

SMF Supporter
Joined
Apr 29, 2018
Messages
7,509
Points
113
Location
Malaysia
First Name
Richard
Trying to get them to look like this which doesn't have a significant upward curve depending on the material its manufactured with...
h0129.jpg
Mine aren't better than yours Jakko due to the length they droop slightly at the edge too.
h0128.jpg
It is still quite a chore if the rotors are molded in a downward droop as in the case of the Italeri UH34 but if the Seaking blades are molded straight then half the battle is won. Good luck.

Cheers,
Wabble
 

Jakko

Way past the mad part
SMF Supporter
Joined
Apr 28, 2018
Messages
10,809
Points
113
First Name
Jakko
Jakko they still look bent downwards at the tips which is not what is needed when showing flight so I guess it needs bending all the way.
Not when in flight, no, but at least my model will show the helicopter at rest (in part because I couldn’t find a good figure to represent TC :smiling3: ) with its rotor not spinning, and for that, bending it carefully like I described works very well. For in flight, you would need to angle the whole blade upwards, which may be easy or hard depending on how the rotor head is intended to be put together.
 

langy71

SMF Supporter
Joined
Apr 27, 2018
Messages
1,559
Points
113
Location
Nottingham
First Name
Chris
Some good tips here which I'll be sure to follow when i finally make a start on the Bell Kiowa I grabbed a while back... :thumb2:
 

Waspie

SMF Supporter
Joined
Mar 13, 2023
Messages
2,480
Points
113
Location
Portland - Dorset
First Name
Doug
There is an exception to the droop on rotor blades.
If you look at the Westland Lynx/Wildcat as is now! The blades when stationary are straight and angled upwards. Due partly due to the blade construction and partly due to the rigid rotor head.
The Wessex, Sea Kings have what is called semi or fully articulated rotor heads. (The have hinges in both vertical and lateral axis). Won't go into helicopter theory of flight!! Advancing and retarding blah blah blah!!! (Mainly because I have forgotten most of it :confused: ).
 
Top