1/32 Albatros W.4 (late) Floaty Conversion

Jim R

SMF Supporter
Joined
Apr 27, 2018
Messages
13,754
Points
113
Location
Shropshire
First Name
Jim
Well Allen, what can I say that hasn't been said. The quality of your work on this is truly impressive. Great scratching. Railway wagon is looking the part. (Those RP cutters are definitely worth the money). I hope the hex decals go on ok. They are a very big part of the overall look.

Good luck in the comp.
 

Allen Dewire

Proud Rabble Member
SMF Supporter
Joined
Apr 27, 2018
Messages
4,105
Points
113
Location
Bamberg
First Name
Allen
Another good evening from the Mole,

Paul E, Rick, Steve, Paul, Mick - Thank you so much for the nice comments and interest, guys. As for the comps, Sunday @10:00, when they open the room up, I'll have a look and see. I do appreciate the votes of confidence!!!...

Mr. Merryweather - Thanks my friend! You know old folks are really slow at the bench. I can't believe I've (almost) finished two builds this year either!!! Nothing epic here Neil, just total stupidity on my part, but you know that!!!...

Jimbo - RPToolz cutter and punch sets are really great and in this case, my most valuable asset for the flatcar. I too hope the decals work out. I wanted to paint the base coat on the wings for them yesterday, but with 20 kph winds (with gusts up to 40 kph), I couldn't open the window for the spray booth hose. Thank you my friend and have you found a 1/35 K. Zeta-Jones figure yet???...

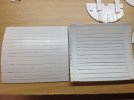
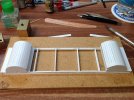
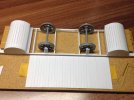
No rest for the weary, as the saying goes...I finally managed to finish the flatcar build, for the most part. A couple of minor fixes and she will be ready for some paint. I started with the wheel covers,

IMG_4106.JPG
I cut the strips in half, as thinner strips would curve better than thicker ones. Glued them to the wood slats and let them dry awhile. I removed the tape and and did a test to see how they flexed,

IMG_4104.JPG
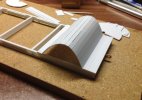
Looks pretty good to my eyes. The gap between the slats are not as bad as in the pic. They have to be formed around the side wall frames. I modded the frames with extensions that go into the flatcar frame sides to keep them vertically straight, and for a better glue point later,

IMG_4105.JPG
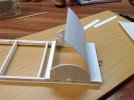
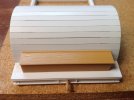
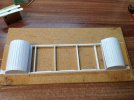
I also added the bottom cross slat for the flat face of the cover. After they dried, I glued it to the other cover and let that dry a bit too. Now it was time to see how the wheel covers would Rock 'N Roll over the side walls,

IMG_4107.JPG
It was looking real good until I realized (brain fart) I had mixed up the side walls when I had glued the bottom slat on them. I forgot to mark them as they were made in sets, with a very minimal difference between them...DOH!!! Anyway, I hit them wit some TET and hoped for the best,

IMG_4108.JPG
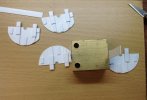
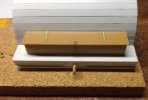
They bent very well and held too!!! The flat faces still need some love and after the glue dries, I can address them. The flatcar had storage boxes on both ends, so I had to make those too. I grabbed some of the leftover seat boards from Italeri's Opel Blitz kits in the stash that wasn't needed. Cut and trimmed them down to size, for this,

IMG_4109.JPG
Nice that they have wood grain on them. You can also see I've added a tow hook, as these flatcars didn't have regular RR buffers and couplings. The later model flatcar used at Zeebrügge did have them. I used a couple of tow cable ends leftover from my Airfix Hetzer kit. I trimmed the backsides to fit against the slats,

IMG_4110.JPG
These looked rather drab and needed some dressing up, like the real ones. Rummaged through the etch set stash and finally found some stuff to use,

IMG_4113.JPG
I don't know if the real ones had 2 or 3 hinges as finding pics of this flat car are very difficult. I went with 2. So here is how we stand as of 3 hours ago with the flatcar,

IMG_4114.JPG
The ends of the cover slats need to be tweaked down to the upper slat to be flush. The wheels are a prob as I have ordered an Italeri dock section with RR tracks, but I don't know how wide apart the rails are. The MiniArt wheels are set to the German standard rail width and have the tubing on them to support the mounting pieces that are hanging. The wheels are able to slide outward on the axles if the Italeri kit's rails are wider than the MiniArt kits rails. I'll cut new tubing if that's the case. The wheel covers and tool boxes are not glued to the frame for the ease of painting. I might glue the boxes to the covers to make it even easier. I'll end up painting the frame with a hairy stick, because I need to shoot the wood slats on it with the hissy. I can't see spending a lot of time masking the frame when there isn't a lot of it visible afterwards...

That's it for the flatcar and it's back to the Albatros Cabane struts. Our weather is supposed to be warm this weekend and calm too. If the wind stays away, I can do a marathon session with the hissy sticks and spray booth...........

Thanks for watching and have a great night!!!

Prost
Allen
 

Allen Dewire

Proud Rabble Member
SMF Supporter
Joined
Apr 27, 2018
Messages
4,105
Points
113
Location
Bamberg
First Name
Allen
We're still going crazy on the Mole!!!....

Truly impressive stuff Sir. You're going from strength to strength.
Thanks Jim! But I'm getting weaker everyday with the pressure on...

Dude1, remarkable work , if I was wearing a hat I'd lift it off .
Thank you Dude 2! Still owe you a PM though...

Fabulous stuff Allen, it's good to see the mojo in full swing!
Thanks to you Buddy, the mojo is flying off the charts!!! Somewhere near Jupiter right now...

Hat off with a triple loop in the air (of the hat, not me :tongue-out2:) while bowing, Sir. ;)
Thank you Andrea, but please be careful with those movements my friend!!! You could land on your forehead...Oh, and congrats on your retirement too!!!...

Small round of applause, looking superb
Too kind Mick!!! And thanks for keeping the noise down as I have no idea what I'm doing...

This is truly an amazing build.
Thanks so much Boss!!! It's not as amazing as your resin Scania conversion though, Ian. Sorry, I still owe you comments too...

Dude,
Outstanding scratchery mate. Keep it going.
Thank you Bro!!! It's going, but the only scratchy here is my head or my butt, as I have no clue whatsoever. Beer's good though...

Ok folks, the crunch is on and I have been really busy at the table and not much time on the forum, to ketchup. My sincere apologies for that...A lot of pics and I'll keep the Bla-Bla short and sweet tonight. Started prepping brass and plastic for the supports for the gorgeous floats.!!! RR flat car got a coat of XF-59 Desert Yellow,
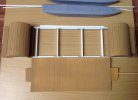
IMG_4120.JPG
Now what to use for the woodgrain? I have a cheap set of acrylic oils from the € 1 store. It has 12 colors, cost € 2.50 and had 2 burnt color tubes in it. An old foam square from my R/C days and a little water,
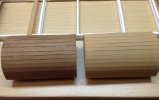
IMG_4122.JPG
Burnt Umber dabbed on and dragged over the surface with the damp foam. Left a great wood pattern, dries quickly and matt....both,
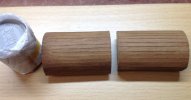
IMG_4123.JPG
I used a 10 ml bottle of paint wrapped in paper towel to keep the surface flat, from the inside, while applying the oils. The rest of the flatcar,
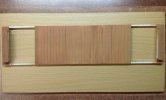
IMG_4124.JPG
Same routine as the wheel covers, but using Burnt Sienna this time. The frame looks a bit wonky in the pic, but it's not. Maybe I should have reversed the color combo on this. Too late now, so I'll just muck it up with some seaweed or darker washes. The 2 together,
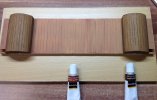
IMG_4125.JPG
Glued the wheels on and gave it try on the Italeri RR tracks platter,
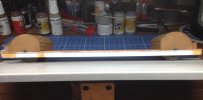
IMG_4127.JPG
Fits fine and the wheels even roll too. I have since painted the frame gray. It only needs detail paint and rust all around. On to the wings,
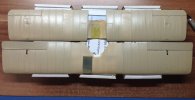
IMG_4128.JPG
I shot them with a coat of XF-57 Buff, mixed with X-22 Gloss, thinned with 40% thinner. Sprayed a coat and saw it wasn't covering very well. So I shot a bit closer and a couple of pieces started getting pools of paint. Big headache, but most of them leveled when they dried. I had to knock a few bigger ones down. They aren't too bad and the decals will cover them up. I found out I had my hissy stick turned down for finer work, adjusted it, and shot a second coat on the wings. It looks funky, but will add to the effect when covered with the decals. Measure 5 times and cut once, was today's theme at the table,
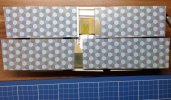
IMG_4129.JPG
Notice the backing paper is white and seems 10 times thicker than the decals. A big pan of warm water, paper towel pieces, Q-tips, tweezers and squeezing my butt cheeks, I went to do the nasty's,
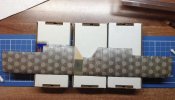
IMG_4130.JPG
What a beatch and nerve wracking job, BUT.......You can see they are on the top wing!!! The decals are a thin, almost a vinyl material and very strong too. The top left wing rear shows just how thin they are...I have to admit they don't tear, even when you pull them with tweezers!!! Once they were on, I rubbed them down with the Q-tips. wet and dry and they snuggled down beautifully. Let them dry a while and then went back to trim off the excess with the sharp blade tip. The bottom wing went easier and after about 4 hours total,
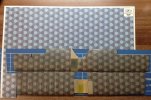
IMG_4131.JPG
The color difference is due to what color you paint the base coat. If I had used white, they would look like the sheet. I went with a warm color base. The nekkid spot on the top wing will be filled in with a small piece behind the rad hole. I hit them with M-Sol on the edges and and raised strut mount surfaces and they stick like glue to the paint. The upper flappies are done too and pre-rigged....

Respect to Lukasz from Lukgraph, as the decals are really superb, once you get the hang of them. I have plenty to finish the fusi top piece and rear wings. Still plenty to do. I made the side supports and drilled into the gorgeous floats for them (Sorry Neil)...Hissy work and much more tomorrow. Thanks for the support and wonderful comments good people. Stress rules and have a good one!!!...3 1/2 days...

Prost
Allen
 

JayCee

SMF Supporter
Joined
Aug 13, 2019
Messages
1,002
Points
113
First Name
John
Excellently done, Allen. I personally think the undercoat you used improves the decal finish. The original looks a bit bland.
John.
 

adt70hk

I know its a bit sad but I like quickbuild kits!!!
SMF Supporter
Joined
Sep 4, 2019
Messages
9,507
Points
113
First Name
Andrew
Allen

My turn to appologise for getting behind. Just had a catch-up. That is simply outstanding work.

Very well done indeed!!

ATB.

Andrew
 

Jakko

Way past the mad part
SMF Supporter
Joined
Apr 28, 2018
Messages
10,839
Points
113
First Name
Jakko
That is really starting to look the part, both the plane and the wagon.
 

minitnkr

Rabble & escape committee member
SMF Supporter
Joined
Apr 27, 2018
Messages
6,724
Points
113
Location
Dayton, OH
First Name
Paul
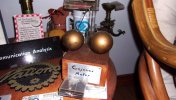
You've been awarded the Brass Cajones for taking on this difficult project. The Cajones Award was from my remote support days. The award was prominently displayed on top of the recipients monitor along with an official looking certificate explaining the actions taken. The Brass Cajones was the highest award. Below in the plastic box are the Beaver Cajones ( for weasel or whimpie behavior) & the empty hanger for the dreaded No Cajones.
100_3966.JPG
 
Top