1/35 M70A2 Krueger MBT, Desert Storm, 1991

Jakko

Way past the mad part
SMF Supporter
Joined
Apr 28, 2018
Messages
10,797
Points
113
First Name
Jakko
Thanks, all :smiling3: Now all I still need to do to the tracks, is add sand. That will probably happen when I also add some to the rest of the suspension.
 

Jakko

Way past the mad part
SMF Supporter
Joined
Apr 28, 2018
Messages
10,797
Points
113
First Name
Jakko
On closer inspection of photos, I skipped the sand. Instead, I added the tracks to the hull:

47C43C07-E911-4837-B0CB-78A2037A57E0.jpeg

I drilled holes through the links at both ends and used copper wire to pull them together. Originally, the plan was to use strong thread, but my knot-tying skills weren’t up to getting the thread tight enough in the small confines of the suspension and angle of the hull. Copper wire worked well as an alternative, until I saw:—

999CA7DC-4C8A-4A3A-A0E4-5CC6AEBDDD17.jpeg

that the idler wheel gets pulled outward because its mounting is rather weak. In the end, I cut the copper wire again and glued the tracks to the wheels instead:

82F665C9-6847-4D42-8949-6931F74EC128.jpeg
 

Jakko

Way past the mad part
SMF Supporter
Joined
Apr 28, 2018
Messages
10,797
Points
113
First Name
Jakko
Side skirts on:

526C94D9-A9B2-4A03-B11E-03FB6DFEB14D.jpeg

The supports I had built worked well, though the skirts themselves had warped a little since I built them two years or so ago. After straightening them out as much as possible, I glued and clamped them to the hull and all seems to be well.

I also glued the machine gun mount into its turret and its hatches:

7387B132-9EBA-490A-BE20-CABCA480F920.jpeg

The rods that automatically open and close the hatches when the gun rises and drops still need to be painted, of course.

And everything together temporarily, other than the mine plough:

6EE018B4-5740-4A44-AFA6-3F28BE0E4AFE.jpeg

This revealed a minor problem:

D9B63028-6577-4BDE-A974-E9C4B95D9E6B.jpeg

The machine-gun hatch fouls the driver’s hatch. This is most likely a mistake by Dragon, as these are parts I didn’t alter, but it means the gun turret can’t be aimed straight forward when the driver’s hatch is n the 12-o’clock position.
 

adt70hk

I know its a bit sad but I like quickbuild kits!!!
SMF Supporter
Joined
Sep 4, 2019
Messages
9,496
Points
113
First Name
Andrew
Coming on nicely Jakko. Shame about the minor fit issue on the turret.

ATB.

Andrew
 

Jim R

SMF Supporter
Joined
Apr 27, 2018
Messages
13,726
Points
113
Location
Shropshire
First Name
Jim
Hi Jakko
Glad you got the tracks sorted ok. Probably better to have them glued anyway
That hatch issue is odd. Just maybe the hatch couldn't be fully opened when the MG was used??? Can't imagine Dragon getting it so obviously wrong but you never know
Jim
 

Tim Marlow

Little blokes aficionado
SMF Supporter
Joined
Apr 27, 2018
Messages
16,777
Points
113
Location
Somerset
First Name
Tim
Good work on the tracks. Strange issue with the hatches though Jakko. Do actual images of the tank show this as well?
 

Jakko

Way past the mad part
SMF Supporter
Joined
Apr 28, 2018
Messages
10,797
Points
113
First Name
Jakko
I don’t know if it was like that on the real tank, but if Dragon put the driver’s hatch too far back by even half a millimetre, it ends up like this. I suspect that on the real thing, they just clear each other. Or maybe I glued the driver’s hatch at slightly too big an angle rearward.

Another minor problem I noticed was my own fault: I had built a new mine plough mount on the hull, because the M1 Abrams type of course wouldn’t fit. The original has two big eyes on the top corners, which I omitted because I didn’t see what their function was. Yesterday, trying to figure out where the various bits of chain go that are on these ploughs, I worked it out: a chain attaches to each of them. So that meant adding these bits after all:

98D5D1C0-81ED-4690-8FC7-1B7441D17D7E.jpeg

I drilled a hole in a bit of 1 mm thick plastic card, cut and filed the half-round shape around it, then cut it off and glued the eye to the model (after scraping the paint off, of course). Still to be painted to match the rest of the model, naturally.
 

stillp

SMF Supporter
Joined
Nov 17, 2016
Messages
7,220
Points
113
Location
Rugby
First Name
Pete
Would the driver's hatch be open when the gun was in use?
Pete
 

Jakko

Way past the mad part
SMF Supporter
Joined
Apr 28, 2018
Messages
10,797
Points
113
First Name
Jakko
It would probably not be the intention, no. But that’s no reason to not have both open on a model :smiling3:
 

stillp

SMF Supporter
Joined
Nov 17, 2016
Messages
7,220
Points
113
Location
Rugby
First Name
Pete
I'm just wondering if the same issue would exist on the 1:1.
Pete
 

Jakko

Way past the mad part
SMF Supporter
Joined
Apr 28, 2018
Messages
10,797
Points
113
First Name
Jakko
I'm just wondering if the same issue would exist on the 1:1.
So do I :smiling3: I think it probably didn’t, for various reasons.

The concussion from the 50 would seriously ruin the drivers week if hatch left open.
On the real MBT 70, of course, this was a 20 mm cannon with a much longer barrel, that projected a fair amount beyond the driver’s hatch, so that particular problem probably wouldn’t have been as severe:

koblenz.png
 

Jakko

Way past the mad part
SMF Supporter
Joined
Apr 28, 2018
Messages
10,797
Points
113
First Name
Jakko
After a quick paint job for the new eyes (sand colour, wash, then drybrush) they look like they have always been on the model:

737674D9-418C-49A0-BA7A-DCC72EFD9CD2.jpeg

Then the fun with the chains began. Tamiya’s M1A1 instructions say to tie the chain to the model with copper wire, but on the real tank, they were attached with D-clasps. Unfortunately, I don’t have ten such clasps that are small enough, and even if I did, the holes in the plough are too small for them. So, I decided to bend copper wire into an approximation of their shape. First up were the chains on the new eyes, because they would be hardest of all to reach with the plough on the tank:

EC2422C5-70F9-40CB-833D-4617D2C80D38.jpeg713587AA-ACB5-4556-811B-F3B54E395980.jpeg

And everything in place:

C7C2D6DE-68EC-47A5-A71F-20380E896033.jpeg429929F0-C746-4E6A-889D-AFA5D569C3CA.jpegCC72B802-EB1B-42EA-AB45-FEE14DABD027.jpeg

The “dog bone” is loose, I may or may not glue it to the model approximately where it is in the photos — on the real tank it was normally put there when not actively ploughing for mines. Now to find a way to paint these chains without making a mess … they are to be sand colour like the rest of the model.
 

Jakko

Way past the mad part
SMF Supporter
Joined
Apr 28, 2018
Messages
10,797
Points
113
First Name
Jakko
Thanks, fiddly indeed but not quite as neat as I had in mind :smiling3:
 

Jakko

Way past the mad part
SMF Supporter
Joined
Apr 28, 2018
Messages
10,797
Points
113
First Name
Jakko
The plough is now finished, with the chains painted (same base colour and drybrush as the tank), and cables added from copper wire, the Tamiya handle and a bit of thread to tie the handle to the brush guard:

B0AAF2BE-B0BB-41D8-9D40-B9A4F11A2B4D.jpeg

Those cables still need to be painted here, of course. (On the M1, the handle was usually tied to some fixture on the left rear of the glacis plate with a cable or strap of some sort. This seems a likely alternative for an MBT 70-type vehicle.)

Here’s the whole vehicle with those bits painted, finished as far as I’m concerned other than crew and stowage:

E1026BAE-1DCC-475B-82FF-A47CE31C2ABE.jpeg

And said crew and stowage:

30843A17-1633-4747-AF9D-C349042C1878.jpegADD4271D-9799-4F03-829E-822F267B6802.jpeg

The crew is from Master Box, a set of Afghanistan figures, but I put Hornet heads onto them. Most people seem to build Gulf War tanks with crews in standard BDU uniforms, which is generally correct for Desert Shield, but not the ground phase of Desert Storm — tank crews were given nomex (fire-resistant) coveralls and slim tankers’ body armour just before the ground war started. Those are still in use today, so modern figures can be used for Desert Storm as well.

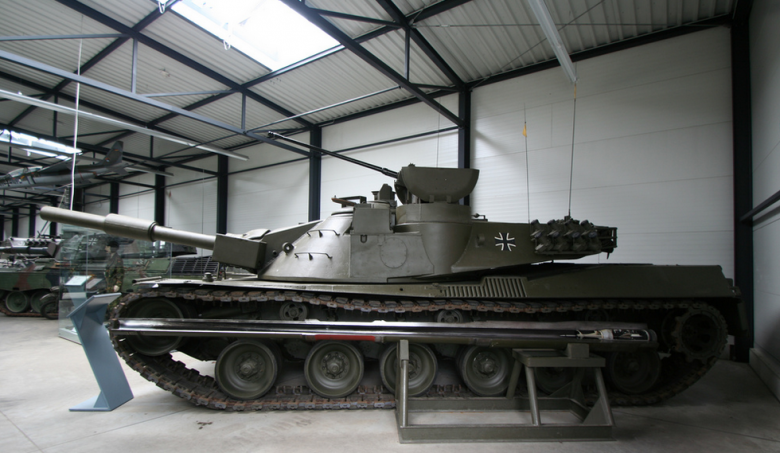
The stowage is from various sources, mainly Tamiya. The roadwheel is from an Italeri Leopard 2 with the bolts cut off and holes drilled to match MBT 70 wheels (ten bolts vs. eight). The style of the wheel isn’t quite the same but the diameter is, so it looks right, I think.
 

adt70hk

I know its a bit sad but I like quickbuild kits!!!
SMF Supporter
Joined
Sep 4, 2019
Messages
9,496
Points
113
First Name
Andrew
Great work Jakko. That really has turned out beautifully.

ATB

Andrew
 

Jakko

Way past the mad part
SMF Supporter
Joined
Apr 28, 2018
Messages
10,797
Points
113
First Name
Jakko
Thanks, I’m quite happy with it myself :smiling3:
 
Top