1/72 Airfix Junkers Ju 52

flyjoe180

Joe
SMF Supporter
Joined
Jan 18, 2012
Messages
12,426
Points
113
Location
Earth
First Name
Joe
I started this kit a while ago, I have been trying to make a dent in the stash. The decals are not usable, I think I will do a silver finish with plain prewar markings. Here is the progress so far.

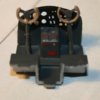
The cockpit/flight deck...

View attachment 57124View attachment 57125

The fuselage halves are together with the cockpit installed...

View attachment 57126View attachment 57127

Wings and tail feathers attached...

View attachment 57128View attachment 57129

The engines are painted and the propellers are ready...

View attachment 57130

This kit is a filler eater...

View attachment 57131

View attachment 59094

View attachment 59095

View attachment 59096

View attachment 59097

View attachment 59098

View attachment 59099

View attachment 59100

View attachment 59101
IMG_0940.JPG

IMG_0941.JPG

IMG_0944.jpg

IMG_0947.jpg

IMG_0955.jpg

IMG_0961.jpg

IMG_0962.JPG

IMG_0974.jpg
 
T

treyzx10r

Guest
Joe that looks like a challenging kit ! I like the tip about the loop antenae thanks for sharing! cheers Trey
 

flyjoe180

Joe
SMF Supporter
Joined
Jan 18, 2012
Messages
12,426
Points
113
Location
Earth
First Name
Joe
Thanks Trey. It is proving to be quite a challenge, perhaps reflected by its vintage. I hope the newer kit by Italeri is a bit neater. Primer is going on today.
 

flyjoe180

Joe
SMF Supporter
Joined
Jan 18, 2012
Messages
12,426
Points
113
Location
Earth
First Name
Joe
Thanks guys. Do you know if the current Airfix Ju 52 is the same old 60s kit or is it a new issue? Because if they are still issuing this one then they need to reduce their price.
 
M

mobear

Guest
remarkable what you have done mate,and good save on the df loops

mobear
 

mossiepilot

A learner learning
SMF Supporter
Joined
Jul 17, 2011
Messages
2,480
Points
48
First Name
Tony
The office looks great Joe, but I don't envy you filling the gaps on all those corrigations.

Keep it up mate, it'll come right.

Tony.
 

flyjoe180

Joe
SMF Supporter
Joined
Jan 18, 2012
Messages
12,426
Points
113
Location
Earth
First Name
Joe
K

Kressy13

Guest
Looking good mate. Will be eager to see it with paint on.

Cheers

Kresten
 
Joined
Oct 17, 2011
Messages
2,186
Points
83
First Name
Aaron
Nice save with the putty joe, Thats a win, i would of given up.

It looks great with a coat of primer on and it seems large for 1/72. nice
 

flyjoe180

Joe
SMF Supporter
Joined
Jan 18, 2012
Messages
12,426
Points
113
Location
Earth
First Name
Joe
Thanks guys. Yeah it is large Aaron, not sure where the heck I'm going to display it.
 

flyjoe180

Joe
SMF Supporter
Joined
Jan 18, 2012
Messages
12,426
Points
113
Location
Earth
First Name
Joe
Bit of a hold up with this as I decide what finish to give it. I'm leaning towards an aluminium look with pre war markings as I have decals for those.
 
Joined
Dec 13, 2011
Messages
434
Points
18
First Name
Michael
Hi Joe, really like this aircraft, looking forward to seeing more, M
 

colin m

Moderator
Staff member
Moderator
SMF Supporter
Joined
Dec 26, 2008
Messages
8,605
Points
113
Location
Stafford, UK
First Name
Colin
I think I built the float plane option when i was many years younger. The one with the huge ring under it, mine detection or something ? Nice to see it built again. Did you manage to recover the ridges after filling. I say ridges because I can't spell corrogated.
 

flyjoe180

Joe
SMF Supporter
Joined
Jan 18, 2012
Messages
12,426
Points
113
Location
Earth
First Name
Joe
Will make a decision soon Michael. Colin, I did recover the ridges, it is all symmetrical and smooth where it should be, and corrugated where it should be. A lot of filling, filing with various shaped files, and sanding. Do not build this kit for a quick build. I am hoping the paint job will be a bit easier. The primer went over and into the corrugations without hassle or pooling.
 

flyjoe180

Joe
SMF Supporter
Joined
Jan 18, 2012
Messages
12,426
Points
113
Location
Earth
First Name
Joe
I managed to get a layer of paint onto this kit today. Will post some pictures once I make some more progress. Stay tuned!
 

Alan 45

Plastic Abuser
Joined
Nov 29, 2012
Messages
10,221
Points
113
Location
Home
First Name
Alan
cracking job there I like the way you changed it from military to civilian , I have made the same kit but that was in my early days and I didn't bother with the putty.

I will be looking to see the finished build
 

flyjoe180

Joe
SMF Supporter
Joined
Jan 18, 2012
Messages
12,426
Points
113
Location
Earth
First Name
Joe
Thanks for the comments guys. Progress has been made.

A silver finish:

View attachment 58179

Then the red tail strip was applied for the Nazi national insignia:

View attachment 58180View attachment 58181

Black wing strips and nose area paint applied. Many of these machines were ex-Lufthansa, and this machine is being finished as a Ju52 from the Transport School in 1939:

View attachment 58182View attachment 58183

Gloss coat applied, engines and exhaust stubs installed:

View attachment 58184

Next step is decal application, then another varnish followed by landing gear and propeller installation.

Thanks for looking in again.

View attachment 60060

View attachment 60061

View attachment 60062

View attachment 60063

View attachment 60064

View attachment 60065

IMG_1342.jpg

IMG_1347.jpg

IMG_1348.jpg

IMG_1350.jpg

IMG_1353.jpg

IMG_1354.jpg
 
T

treyzx10r

Guest
Looking great Joe,glad to see you doing the early scheme I like that one! Great job masking it off too,looks real crisp and clean !
 
Top