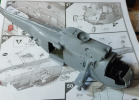
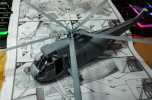
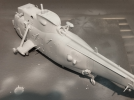
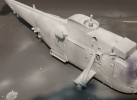
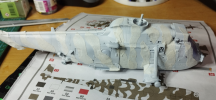
Airfix 1/72nd Westland Sea King HC.4

SteveT

SMF Supporter
Joined
Jan 18, 2024
Messages
314
Points
93
Location
Lancashire
First Name
Steve
When to paint???
When you are happy with getting as far as you can without causing damage that will need repairs...
So speaking from an armour side, I split my painting into wheels/drive sprockets, hull, turret, track. And other items like antennae, machine gun mounts, hatches all are sprayed seperately.
Looking at aircraft I would say fill out any openings that you do not want paint to enter with foam sponge (steal the wifes scouring sponge) cut to shape so it fits the opening - wheel wells/cockpit etc.
But as has been said, you will discover these points with experience... AND DO NOT WORRY if you mess it up, we all do it, we go in the corner, have a little cry, kick the wall and realise not to do it again - but we do!!!
So paint away and then leave us to point you in the right direction for the future, because when I switch over to do a few aircraft later in the year it will be you advising me.
Thank you very much!
 

SteveT

SMF Supporter
Joined
Jan 18, 2024
Messages
314
Points
93
Location
Lancashire
First Name
Steve
Oh dear. haha, I messed up today. I glued two parts (where the undercarriage goes to) and had to dash off out. I came back and oh my!
the part moved a bit and there's now a 1mm gap all around it. Couple that with one side of the fuselage that didn't glue flush and it's been a
bit of a bad day.

But I'm not giving up, I'm having a go at filling the gap with humbrol filler (green tube) but it's rather messy stuff to deal with.

I figure if I do the filling then sand it down and then it might not quite be so obvious when I paint it. (I hope!)
 

Waspie

SMF Supporter
Joined
Mar 13, 2023
Messages
2,625
Points
113
Location
Portland - Dorset
First Name
Doug
Oh dear. haha, I messed up today. I glued two parts (where the undercarriage goes to) and had to dash off out. I came back and oh my!
the part moved a bit and there's now a 1mm gap all around it. Couple that with one side of the fuselage that didn't glue flush and it's been a
bit of a bad day.

But I'm not giving up, I'm having a go at filling the gap with humbrol filler (green tube) but it's rather messy stuff to deal with.

I figure if I do the filling then sand it down and then it might not quite be so obvious when I paint it. (I hope!)
I always look at days like that as learning days. One of the things I have learned from reading these guys posts is when I'm sticking larger parts together I now use tape to hold them in place until the glue has set. The other is, prior to gluing I test the pieces together several times until I am happy with the dry fit. Then I glue. (Checking with the boss, SWMBO, if we are doing anything like - 'shopping' before glue gets in contact with plastic!!)
At least you're making progress, more than I am anyway. It'll turn out fine.
 

Jakko

Way past the mad part
SMF Supporter
Joined
Apr 28, 2018
Messages
10,936
Points
113
First Name
Jakko
You could see if you can pry the parts apart again? Don’t force it, else it’s likely to break, but chances are that the glue isn’t fully dry yet, which might mean you can pull them apart — possibly coupled to Mark’s tip of applying some more liquid cement to the join to soften it.
 

SteveT

SMF Supporter
Joined
Jan 18, 2024
Messages
314
Points
93
Location
Lancashire
First Name
Steve
Small update, we're getting there. it's a mess and I've used some filler in places but we'll see how it goes.
The instructions said to put the wheels on at this stage but I'm holding off, I figure if I don't add them until it's painted then I won't need to mess around trying to mask them ...well that's the idea anyway.

Has some problems with some of the parts not fitting great but that's probably more down to me.

Yes it's a mess but it's my mess. haha!

ohno.png
 

Waspie

SMF Supporter
Joined
Mar 13, 2023
Messages
2,625
Points
113
Location
Portland - Dorset
First Name
Doug
Your getting there Steve. Leaving the wheels off is what I do I have to admit.
Do you have any liquid mask to cover the windows? Very useful for 1/72 scale windows on the SK. (Tip - use a toothpick to apply it if you have and do use liquid mask).
 

SteveT

SMF Supporter
Joined
Jan 18, 2024
Messages
314
Points
93
Location
Lancashire
First Name
Steve
Your getting there Steve. Leaving the wheels off is what I do I have to admit.
Do you have any liquid mask to cover the windows? Very useful for 1/72 scale windows on the SK. (Tip - use a toothpick to apply it if you have and do use liquid mask).

Yes I have a bottle of liquid mask, well two actually. Couldn't decide to get Humbrol or Vallejo so bought both.
 

SteveT

SMF Supporter
Joined
Jan 18, 2024
Messages
314
Points
93
Location
Lancashire
First Name
Steve
Getting a tad further, lots of little bits stuck on that you can't really see here. Got the canopy on and made a complete mess of it as one side would not line up at all.

Getting close to the painting stages now. Hoping the paint will cover a lot of the bodges. (note rotor blades are not stuck on yet)

heli_mess.png
 

SteveT

SMF Supporter
Joined
Jan 18, 2024
Messages
314
Points
93
Location
Lancashire
First Name
Steve
Okay, I am now at the painting stage. I'm tempted to try camo (got it try it sometime, right?)
but I've done a couple of tests on scrap plastic and I'm getting lots of bleed under the masking tape.

any easy way to fix this?
 

Mark1

SMF Supporter
Joined
Apr 17, 2021
Messages
3,570
Points
113
Location
South london
First Name
Mark
I rub a cotton bud over the edge of the tape to make sure its stuck down properly, a thumbnail or cocktail stick to get it in the panel lines etc. Paint from the tape inwards,don't aim towards the tape as it well get underneath easier, also make sure paint isnt to thin and build up light coats.
 

Jakko

Way past the mad part
SMF Supporter
Joined
Apr 28, 2018
Messages
10,936
Points
113
First Name
Jakko
You could hand-paint the camouflage? No masking, I mean. Draw the camouflage shapes onto the model with a pencil first, then just colour inside the lines.
 

SteveT

SMF Supporter
Joined
Jan 18, 2024
Messages
314
Points
93
Location
Lancashire
First Name
Steve
I've just done a base coat of white and it's just about okay. Had problems with the airbrush but it was only the 3rd time I've never used one, so I'm still trying to get to grips with it. I seem to either have it spraying too much or barely at all. Need more practice I think and maybe the psi is wrong. I'll learn ....slowly :smiling3:

I did consider hand painting it as it seems to be a good option for me but then I realised the first coat would be fine but later coats, I'd probably have trouble covering up to the edges without going over.

anyway, here's where I am right now. (quite frankly, I'm aching to start on another kit.. but won't until this is done)

h1.pngh2.png
 

boatman

SMF Supporter
Joined
Nov 8, 2018
Messages
13,006
Points
113
Location
NORFOLK UK
First Name
christopher
NICE WORK on that seaking lookin good an yes please finish this steve before you jump onto another build
chrisb
 

SteveT

SMF Supporter
Joined
Jan 18, 2024
Messages
314
Points
93
Location
Lancashire
First Name
Steve
Well, I'm going for it. I figure if I don't try camo at some point I'll never do it. So, I've been working on masking the model.
Looking at the box it's like tiger stripe camo so I'm doing as good as I can.

Thanks also to Stillp for that great idea of doing a light coat of the white over the masking before I do green. I would never have thought of that!

Here we are so far.
mask1.png
 

Waspie

SMF Supporter
Joined
Mar 13, 2023
Messages
2,625
Points
113
Location
Portland - Dorset
First Name
Doug
Well, I'm going for it. I figure if I don't try camo at some point I'll never do it. So, I've been working on masking the model.
Looking at the box it's like tiger stripe camo so I'm doing as good as I can.

Thanks also to Stillp for that great idea of doing a light coat of the white over the masking before I do green. I would never have thought of that!

Here we are so far.
View attachment 502893
Looking good Steve.
 
Top