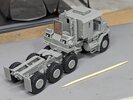
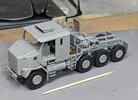
Andy T's 1/72 Takom M1070

Andy T

SMF Supporter
Joined
Apr 26, 2021
Messages
1,966
Points
113
Location
Sheffield
First Name
Andy
With the big rig finished I thought I'd enter this into the GB. Quite a different set of challenges this time so we'll see how it goes.


I've almost finished the bulldozer that comes with this kit but hadn't touched the truck or trailer until yesterday so I hope it still qualifies as unstarted.
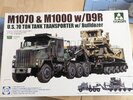
PXL_20230728_124339605.jpg

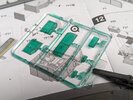
Sprue shots. The cab & some elements are moulded in one piece but there's still plenty of plastic to nail together.

Interesting that the doors are on the clear sprue, but since there's almost as much glass as door, I guess it's easier.
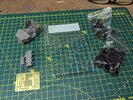
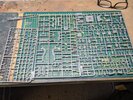
PXL_20230905_100032129.jpg

PXL_20230905_100135022.jpg

As far as I can tell these are mostly the trailer parts. Lots of tiny wheels :confused:
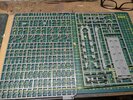
PXL_20230905_100206090.jpg

I've made quite a lot of progress which I'll post in a bit, but so far it's turning out to be an incredibly detailed and well engineered kit, much like the previous Takom kits I've built.

While you're looking at the sprues, note how most parts have extra "run offs", which also act as ejection areas, so there are very few pin marks on the actual parts. It means more gate scars but I find these easier to clean up.

Back after feeding the teenager....
 

Andy T

SMF Supporter
Joined
Apr 26, 2021
Messages
1,966
Points
113
Location
Sheffield
First Name
Andy
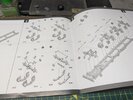
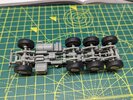
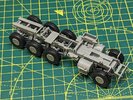
First up was the chassis. I've included a picture from the destructions to show how many parts it's made up from, but it all fell together very well indeed. I did a bit of weighing down after gluing the axles in place, but it wasn't really necessary, more of a just-in-case thing.

PXL_20230905_150808361.jpg

PXL_20230905_122447148.jpg

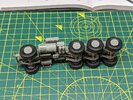
After putting the wheels on (temporarily) we ended up with this

2023-09-05 16.06.49.jpg

PXL_20230905_150702571.jpg

PXL_20230905_150733336.jpg

I did a bit of work on the cab too yesterday since I had about a 10 hour session at this, but I'll post those pictures tomorrow.

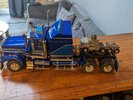
I will leave you with this shot though, which shows the huge difference in scale!

PXL_20230906_173719884.jpg
 
Last edited:

Andy T

SMF Supporter
Joined
Apr 26, 2021
Messages
1,966
Points
113
Location
Sheffield
First Name
Andy
Thanks for confirming Peter :thumb2:

You're more than welcome Doug. I've built a number of military trucks in the past but after the blue one I'll definitely be building another "shiney" in the future.

I was going to pick yet another MAZ 537, my favourite vehicle, but thought I'd try something different.
 

Andy T

SMF Supporter
Joined
Apr 26, 2021
Messages
1,966
Points
113
Location
Sheffield
First Name
Andy
Tell me about it Mick. I must be mad lol.


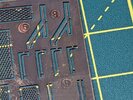
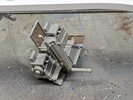
There's a fair bit of etch included, some so small that it's a struggle for me, but I'm having a go. These are front light guards

PXL_20230905_154228887~2.jpg

Two of them just evaporated so I replaced with copper wire, which I actually prefer. Very wonky but they'll be knocked off during paint anyway so I'm not particularly bothered.

PXL_20230905_160152477~2.jpg

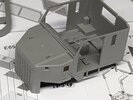
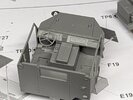
The cab is mostly one piece but there's a dashboard, seats and a few other bits to add inside and a tiny mesh pe grille

PXL_20230906_171658095.PORTRAIT.ORIGINAL.jpg

PXL_20230906_171708609.PORTRAIT.ORIGINAL.jpg

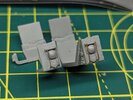
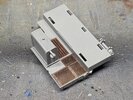
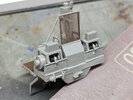
The deck where the winches fit has quite a few pe mesh pieces

PXL_20230906_172521240.jpg

PXL_20230906_171628114.PORTRAIT.ORIGINAL~2.jpg

I have to chuckle every time I see the symbol to indicate a pe part that needs ca glue - some of it is definitely heart breaking :smiling5:

I also added a touch of green to the insides of the glazing.

PXL_20230906_171736215.jpg
 

The Smythe Meister

Born to be WILD....... until about 9pm
SMF Supporter
Joined
Jan 30, 2019
Messages
5,733
Points
113
Location
Devon
First Name
Andy
Just seen this Andy...
You've certainly given yourself a challenge with all those little parts!
Cracking progress so far, chassis looks great with the wheels all in alignment there :cool:,that etch really looks the part....in fact the whole kit looks very nicely detailed indeed:thumb2:,top stuff mate :hugging-face:.
 

Andy T

SMF Supporter
Joined
Apr 26, 2021
Messages
1,966
Points
113
Location
Sheffield
First Name
Andy
I'm not sure if it's placebo Jim but I dunked the whole PE fret into track blackening fluid before I started and it seems to be sticking better than it usually does for me.

I'm guessing the thorough clean and slight etching of the surface is helping.

Of course that could just be my imagination and it's down to me being less scared of it than normal! :smiling5:
 

Gern

'Stashitis' victim
SMF Supporter
Joined
May 17, 2009
Messages
9,705
Points
113
Location
Stourbridge
First Name
Dave
You do know that Eduard do a PE detail up set for this don't you? :smiling:

Just kidding! This is very nicely detailed OOB and you're doing a great job.
 

Andy T

SMF Supporter
Joined
Apr 26, 2021
Messages
1,966
Points
113
Location
Sheffield
First Name
Andy
Thanks Rick & Lee.

There's been a bit more progress even though my shed is hotter than the sun! I keep taking regular "refreshment" breaks which may be why it seems to be going so well - no fear and beer goggles :smiling5:

Winch section is finished. I added some 0.4mm wire to the drums, even though its hardly visible

2023-09-08 16.06.24.jpg

2023-09-08 16.06.49.jpg

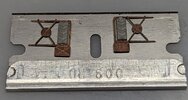
The door mirrors were a laugh. 2 PE and one plastic part each. I'll attempt a bit of clean up once they're solid but won't lose sleep over it if I can't

2023-09-08 17.33.25.jpg

And that's the build phase complete. It's only mocked up so that I can break it down for painting. Can't wait to get masking those windows lol

2023-09-08 16.51.54.jpg

2023-09-08 16.51.34.jpg
 
Top