Bandai 1/16 Rolls Royce Silver Ghost 1908 - "Balloon Car"

tr1ckey66

SMF Supporter
Joined
Mar 6, 2009
Messages
3,686
Points
113
First Name
Paul
Just caught up with this Jim…
What an awesome project, I love it!

The fact that you’re rescuing a previous build is praise worthy in itself, but the care and attention to detail you’re giving this kit is simply outstanding.
I tip my hat sir!

Looking forward to seeing more progress
ATB
Paul
 

Jim R

SMF Supporter
Joined
Apr 27, 2018
Messages
13,724
Points
113
Location
Shropshire
First Name
Jim
A fair bit of progress to report.
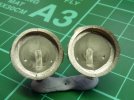
First off the headlights and side lights. The fit of the two halves of each light was pretty poor. Despite a fair bit of work they will have to do. Interestingly these were some of the earliest electric lights fitted to a car that worked successfully. I used clear styrene to make representation of bulbs.
P1070564.JPG

P1070567.JPG

The bonnet was put together and the trim surrounds and hinges fitted.
P1070565.JPG

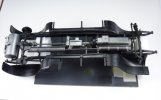
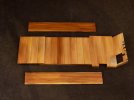
The wooden floor and running boards were painted with various oils.
P1070570.JPG

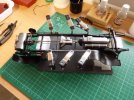
The next job was fitting the mudguards. They were twisted and the fit was hopeless. It took two full afternoons to get them, as Ron would say, summat like. Plenty of clamps (the ones on the far side are only there for balance)
P1070571.JPG

More by luck than judgement they actually ended up pretty good.
P1070572.JPG

P1070573.JPG

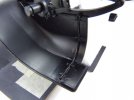
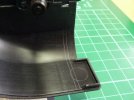
There are support brackets to fit at the front and the rear. The rear ones fit fine and attach to the chassis. The ones at the front fit inside the mudguard on a marked line.
P1070575.JPG

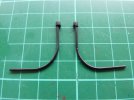
Unfortunately the brackets don't fit the curve. You can see how they are not even the same curve. I will replace them with some lead wire which is easy to bend to the curve.
P1070574.JPG

We are getting there slowly. Thanks for sticking with it.
 

Tim Marlow

Little blokes aficionado
SMF Supporter
Joined
Apr 27, 2018
Messages
16,777
Points
113
Location
Somerset
First Name
Tim
Looking very fine Jim. That floor, in particular, is superb.
 

JR

Member of the Rabble and Pyromania Consultant
SMF Supporter
Joined
May 26, 2015
Messages
17,275
Points
113
Location
lincs
First Name
John
Very nice and neat ( as expected) Jim
 

Jim R

SMF Supporter
Joined
Apr 27, 2018
Messages
13,724
Points
113
Location
Shropshire
First Name
Jim
Neil, Mark, Tim, Tony, John and Miko - many thanks for such supportive posts :thumb2:

As I said in the last update the front mudguard brackets did not fit so I scratched replacements. Looking at photos of the real thing the brackets appear to be riveted in place although there is no sign of any fastenings on the top side of the mudguard.
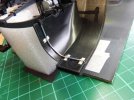
P1070576.JPG

...... and painted
P1070578.JPG
I fitted the exhaust.
P1070577.JPG

Then I thought I'd tackle the wheels. I have found a few builds of this kit online and one said the wheels were impossible and so the model became a shelf queen and another decided to source after market wheels. A few managed OK. I reasoned that if I couldn't manage the wheels then there was little point in going on with the rest of the build.
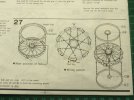
The wheels use a jig. The spokes are black, nylon thread. There is a rim and a centre which is laced up using the jig.
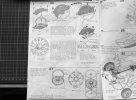
P1070509.JPG

There are two steps - 26 and 27. Both involve lacing. They are then fitted together.
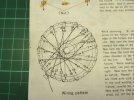
P1070581.JPG

P1070582.JPG

The problem is that God didn't give me enough hands. I could have done with one or two extras. The thread is slippery and has to be kept taut, the jig has to be turned over and back multiple times and the wheel itself has to be turned in the jig. Anyway after many, many starts I have one wheel. Very, very effective. The two laced rims are glued together.
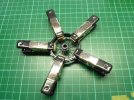
P1070579.JPG

And .... drum roll.... I have one wheel.
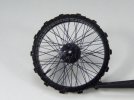
P1070580.JPG

Still need the chrome centre and the tyre but it's done. I have actually done the first lacing of a second wheel. Doing the wheels made me think of the late, great Simon T. He spoked wheels and we joked about him have trained spiders - good memories.

Thanks for your continued support.
 

yak face

Wossupwidee?
Staff member
Moderator
SMF Supporter
Joined
Jun 13, 2009
Messages
12,398
Points
113
Location
sheffield
First Name
tony
Outstanding work jim , the wheel looks superb , the good thing is that now youve done one the other three should get easier ( slightly ! ) cheers tony
 

Jim R

SMF Supporter
Joined
Apr 27, 2018
Messages
13,724
Points
113
Location
Shropshire
First Name
Jim
Thanks guys for your posts. This is one of those builds that needs "encouragement" :smiling:
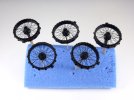
Finally got the wheels finished. I thought it would get easier but wheel no.5 took almost two hours. The main spokes unraveled 16 times - the air was very blue. I got almost to the end and then the nylon thread slipped and being stiff and slippery it just unraveled. Once the tension is lost you're b******d.
They've had a coat of MRP black.
P1070584.JPG

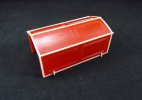
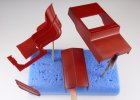
The body was also primed and sprayed with MRP. Because MRP paint is a satin finish it will need a gloss coat.
P1070585.JPG
 

The Smythe Meister

Born to be WILD....... until about 9pm
SMF Supporter
Joined
Jan 30, 2019
Messages
5,719
Points
113
Location
Devon
First Name
Andy
Just had a catch up Jim,great progress indeed :smiling3:
As for those wheels,well.... words fail me!!:flushed:..... What an incredible bit of modelling.... superb stuff :cool:
 
Top