Chris's 1/72 Revell SE5A.

Steve-the-Duck

SMF Supporter
Joined
Jul 3, 2020
Messages
1,216
Points
113
Location
Medway Towns
First Name
Chris
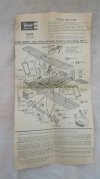
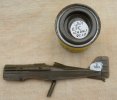
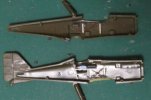
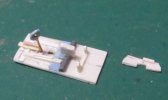
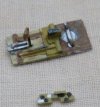
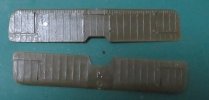
Okay, so, the Hector is stalled for a while, much air-brush practice to ensue, so this was going to be next afterwards but I may just make a start now-ishIMG_2380.JPGIMG_2381.JPG
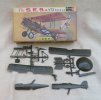
I WILL be putting in cockpit detail, thanks to Wingnut references. Intention is a post-war RAE display aircraft in silver, which I can rattle-can
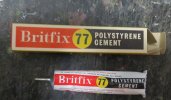
BTW, when I got this, CHEAP, off eBay, this was in the box too
IMG_2382.JPG
Brings back memories. I think all my Matchbox kits in the 'seventies were stuck with this

But not this one, not this time.
Now I just need to wait for some new drill-bits to arrive for the rigging holes.
 

colin m

Moderator
Staff member
Moderator
SMF Supporter
Joined
Dec 26, 2008
Messages
8,608
Points
113
Location
Stafford, UK
First Name
Colin
Don't you love it when all the instructions are on one page.
 

yak face

Wossupwidee?
Staff member
Moderator
SMF Supporter
Joined
Jun 13, 2009
Messages
12,427
Points
113
Location
sheffield
First Name
tony
Nice one chris , yes Britfix cement brings back nostalgic memories ( and smells!) used to like the smell of Gloy poly cement too. Has the tube been opened , and if not are you going to use it ?
 

Steve-the-Duck

SMF Supporter
Joined
Jul 3, 2020
Messages
1,216
Points
113
Location
Medway Towns
First Name
Chris
Nice one chris , yes Britfix cement brings back nostalgic memories ( and smells!) used to like the smell of Gloy poly cement too. Has the tube been opened , and if not are you going to use it ?
I haven't even opened the box to check the tube itself. It feels like there's SOMETHING in there, but it might Schrodinger brand

Am I tempted to USE it though? Well, I've got that Matchbox Siskin and Fury...
Maybe if I DO do another Heyford. Or finally get the Stranraer I've been looking at buying for FORTY-FIVE ears...
 

Steve-the-Duck

SMF Supporter
Joined
Jul 3, 2020
Messages
1,216
Points
113
Location
Medway Towns
First Name
Chris
'May I say, sir, that now we are cooking with gas!'
IMG_2456.JPG
The silver job I'm doing has a white registration code on a PC10 panel, so I'm going to try that Letraset I got for the Matador in the Trucks GB
We'll see...
 

Steve-the-Duck

SMF Supporter
Joined
Jul 3, 2020
Messages
1,216
Points
113
Location
Medway Towns
First Name
Chris
So, for some reason, I got it into my head to put in cockpit detail
What was I THINKING!
Reference was the Wingnut site of their build. It's come together surprisingly quickly...
Now I've jinxed it
IMG_2464.JPG
I could have just painted the sidewall detail...
IMG_2468.JPG
Only had one piece, first piece for the trigger ring, ping into the ether. Hmm, before paint, this doesn't look half bad. But I can still make a hash of the instrument panel
I have low expectations of anything quite going right, so I'm never disappointed!
 

yak face

Wossupwidee?
Staff member
Moderator
SMF Supporter
Joined
Jun 13, 2009
Messages
12,427
Points
113
Location
sheffield
First Name
tony
Nice pit chris , as for the glue , go on ! Use it! Brings back memories of the old pin in the end of the nozzle . Maybe thats why we always used to get gluey fingerprints all over in the old days , pulling the pin out you would always get some on your fingers!
 

colin m

Moderator
Staff member
Moderator
SMF Supporter
Joined
Dec 26, 2008
Messages
8,608
Points
113
Location
Stafford, UK
First Name
Colin
So, for some reason, I got it into my head to put in cockpit detail
What was I THINKING!
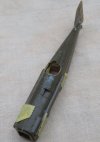
Before I go down this particular rabbit hole, I put the fuselage halves together, to see, who much can be seen in the pit. Often I'm quite happy to realise the answer is, nothing.
 

Steve-the-Duck

SMF Supporter
Joined
Jul 3, 2020
Messages
1,216
Points
113
Location
Medway Towns
First Name
Chris
Before I go down this particular rabbit hole, I put the fuselage halves together, to see, who much can be seen in the pit. Often I'm quite happy to realise the answer is, nothing.
Yeah, I know, but, once I start...
And the answer is ' DO NOT look at Wingnuts reference and buold photos'
Or use pilot figures...
 

tr1ckey66

SMF Supporter
Joined
Mar 6, 2009
Messages
3,686
Points
113
First Name
Paul
Another vintage kit with vintage glue as a bonus. Terrific stuff!
Nice cockpit detail Chris. It does seem a shame that a lot of it will not be seen, but at least you’ll know it’s there.
Looking forward to the progress.
Paul
 

Steve-the-Duck

SMF Supporter
Joined
Jul 3, 2020
Messages
1,216
Points
113
Location
Medway Towns
First Name
Chris
So, the cockpit parts are painted...

IMG_2472.JPG
I did think about drilling out the instruments, but a few shiny paint blobs suffice
And the sidewalls done
IMG_2471.JPG
with just a little shading

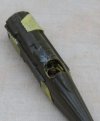
And then the halves together
IMG_2474.JPGIMG_2475.JPG
And, of course, all that can be seen is the top of the joystick. We all knew this would happen
 

Steve-the-Duck

SMF Supporter
Joined
Jul 3, 2020
Messages
1,216
Points
113
Location
Medway Towns
First Name
Chris
So, the wings have lots of tiny holes drilled ready
IMG_2477.JPG
Plus, I pushed in the top of the stand to fill the hole in the lower wing, and smoothed it off

Then, I noticed in the reference picture I'm using, the 'plane didn't have the long exhausts, so off they're carved
IMG_2478.JPG
As the struts have a spreader top and bottom, I can fit the rigging there before even attaching them. Dry-fitting the lower wing, it's a very tight fit, thanks to the age of this p[articular issue
 

Steve-the-Duck

SMF Supporter
Joined
Jul 3, 2020
Messages
1,216
Points
113
Location
Medway Towns
First Name
Chris
Why is my progress so slow? Too much work on the cockpit!

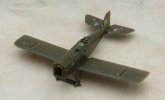
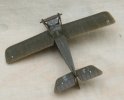
And while the varnish is drying on the Hector, before I have to try and fit the coaming properly, here we are...
IMG_2480.JPGIMG_2481.JPG
Lower wing, tail-surfaces and undercarriage legs on.
Had to fill some of the tiny holes for the rigging on the tailplanes as they looked in the wrong place. Tiny elevator horn from plasti strip.
So, while working on the undercarriage, one of the legs vanished completely off the table. Having cleared everything and searched to no avail, I finally noticed it against a cupboard base more than a meter away. Didn't even see it go...

Time to rig the interplane struts. And then do something about those sink marks on the wing. They're more obvious in the photos than the actual piece
 

rtfoe

SMF Supporter
Joined
Apr 29, 2018
Messages
7,535
Points
113
Location
Malaysia
First Name
Richard
Good effort on the cockpit details Steve, it's crazy isn't it in 1/72 scale. I had my fair share of cockpit detailing on my RE8 as the Airfix figures weren't salvageable plus there is the passenger seat with his little toy in the back. Click on this to see what I mean.

The tube of glue reminds me of the Airfix tube cement...the smell was sublime. Always tempted to taste it and got the tongue burnt because of my bad habit of biting my fingernails then.

Cheers,
Wabble
 
Top