Very sweet progress Dave. She’s coming on a storm now!
- Home
- Forums
- Group Builds
- The New Group Builds (2017 on)
- The User Created Group Builds
- 2023 Builds
- Jakko's Movie/TV star GB: Mar - May '23
You are using an out of date browser. It may not display this or other websites correctly.
You should upgrade or use an alternative browser.
You should upgrade or use an alternative browser.
DaveCov's "Goldfinger" Doyusha 1/24 Aston Martin DB5 007 (07-1-2800)
- Thread starter davecov
- Start date
-
- Tags
- 007 goldfinger james bond
Jim R
SMF Supporter
Iconic car Dave. Really good progress. Good fix with the bumper but odd it was too narrow by so much. Chrome looks superb, so much better than the factory coating.
davecov
SMF Supporter
Thanks everybody.
Latest update.
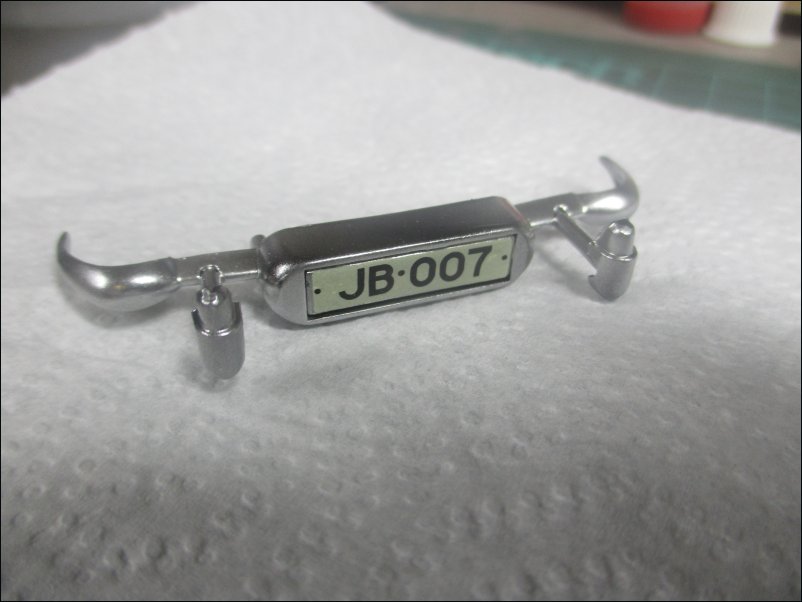
The revolving number plate was put into the bumper but not without problems. It was so tight that it would not revolve nor would it sit upright. Fixing it was a bit fraught as I had to fix it without damaging any decals:
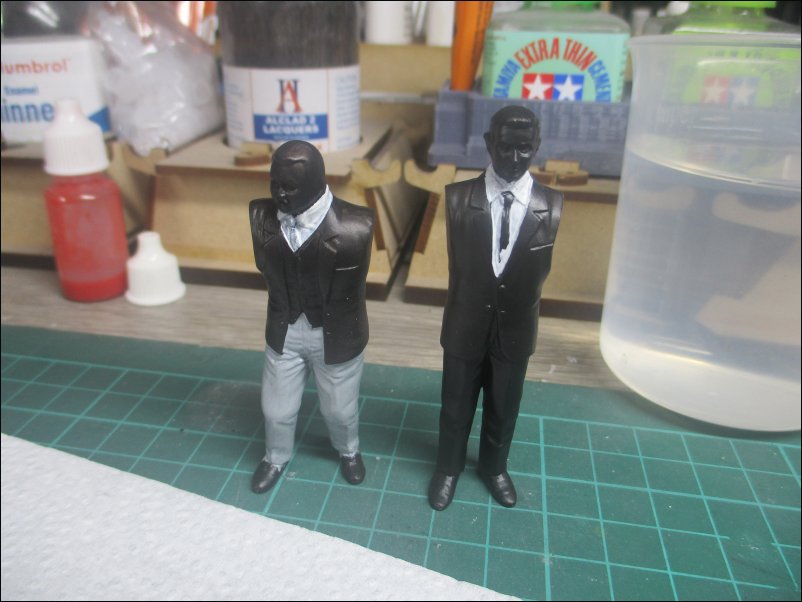
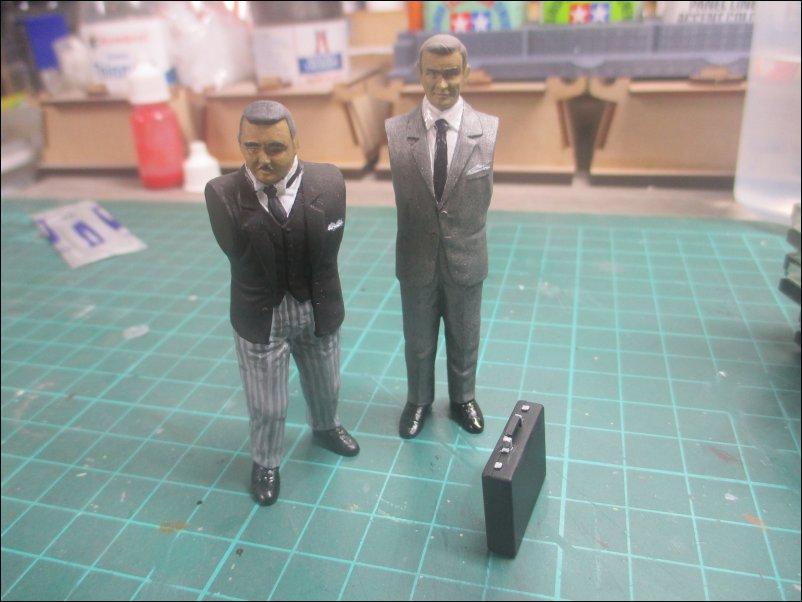
Odd Job's hat was painted black and the cuffs of the two figures were painted satin white:

The shirts were painted with satin white but they will get another coat later on during the painting. Odd Job's trousers were painted with H127 Satin US Ghost Grey:
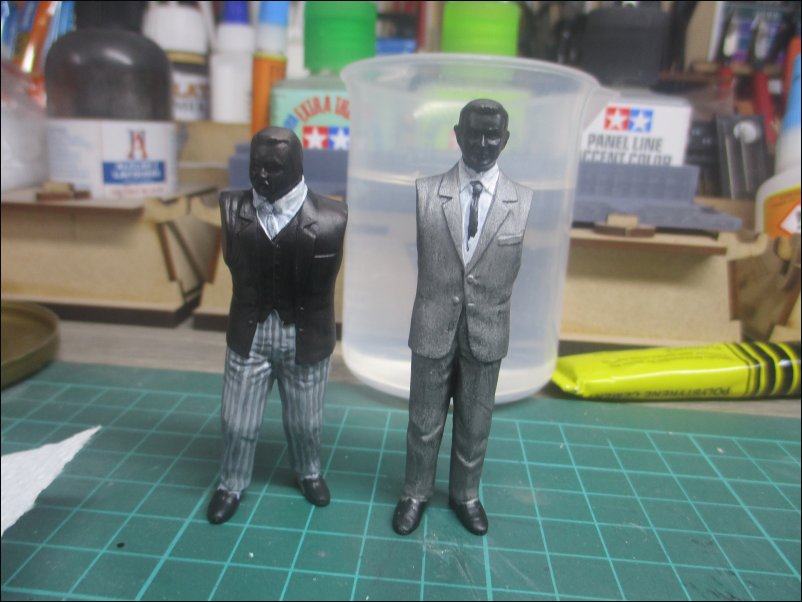
I painted contrasting stripes on Odd Job's trousers using H164 Satin Dark Sea Grey. I gave James Bond a H53 Gunmetal suit. I am not sure at this time if I will give his suit a second coat:
That's all for now.
Dave
Latest update.
The revolving number plate was put into the bumper but not without problems. It was so tight that it would not revolve nor would it sit upright. Fixing it was a bit fraught as I had to fix it without damaging any decals:
Odd Job's hat was painted black and the cuffs of the two figures were painted satin white:
The shirts were painted with satin white but they will get another coat later on during the painting. Odd Job's trousers were painted with H127 Satin US Ghost Grey:
I painted contrasting stripes on Odd Job's trousers using H164 Satin Dark Sea Grey. I gave James Bond a H53 Gunmetal suit. I am not sure at this time if I will give his suit a second coat:
That's all for now.
Dave
davecov
SMF Supporter
A small update.
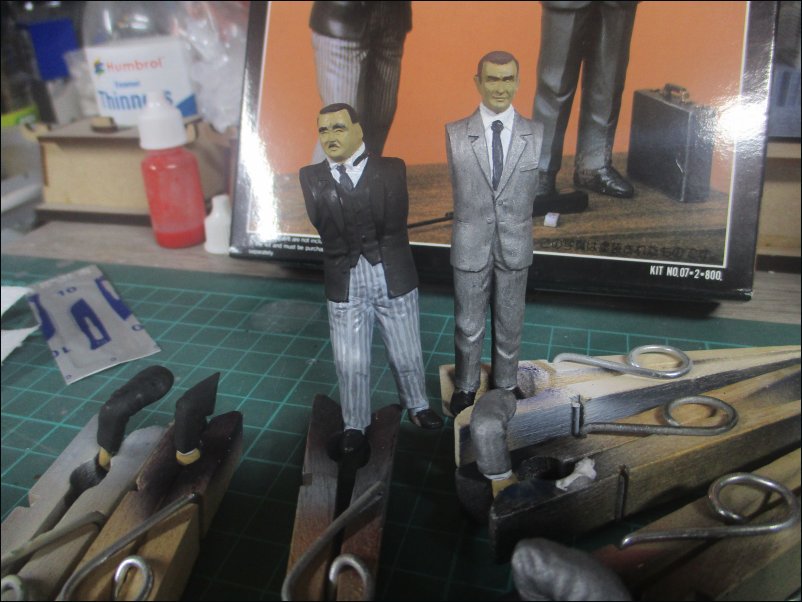
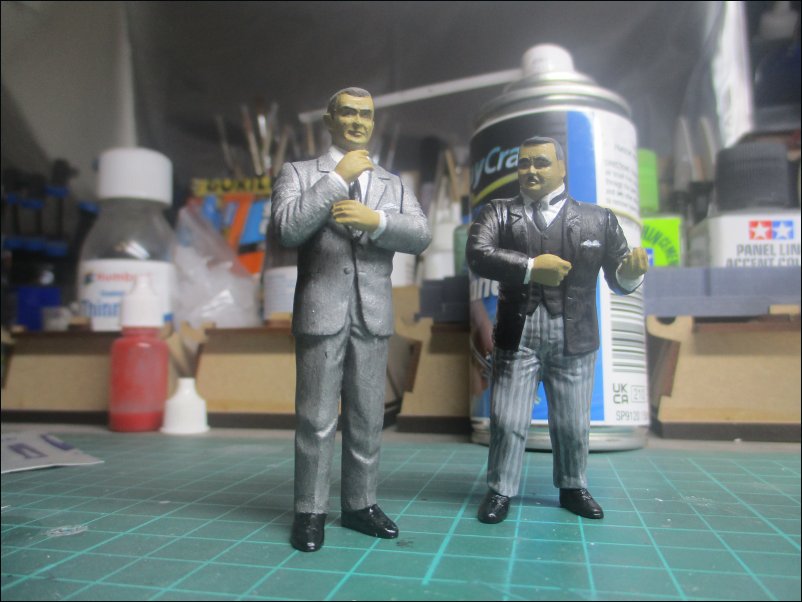
Progress has been made on the basic painting of the figures but it will be a while yet before they are finished:
That's all for now.
Dave
Progress has been made on the basic painting of the figures but it will be a while yet before they are finished:
That's all for now.
Dave
Jim R
SMF Supporter
You've done a great job with those figures. Special credit for Oddjob's striped trousers.
davecov
SMF Supporter
Thanks @Jim R
Another update now.
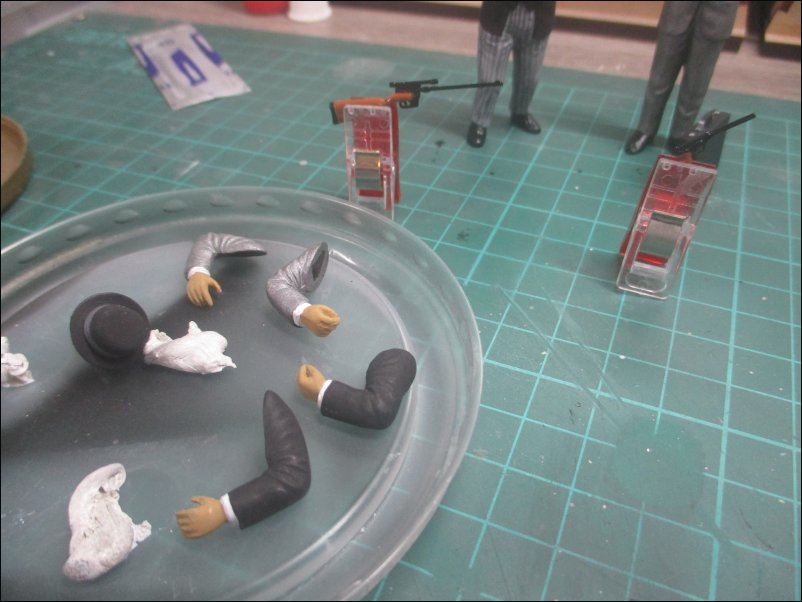
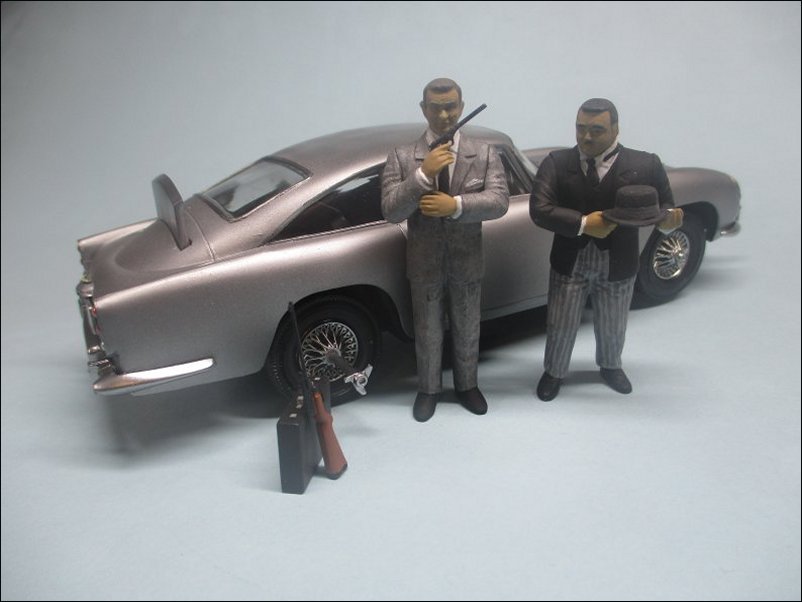
More work on the figures and the suitcase:
Arms were finished and then I realised that the I had painted the right arms the wrong colours. I decided that I would repaint those after fixing to the bodies. The rifle and gun were also finished:
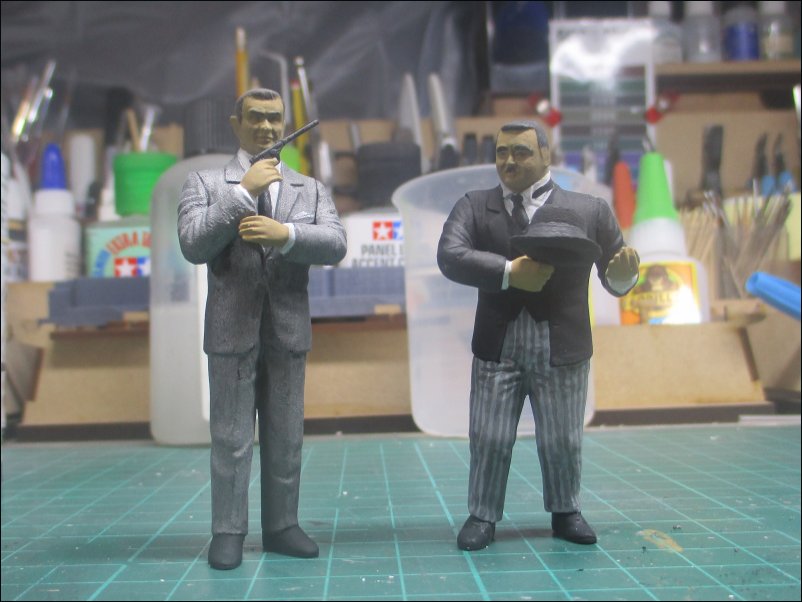
Arms have been fitted on bodies and repainted. I have also worked on the faces and hair but the results are washed out a bit by the lighting:
That's all for now.
Dave
Another update now.
More work on the figures and the suitcase:
Arms were finished and then I realised that the I had painted the right arms the wrong colours. I decided that I would repaint those after fixing to the bodies. The rifle and gun were also finished:
Arms have been fitted on bodies and repainted. I have also worked on the faces and hair but the results are washed out a bit by the lighting:
That's all for now.
Dave
davecov
SMF Supporter
A little more to report.
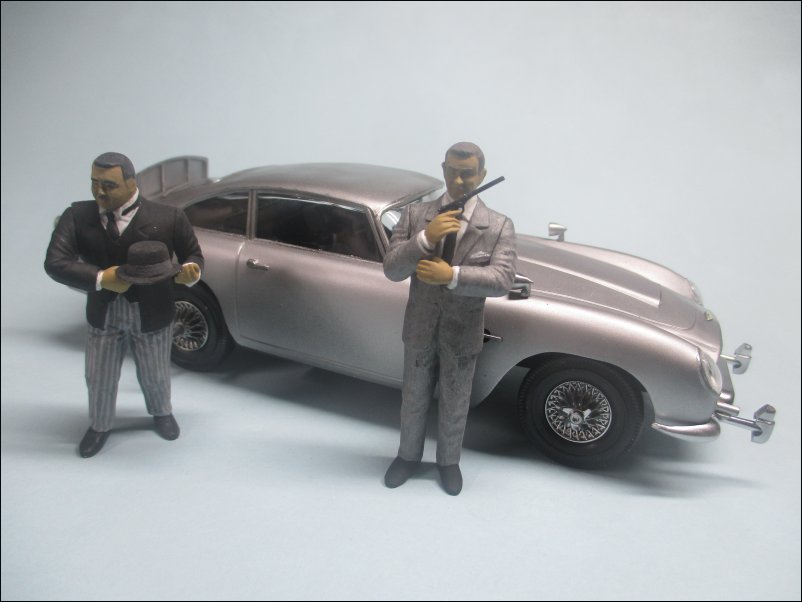
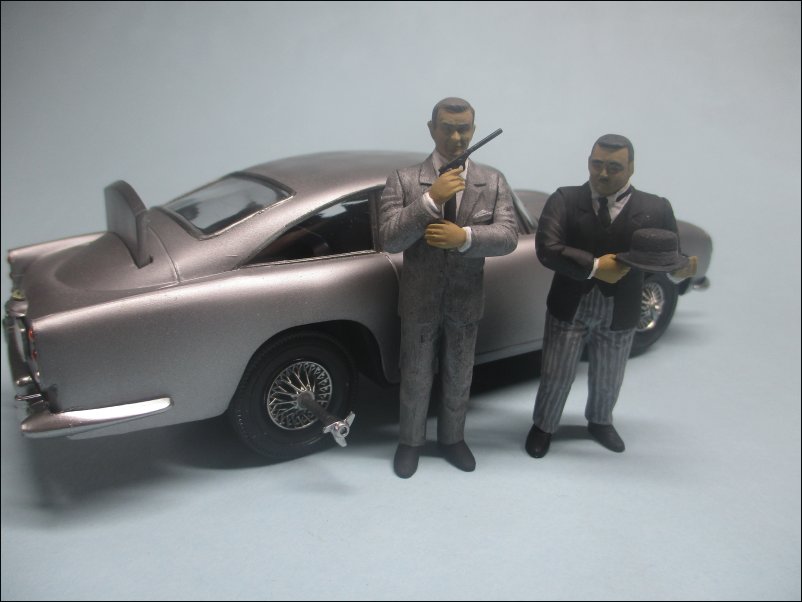
The painting of the figures was completed and their weapons added. The figures were then given a coat of matt varnish:
That's all for now.
Dave
The painting of the figures was completed and their weapons added. The figures were then given a coat of matt varnish:
That's all for now.
Dave
davecov
SMF Supporter
The final piece of painting to report now.
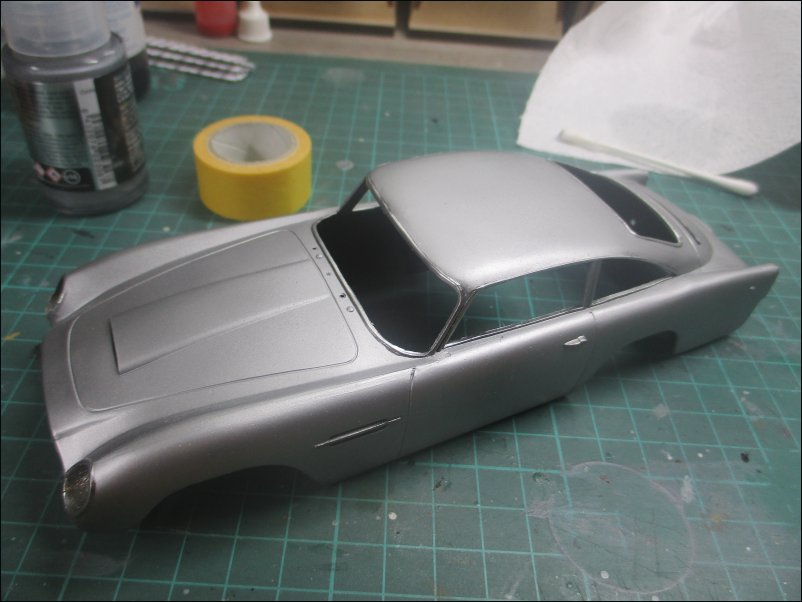
My order of Ammo by Mig Jimenez A-Stand Chrome Metallic Laquer (A.MIG-2306) arrived this morning so I was able to paint the parts of the bodyshell already masked and undercoated. I then removed the masking:
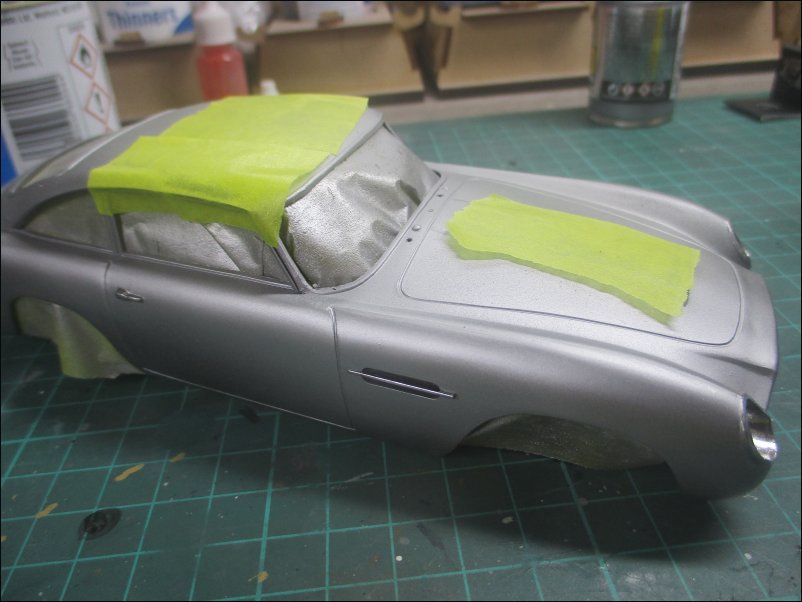
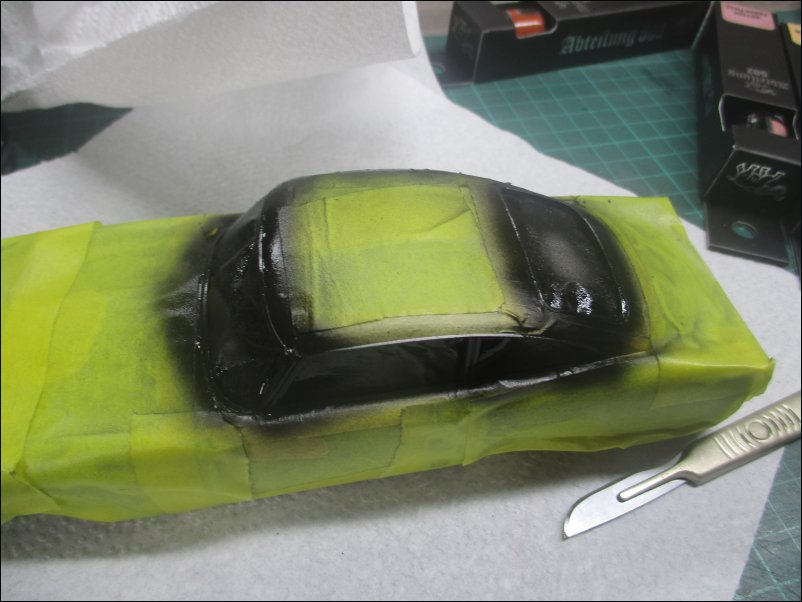
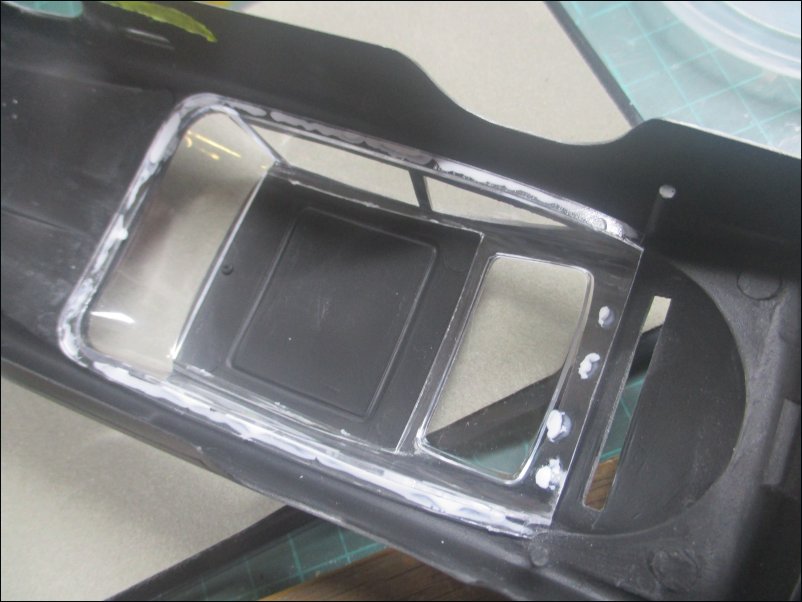
Time to mask off the window trim and apply a coat of Gloss Black Base:
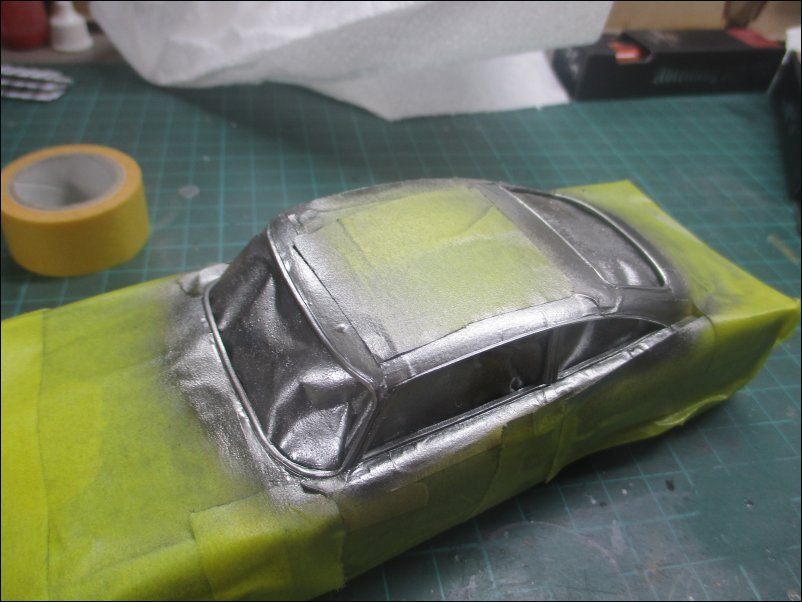
The window trim was painted with Chrome Metallic Laquer:
The masking was removed to reveal the shiny window trim:
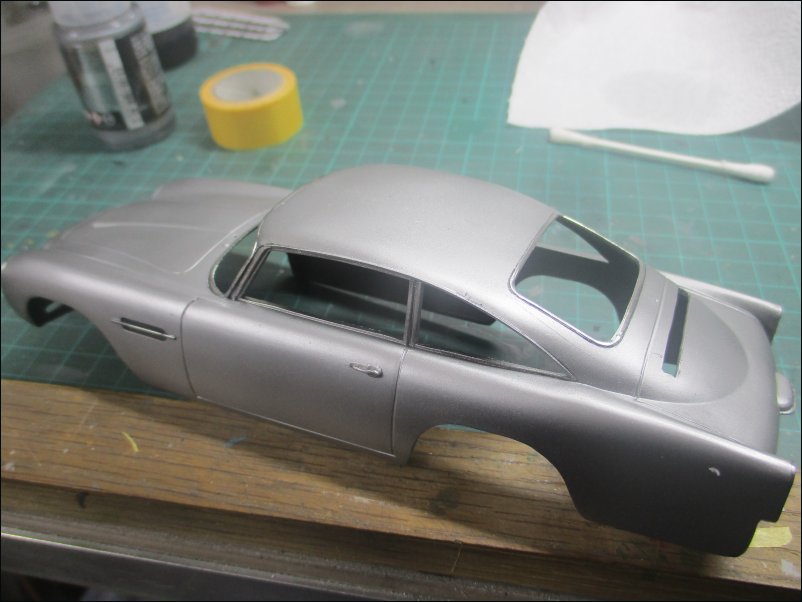
Another view:
Not much to do now and my next report will be the final one for this build.
That's all for now.
Dave
My order of Ammo by Mig Jimenez A-Stand Chrome Metallic Laquer (A.MIG-2306) arrived this morning so I was able to paint the parts of the bodyshell already masked and undercoated. I then removed the masking:
Time to mask off the window trim and apply a coat of Gloss Black Base:
The window trim was painted with Chrome Metallic Laquer:
The masking was removed to reveal the shiny window trim:
Another view:
Not much to do now and my next report will be the final one for this build.
That's all for now.
Dave
davecov
SMF Supporter
Final report now.
Using Canopy Glue, I fixed the windows in place:
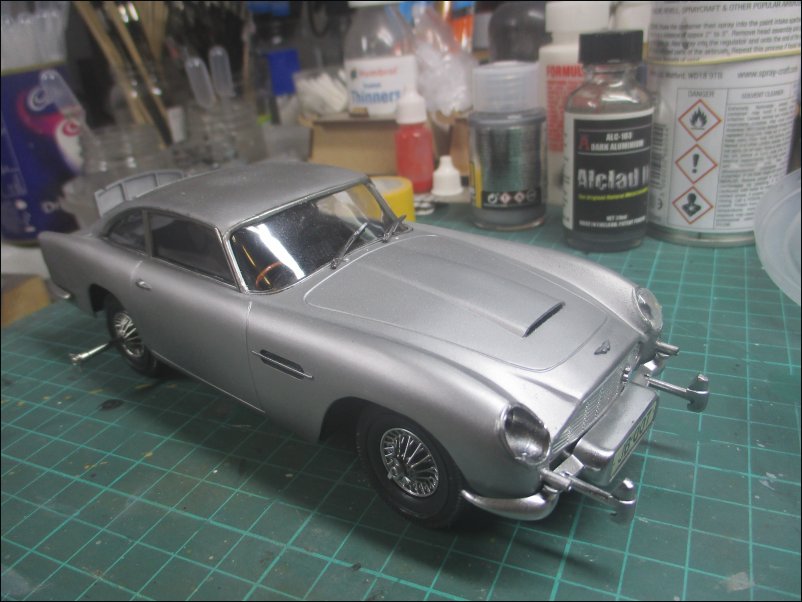
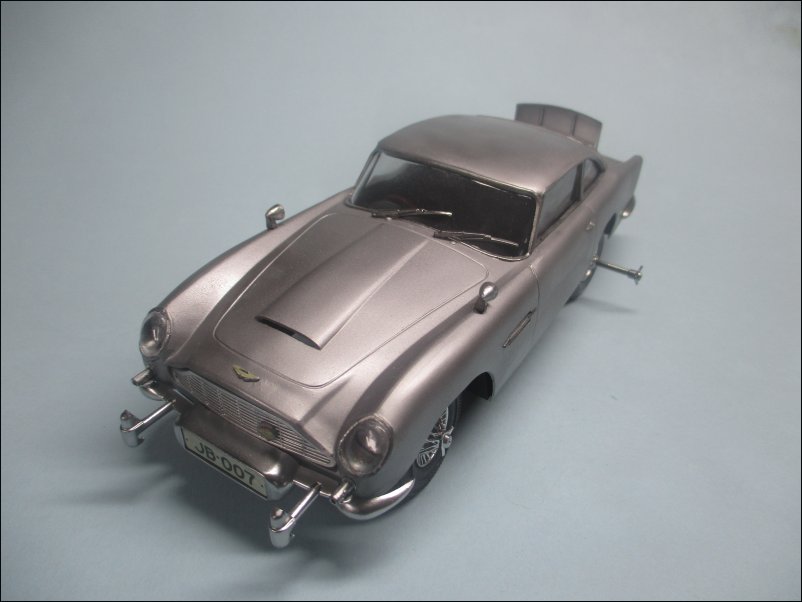
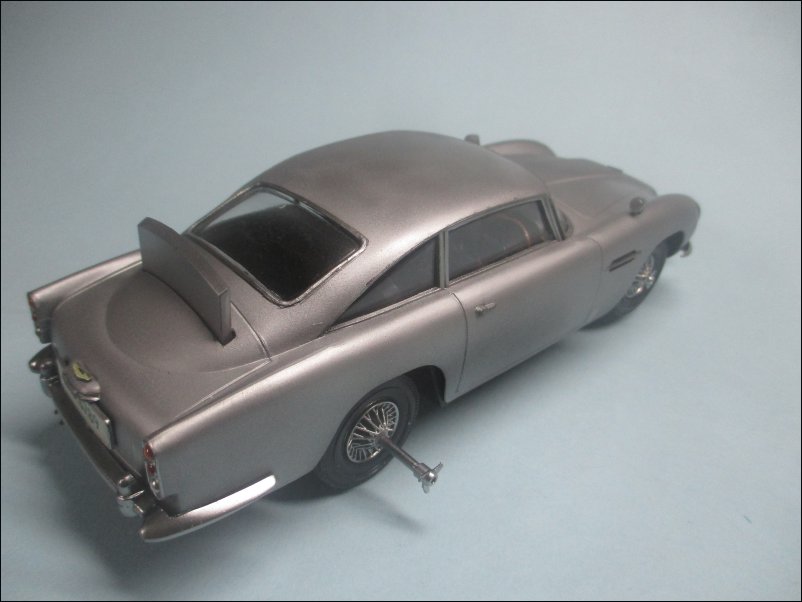
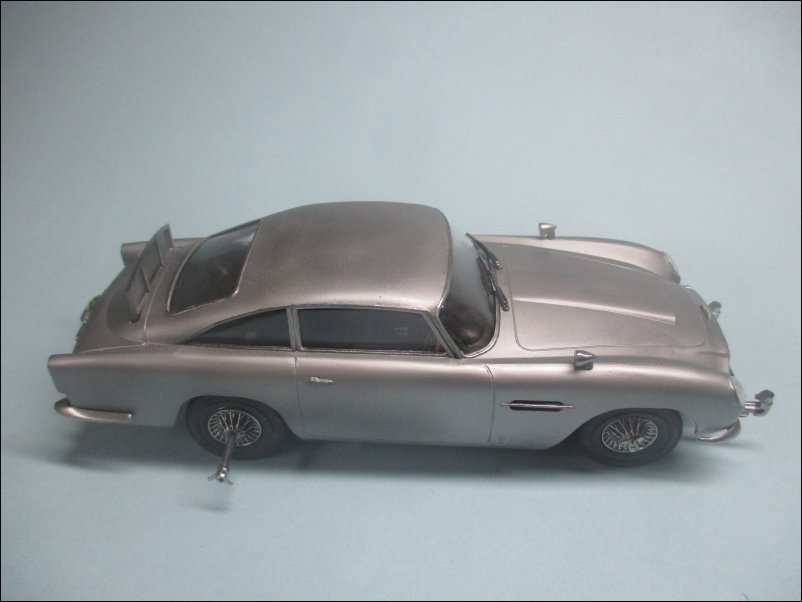
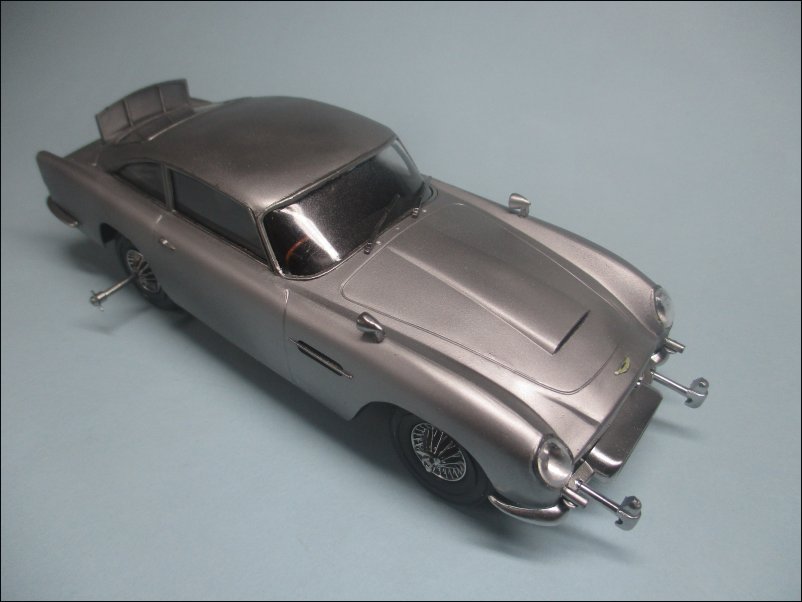
Once the windows were dry, I fitted the rear-view mirror and attached the bodyshell to the floorpan. The wipers, machine guns, badges, bumpers and tyre shredders were glued and the headlamps were fitted:
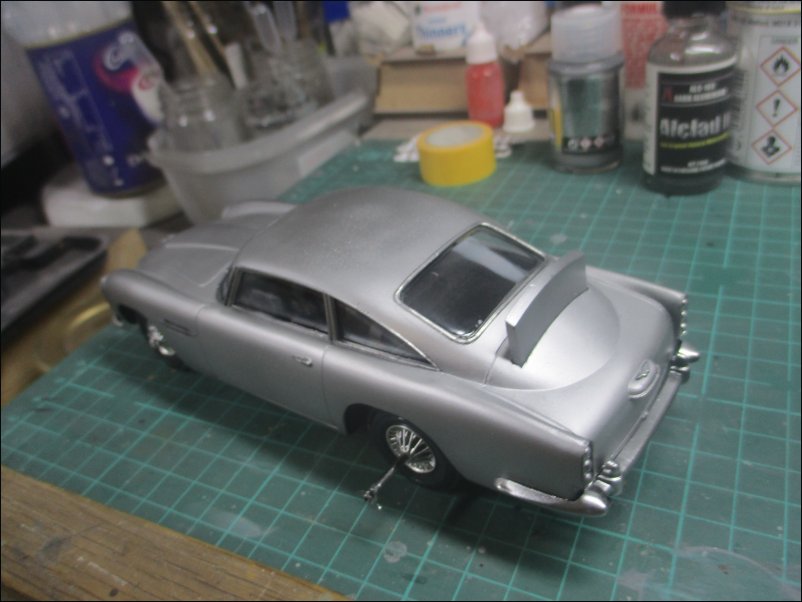
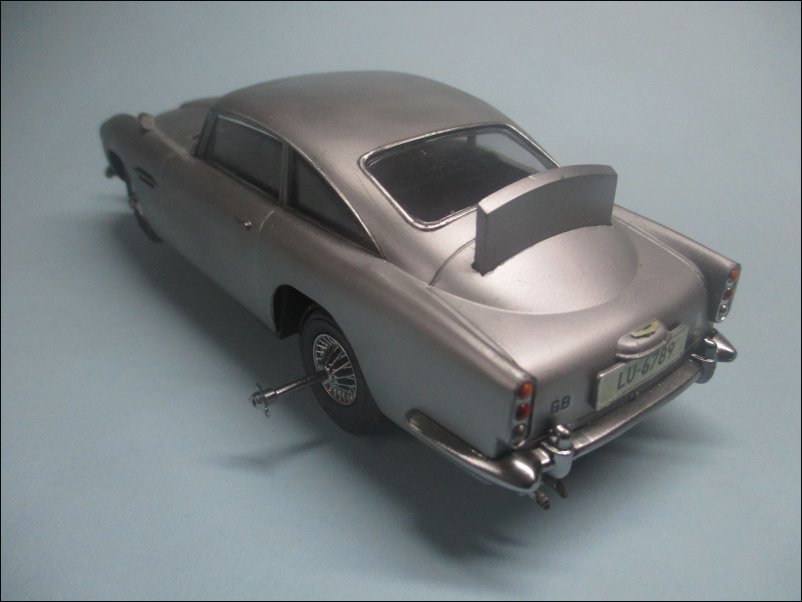
View from the back. I made an error during this time by marking the passenger window and it took a lot of time and effort to remove the mark:
Wing mirrors were glued in place:

Rear lights and indicators were painted:
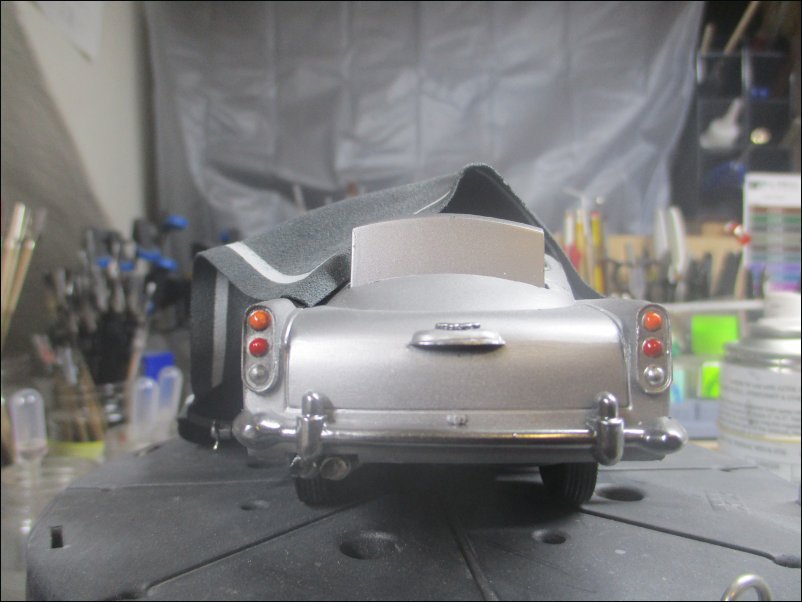
Badge decals were applied and rear number plate was glued in place:
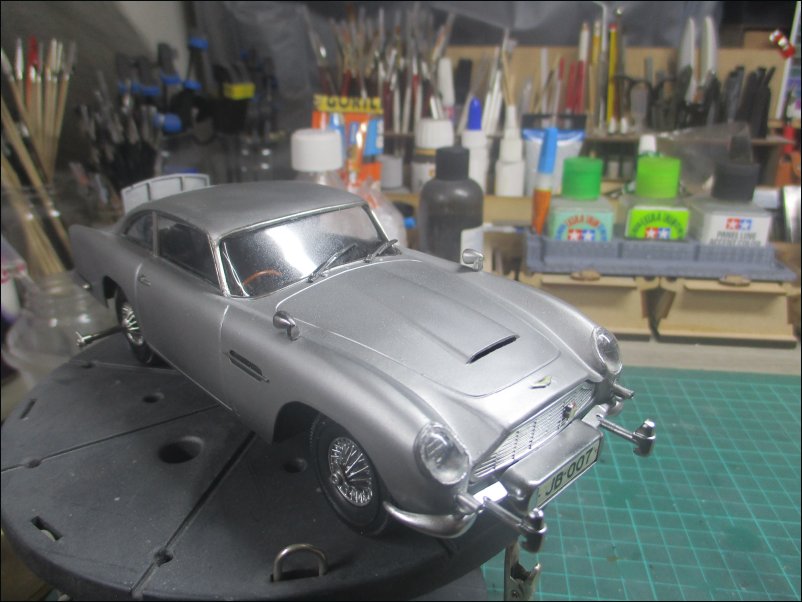
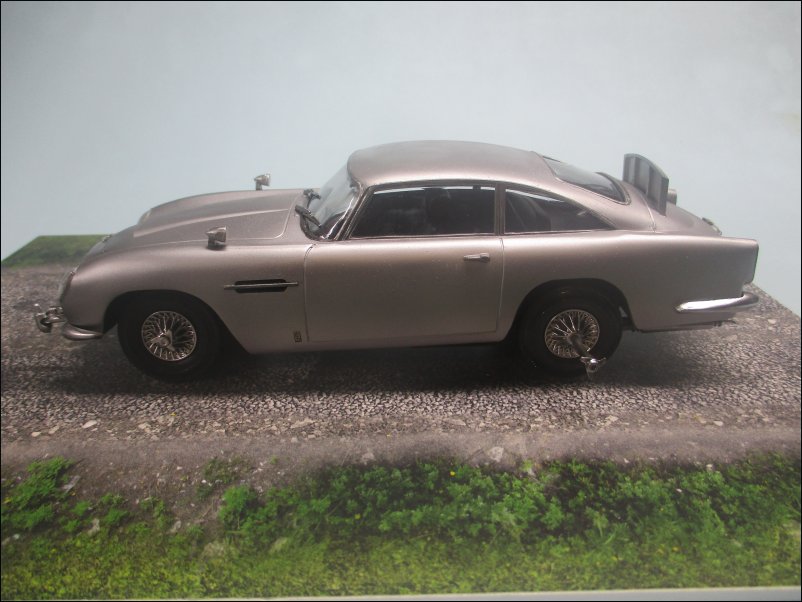
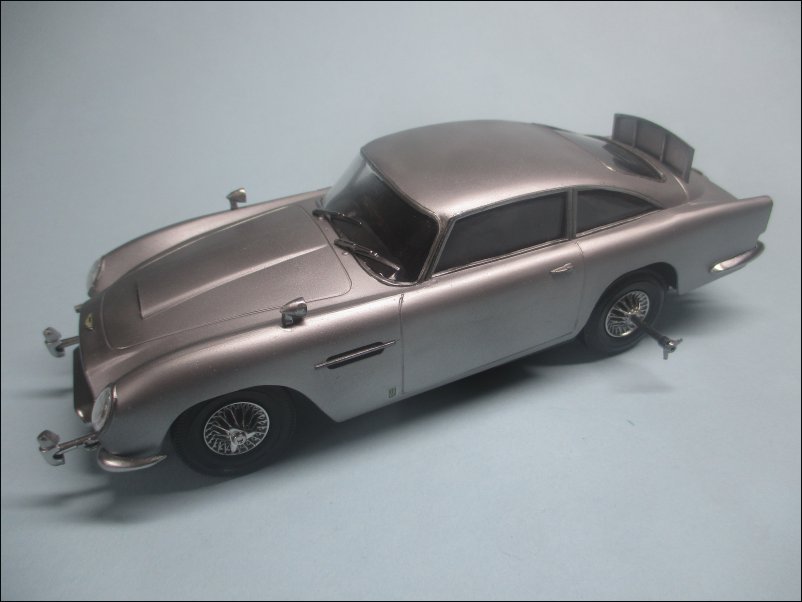
DB5 badge decals were applied to sides and rear although at least one of the DB5s used in the Goldfinger film didn't have the side badge. It is now finished:
That's all and thanks to @Jakko for organising this GB.
Dave
Using Canopy Glue, I fixed the windows in place:
Once the windows were dry, I fitted the rear-view mirror and attached the bodyshell to the floorpan. The wipers, machine guns, badges, bumpers and tyre shredders were glued and the headlamps were fitted:
View from the back. I made an error during this time by marking the passenger window and it took a lot of time and effort to remove the mark:
Wing mirrors were glued in place:
Rear lights and indicators were painted:
Badge decals were applied and rear number plate was glued in place:
DB5 badge decals were applied to sides and rear although at least one of the DB5s used in the Goldfinger film didn't have the side badge. It is now finished:
That's all and thanks to @Jakko for organising this GB.
Dave
Stefee
SMF Supporter
Beautiful job.
Excellent job Dave. It captures the look of the iconic Bond car superbly.
Outstanding work Dave.
PaulinKendal
SMF Supporter
Superb - and what an amazing car the DB5 was! You've certainly done it justice.
Neil Merryweather
SMF Supporter
A wonderful job , Dave.
I don't doubt that you've got the colour correct but in my memory (probably of the Dinky car I had at the time) the DB5 was a bronze colour . Did Dinky get it wrong or is my memory playing tricks?
I don't doubt that you've got the colour correct but in my memory (probably of the Dinky car I had at the time) the DB5 was a bronze colour . Did Dinky get it wrong or is my memory playing tricks?
davecov
SMF Supporter
Thanks everybody.
@Neil Merryweather Neil, it was Corgi who produced the gold DB5 first of all in 1965 and then a silver one in various versions. Silver was the correct colour and you can read the story of the gold one, here.
Dave
@Neil Merryweather Neil, it was Corgi who produced the gold DB5 first of all in 1965 and then a silver one in various versions. Silver was the correct colour and you can read the story of the gold one, here.
Dave
Tworrs
SMF Supporter
Excellent result Dave, really looks the part.
Neil Merryweather
SMF Supporter
I might have known!Thanks everybody.
@Neil Merryweather Neil, it was Corgi who produced the gold DB5 first of all in 1965 and then a silver one in various versions. Silver was the correct colour and you can read the story of the gold one, here.
Dave
that's a fantastic article, thanks!