Engines,engines, engines

  • Thread starter Deleted member 3568
  • Start date
D

Deleted member 3568

Guest
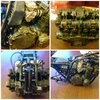
Hi all some people have said they thought my engines looked very realistic (I think it helps in that most of my life I've been around or worked on either motorcycle or car engines) so I thought if anyone wants to know how I do any aspect of weathering an engine they could just ask or if it would help maybe I could try and post a video (pretty rubbish at social media)

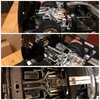
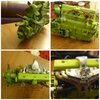
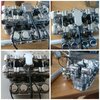
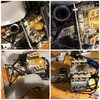
Here is a random sample of the hundreds of engines I must have modeled over the years

Resizer-16289578028830.jpg
Resizer-16289578028831.jpg
Resizer-16289578028832.jpg
Resizer-16289578028833.jpg
Resizer-16289578028834.jpg
Resizer-16289578028835.jpg
 

Airborne01

SMF Supporter
Joined
Mar 30, 2021
Messages
3,140
Points
113
Location
Essex
First Name
Steve
Obi One Kenobi.
When I do my next Opel Blitz or Hanomag I'll ask permission to sit at the feet of the master - I'll even put two hard-boiled egg halves in my eyes for the first few minutes! Excellent!
Steve
 
  • Haha
Reactions: JR
D

Deleted member 3568

Guest
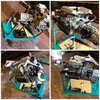
Hi all so the first installment, I'm basically the laziest modeler ever and if there's a short cut or an easy way to do something I'm there.

So heres the first bit of aging an engine, since I'm working on an engine atm I decided to use that as the first example.

First requirement talcum powder.

IMG-7909.jpg

Here's our nice clean engine

IMG-7907.jpg
IMG-7908.jpg

I use enamels so in this case I dip the brush in white spirit before picking up some talc(you can use water but you would have to matt the engine first as the water will just bead otherwise) I then dab the loaded brush on the engine (really load it all up with the white spirit and talc)once that's done flood with white spirit till it looks how you want.

IMG-7911.jpg
IMG-7910.jpg

I used gun metal from ABT

IMG-7912.jpg

To highlight the bolt heads.

IMG-7913.jpg

I then dust it all with Uschi powders

IMG-7916.jpg

Then buff that with a soft brush

IMG-7917.jpg

IMG-7918.jpg
IMG-7915.jpg

My ref pic

Resizer-16293122811420.jpg

This is going to end up being a very long post as I have lots of stuff to add to it (assuming you want it)
 

Tim Marlow

Little blokes aficionado
SMF Supporter
Joined
Apr 27, 2018
Messages
16,731
Points
113
Location
Somerset
First Name
Tim
Great stuff. I always find it interesting seeing how someone does something really well.
 
  • Like
Reactions: JR

JR

Member of the Rabble and Pyromania Consultant
SMF Supporter
Joined
May 26, 2015
Messages
17,275
Points
113
Location
lincs
First Name
John
I'm in, engines are all ways open for weathering Ken, interesting to see how others do it .
 

minitnkr

Rabble & escape committee member
SMF Supporter
Joined
Apr 27, 2018
Messages
6,705
Points
113
Location
Dayton, OH
First Name
Paul
......partial to Fords & Porsches eh.
 
  • Like
Reactions: JR
D

Deleted member 3568

Guest
Hi all well I have been given lots of ref pics of this engine and none of them are as distressed as this is, so a bit of white spirit and a cotton bud and it's looking more like it should.

IMG-7954.jpg

So next method, here is the sacrificial engine for this example (and for most of the others)

IMG-7961.jpg

OK as I said at the start of this I use mostly enamels so I can't say if this works with acrylics (although I've found in the past adding washing up liquid to the solution tends to have the same effect as white spirit)

If you want an engine that looks like it's been in a dusty environment (as in my mad to the max bike)

Get an empty tin or bottle into that pour some matt colour of the earth in the area your engine has been driving in ( for the mad to the max bike I used sand as it was set in a desert, for this I've used earth)

Add talcum powder to it and mix keep adding talc till you get paste like consistency then add white spirit keep stirring till you get the consistency of milk, add the talc to the paint first don't thin it till you've added the talc as the talc doesn't seem to take the colour if you thin the paint first.

OK so use a big brush and load it with this mixture and dab it all over the engine(really cover it so it gets in all the nooks and crannies, then load your brush with white spirit (this is the important bit hold engine as it will be in the car or bike and flood the engine with white spirit just let gravity do its thing.

IMG-7963.jpg
IMG-7962.jpg

This is how it looks when dry

IMG-7964.jpg

All the plastic parts I dab with ABT copper oxide blue patina

And again blend with white spirit

I also add ABT engine grease anywhere you might expect an oil leak

IMG-7967.jpg
IMG-7966.jpg
IMG-7965.jpg
 

Tim Marlow

Little blokes aficionado
SMF Supporter
Joined
Apr 27, 2018
Messages
16,731
Points
113
Location
Somerset
First Name
Tim
Among all the lunacy on here at the moment it’s nice to see some modelling has broken out. Great work and a very informative blog.
 
  • Haha
Reactions: JR

Mark1

SMF Supporter
Joined
Apr 17, 2021
Messages
3,550
Points
113
Location
South london
First Name
Mark
I've spent a lot of time around engines but wouldn't know how to get a model one looking so realistic, superb work.
 
D

Deleted member 3568

Guest
Sorry for such a long wait before a progress report but I have to wait till I'm doing something that relates to this topic.

OK so for headers I use ak real metal steel

IMG-8161.jpg

Ak real metal gold

IMG-8206.jpg

And valejo Arctic blue

IMG-8206.jpg

First paint the headers with AK steel ( if I was doing bike headers I would buff the steel up first) (the AK range of metal finishes are amazing and all can be buffed) (the buffing works even better if you have of the paint on the cotton bud or cloth you are buffing the work with)

Slightly off point my airbrush died so I decided to try and replicate finishes without one.

So get some of the AK gold on your brush(medium flat brush) work most of it off on a tissue and dry brush only on the first bends of the headers.

Next get a cotton bud dip it in AK steel and rub most of it off then dip it in the Arctic blue and starting at the dry brushed gold blend from the gold down towards the exhaust.

IMG-8208.jpg
IMG-8207.jpg

Here's how it should look.

IMG-8211.jpg
IMG-8210.jpg
IMG-8209.jpg

If on a motorcycle you would blend less and the header would be highly polished.
 

JR

Member of the Rabble and Pyromania Consultant
SMF Supporter
Joined
May 26, 2015
Messages
17,275
Points
113
Location
lincs
First Name
John
Very impressive shine Ken.
 

Mini Me

SMF Supporter
Joined
Jun 1, 2018
Messages
10,159
Points
113
First Name
Rick
Well done Ken.......some of these are so real looking you have to start hunting to see if it's a model or not. Rick H. :thumb2:
 
Top