Fernando N's Tamiya 1/48 Focke Wulf Fw190 D-9

Fernando N

Aviation fan and the Roadrunner, meep meep!
SMF Supporter
Joined
Apr 27, 2018
Messages
1,889
Points
113
Location
Almere, Netherlands
First Name
Fernando
Good evening all,

With the little Abrams almost finished, I’ve decided to build this one as an in between project:
20190119_151605_resized.jpg
Firstly the contents of the box, the instructions and a sheet to copy and use as painting masks:
20190119_151628_resized.jpg
Decals, canopies and the Eduard FE210 set I bought to enhance the interior:
20190119_151736_resized.jpg
Sprues and some poly-caps for the prop:
20190119_151811_resized.jpg
20190119_151833_resized.jpg
Had a start yesterday and continued this afternoon, modifying the cockpit for the pe and adding a coat of paint.
Most of the interior pe is on now:smiling4::
20190120_165609_resized.jpg
With not so much parts in the kit, I hope to have it built up soon and ready for paint, the box-art version seems to be the most interesting one to paint of the three.:tongue-out3:

Thanks for looking in.
Fernando
 

Attachments

  • 20190119_151736_resized.jpg
    20190119_151736_resized.jpg
    146.7 KB · Views: 1

Si Benson

SMF Supporter
Joined
Apr 27, 2018
Messages
3,322
Points
113
First Name
Si
Hi Fernando,
Oh I’m definitely in on this one, I have a 109 in the stash so I’m hoping to pickup some pointer:thumb2:
I’m sure you’ll do it justice :cool:
 

rtfoe

SMF Supporter
Joined
Apr 29, 2018
Messages
7,509
Points
113
Location
Malaysia
First Name
Richard
Being a Tamiya kit this will be one smooth build Fernando...I'm in on this as well. I have a horrible Fujimi kit that has a wrong shaped nose to fit a battery operated motor.

Cheers,
Richard
 

JR

Member of the Rabble and Pyromania Consultant
SMF Supporter
Joined
May 26, 2015
Messages
17,275
Points
113
Location
lincs
First Name
John
Fernando .
Can I join in ?OK its not armour or Russian :smiling2:
But will be interesting to see the painting.
John :smiling3:
 

Fernando N

Aviation fan and the Roadrunner, meep meep!
SMF Supporter
Joined
Apr 27, 2018
Messages
1,889
Points
113
Location
Almere, Netherlands
First Name
Fernando
Hi everyone, sorry for the very late reply as I’ve lost the mojo on this way back and totally forgot about the tread, but some of you might have guessed that then.

Anyway with the end of the month and this GB looming, I carefully reactivated this build last week and hoped to finish it in time (good motivation to finish at all).:nerd:
Si, Ian, Richard, John, Al and Jim, thanks for the interest and sorry to keep you waiting…

A lot to show now, but I was a bit keen on getting this one finished on time, sorry…
Dug up some old progress pics before things went less than enjoyable, here’s the office and seat with all the Eduard etch:

339074
Then started at modifying the office top for some etch add-ons:
339075
After here it came to a grinding halt, the lower wing-fuselage join had a gap at two places that need to be filled and I made a choice of fitting an open cowling only later wanted the closed version on.:sad-face:
Those things made me putting this one back in the box as I didn’t like all the work involved at the time, other GB’s took the mojo too at that time…

Fast forward three months, mojo is back and the mentioned obstacles were tackled, not perfect at all but still acceptable for a painting exercise.
Struck with a new flow, readied the office for masking and the barrels were replaced with brass micro-tube:
339076
339077
339078
Thought something was missing on the main landing gear legs, so added a copper wire on each for the brake line:
339079
Have a Kagaroo book on the ‘’A’’ variants, the legs look a lot like the A’s.
Problem was I only had good pics on the A-0 variants legs, and on others the lines seemed to be there but I can’t be sure.
So don’t shoot me if I’m wrong, I just like the look now.:upside:

Then it was the best part of the build, airbrushing the colours on after all was masked of course.
First VJ Grey primer, followed by VJ 71.057 Black for the pre-shade and VJ 71.257 Light Blue RLM 76 for the undersides:
339080
After a day’s worth of drying and a white tack mask, VJ 71.011 Dark Green RLM 83 was sprayed on followed by more masking and VJ 71.259 Grey Violet RLM 75.
Removed the masking and carefully mottled the sides with the RLM 75 & 83 to get this result:
339081
339082
A bit odd looking but with the subsequent layers of varnish and weathering the colours will look better.
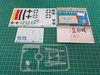
:smiling:

Next up were the decals, being older Tamiya decals the swastikas were still on the sheet but already not show on the instructions or the box art.
Nowadays all officially imported Tamiya kits in Holland go through Germany, and the swastika decals get painted over…
Although these were from 1995 there was little yellowing and they went on fine, only requiring at bit longer in the water and a tad more MicroSol to settle in:
339083
The fuselage band turned out to be the only bad fit of the lot, so it was sprayed on using VJ 71.001 White as a basecoat, then VJ 71.002 Medium Yellow followed by the VJ 71.003 Red RLM 23.

Almost finished with the weathering and the final coats of varnish are on so the completed pics are not far now.
Thanks for looking in.

Fernando
 

JR

Member of the Rabble and Pyromania Consultant
SMF Supporter
Joined
May 26, 2015
Messages
17,275
Points
113
Location
lincs
First Name
John
Very nice Fernando, the additions of the brass tube and the wheel leg with the wiring showing certainly add.
Also nice painting, very neat .:thumb2:
John .
 

rtfoe

SMF Supporter
Joined
Apr 29, 2018
Messages
7,509
Points
113
Location
Malaysia
First Name
Richard
:smiling6::smiling6: Worth the wait. Was surprised the Tammi fitting was slightly off at the wing roots. Looking good with the decals on.

Cheers,
Richard
 

Fernando N

Aviation fan and the Roadrunner, meep meep!
SMF Supporter
Joined
Apr 27, 2018
Messages
1,889
Points
113
Location
Almere, Netherlands
First Name
Fernando
Evening all,

John, thanks with such prominent guns they just had to be up-graded.:thumb2:
Peter, thank you, hope you like the end result too.:smiling4:
Richard, thanks sometimes their older ones have fit issues, just need some filler and elbow grease to solve.:tongue-out3:

Having this day and yesterday afternoon off for some serious dental work, in the recovery hours I’ve managed to take this one to the finish line.

After the decals it was wash time, my trusty set of A.MIG 1005 for the top and A.MIG 1601 for the undersides.
A.MIG 1602 was used for the sides with the mottling being too dark for the medium grey and too light for the dark brown washes.
When the washes were cleaned, all parts got two coats of VJ matt and it was the unmasking moment, always a nervous one to see if any paint crept under the tape…:smiling6:
Luckily little had to be corrected and after finishing the office and canopy, a smear of soot from the exhausts and ejector ports was replicated with the Tamiya ‘’B’’ weathering make-up box.

The spinner decal needed the most MicroSol to get the worst creases out, still some in but looks ok now:
339191
Used Ushi 0.1mm wire for the areal wires, always interesting to make it so the standing one doesn’t make the hanging one look sagged.:rolling:
A drop of thinned PVA and minimal tension made it look alright:
339192
So all complete now and just in time:
339193
Nice of Eduard to include a nameplate in the pe set.:smiling4:
339194
339195
339196
All in all a pretty nice kit to build, apart from a fit issue and some modellers induced ones still had a good time building and painting this one.
Colours might be off but I still like how she looks in her late war RLM’s.:smiling:
Surprisingly on her own, she looks a lot bigger due to the shape of the fuselage, still no bigger than a 1/48 Mustang.

Neat that this GB was on to motivate me building one, thanks guys.:thumb2:
Finished pics will be in the completed section soon and thanks for looking in.

Fernando
 

rtfoe

SMF Supporter
Joined
Apr 29, 2018
Messages
7,509
Points
113
Location
Malaysia
First Name
Richard
Beautifully done Fernando. A little addition to top off the icing on the cake are the little protruding tab undercarriage indicators on the top of the wings. You'll know what I mean when you check out references. The Fockwulf seems to be the only aircraft with this kind of indicator.

Cheers,
Richard
 

Steven000

WWII and nuts.
SMF Supporter
Joined
Aug 29, 2018
Messages
1,945
Points
113
Location
Belgium
First Name
Steven
Great work Fernando, I got one in the stash too :thumb2: but nooooo time :smiling5::smiling5::smiling5:
Also nice color scheme :thumb2:
Cheers, Steven
 

Fernando N

Aviation fan and the Roadrunner, meep meep!
SMF Supporter
Joined
Apr 27, 2018
Messages
1,889
Points
113
Location
Almere, Netherlands
First Name
Fernando
Beautifully done Fernando. A little addition to top off the icing on the cake are the little protruding tab undercarriage indicators on the top of the wings. You'll know what I mean when you check out references. The Fockwulf seems to be the only aircraft with this kind of indicator.

Cheers,
Richard
Thanks Richard, will add them on now and make new pics for the completed tomorrow afternoon…:thumb2::smiling5:

My refs don’t give the colour and the b/w pics make me believe they were red when visible, am I correct?
 

Allen Dewire

Proud Rabble Member
SMF Supporter
Joined
Apr 27, 2018
Messages
4,105
Points
113
Location
Bamberg
First Name
Allen
Damn Buddy,

You are just too busy here. This is beautiful and this coming from a non-wing thingy builder. I take it you shot the mottle with the hissy stick. It came out real well!!! Oh, and I hope you are not in too much pain...
 

AlanG

Moderator
Staff member
Moderator
SMF Supporter
Joined
Dec 2, 2008
Messages
7,491
Points
113
Location
Scotland
First Name
Alan
My refs don’t give the colour and the b/w pics make me believe they were red when visible, am I correct?

You'd be correct. They are indeed red


Excellent build Fernando. Love it
 

Fernando N

Aviation fan and the Roadrunner, meep meep!
SMF Supporter
Joined
Apr 27, 2018
Messages
1,889
Points
113
Location
Almere, Netherlands
First Name
Fernando
Damn Buddy,

You are just too busy here. This is beautiful and this coming from a non-wing thingy builder. I take it you shot the mottle with the hissy stick. It came out real well!!! Oh, and I hope you are not in too much pain...
Thanks buddy, mottle is from the AB and the pain isn’t noticeable due to the ibuprofen.

Not too bad for having a titanium implant installed in one’s upper jaw this morning, step one in the cyborg conversion.:smiling5:
Sadly they didn’t have anything heavier being a heavy metal fan and such…
 
Top