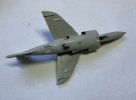
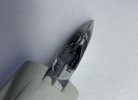
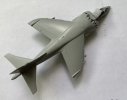
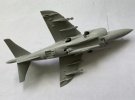
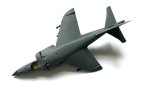
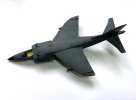
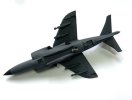
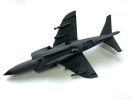
Geoffers Italeri 1/72 Sea Harrier FRS.1

Geoffers

SMF Supporter
Joined
Jan 26, 2017
Messages
1,019
Points
113
Location
Shropshire
First Name
Geoff
Hello Guys,

I’m going to join my first Scale Model Forum GB with this entry.
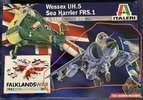
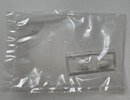
200FBFC1-145F-4D5E-8FE8-34CB4412971E.jpeg

I know a Sea Harrier is an obvious choice but they do look cool :cool:

It’s an oldie ( not sure if it can be described as a golden oldie :thinking:) first tooled by Esci back in 1983.

I may build it in flight unless I can spruce up the cockpit.

Sprue shots etc to follow, thanks for looking.

Geoff.
 

Geoffers

SMF Supporter
Joined
Jan 26, 2017
Messages
1,019
Points
113
Location
Shropshire
First Name
Geoff
Thanks papa :thumb2:

I’m starting with the Sea Harrier as I’m in the middle of a fight(build) with an Italeri Sea Dragon kit so am feeling a bit helicoptered out :confused:

I might build the Wessex if I have enough time left after the Sea Harrier though.

Cheers,

Geoff.
 

The Smythe Meister

Born to be WILD....... until about 9pm
SMF Supporter
Joined
Jan 30, 2019
Messages
5,748
Points
113
Location
Devon
First Name
Andy
Not in this GB personally Geoff,
(Not because it doesn't interest me, it's just that I have nothing suitable in the stash),
But that's one iconic subject you've picked there... I love em !!
Hence,I shall be following your progress :smiling3:
Andy
 

Geoffers

SMF Supporter
Joined
Jan 26, 2017
Messages
1,019
Points
113
Location
Shropshire
First Name
Geoff
Hello guys,

I’ve been holding back from starting as I wanted to clear some of my current projects.

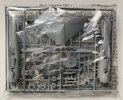
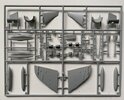
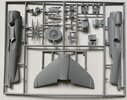
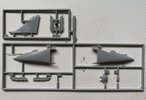
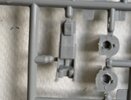
Nearly there now though so thought I would post the pictures of the sprues etc.

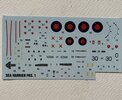
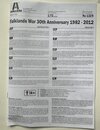
B887FBCA-7210-4C87-AFAC-B5C5B84F6F49.jpeg
All nice and fresh :smiling4:

7CE21FD5-8965-4B11-8822-5A64C2EF169A.jpeg

442FA8A4-5E30-4303-BE83-373C5F6DB027.jpeg
8182BC79-C398-4E3E-94EF-6A5A2B6CF524.jpeg
C35DE1FE-75FF-40E4-A664-CFC830B1B92F.jpeg
F291259B-E3A7-4C3E-A23E-D1C0F0EEEB28.jpeg
2EBFCA55-F609-45E6-AEDE-45350CB9F0D2.jpeg

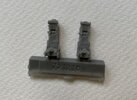
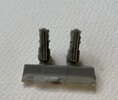
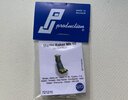
I’ve also been waiting on delivery of a resin ejector seat to spruce up the cockpit a bit. It arrived today and I am very underwhelmed by it to say the least :sad:

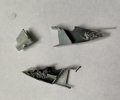
Here’s the original kit version.
22567AAB-0F39-4DD6-BA34-FB1CEEBD405A.jpeg

Here’s the resin one
BF61B101-2F07-4A52-866A-E0C92EBAA282.jpeg
5592FA9E-C9FF-4C93-B305-6976FDA5B7FA.jpeg

8CDC8702-94EB-403B-AB6C-014DBCF03D1C.jpeg

As you can see the seatbelt details which was the main reason I decided to upgrade are mostly missing.

I was going to build it on the ground but am toying with the idea of sourcing a pilot figure and building it inflight, I still haven’t decided.

Anyway I’ll start cutting plastic soon, thanks for looking :thumb2:

Geoff.
 

Jim R

SMF Supporter
Joined
Apr 27, 2018
Messages
13,754
Points
113
Location
Shropshire
First Name
Jim
Hi Geoff
A great choice for the GB. Looks a decent kit despite it's age. The resin seat is a nice upgrade and will look fine painted up.
Jim
 

Tim Marlow

Little blokes aficionado
SMF Supporter
Joined
Apr 27, 2018
Messages
16,798
Points
113
Location
Somerset
First Name
Tim
Kit looks good Geoff. Can’t say the same for the resin seat though, that looks quite poor to me, like the moulds are completely worn out….I think I’d be complaining there :thumb2:
 

colin m

Moderator
Staff member
Moderator
SMF Supporter
Joined
Dec 26, 2008
Messages
8,604
Points
113
Location
Stafford, UK
First Name
Colin
I do like a Harrier and I'm glad to see one being built. As you've probably noticed, that old Esci kit isn't bad at all. I'm looking forward to this.
 

Geoffers

SMF Supporter
Joined
Jan 26, 2017
Messages
1,019
Points
113
Location
Shropshire
First Name
Geoff
Thanks guys :thumb2:

Yes it is indeed an old Esci kit but it does have some nice detail for its age.

I will be happy if mine turns out as nicely as your build Pete.

In regard to the poor quality of the seats I have emailed PJ Production and will let you know what they say.

Cheers,

Geoff.
 

Geoffers

SMF Supporter
Joined
Jan 26, 2017
Messages
1,019
Points
113
Location
Shropshire
First Name
Geoff
Hello Chaps,

I’ve been busy with the build so thought it about time to post an update.

Firstly I had a reply from PJ Production and their explanation is that there is nothing wrong with the seat. They claim that they have changed the mould to recreate a seat with hooked up seat belts rather than them dangling!
I felt the tone of the reply was a bit condescending but never mind there are other aftermarket companies to buy from in future ;)

Anyway on to the build.

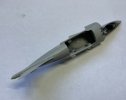
First up is the cockpit, it’s pretty basic with decals for the instrument panels, control column and seat.
I’m not too bothered as after the disappointment with the seat I’ve decided to close the canopy so not much will be seen.

I added some weight to the nose just in case it’s a potential tail sitter. Slivers of lead glued in place with PVA glue.

E1E2E788-F209-4CB4-9ABD-5DA068D53AF9.jpeg
Then it was all buttoned upF32DB8BD-0F2E-473F-B81B-05090202FB9D.jpeg

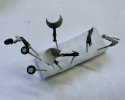
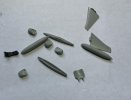
I’ve cleaned and built up most of the ancillary parts.

Some of which have been painted up.

741E250C-32CE-4758-90D1-FDF1A938F028.jpeg

07058D3E-031F-4A54-B77A-3908703442F2.jpeg

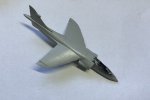
I’ve also been adding the various components to the main fuselage.

A3D9D641-3E8B-497B-AD3E-26B63E55015D.jpeg

90B5F478-ED30-488C-B372-0BF68C78F6C3.jpeg
Unfortunately the rear undercarriage has to be added at this stage so I’ll have to be careful not to break it off :anguished:

So it’s coming together nicely, not much in the way of seam work or rescribing to do so should be ready for paint soon.

Another update soon, thanks for looking :thumb2:

Geoff.
 

Attachments

  • 714C7397-0395-499C-97CD-FB612D63BB11.jpeg
    714C7397-0395-499C-97CD-FB612D63BB11.jpeg
    64.8 KB · Views: 0

colin m

Moderator
Staff member
Moderator
SMF Supporter
Joined
Dec 26, 2008
Messages
8,604
Points
113
Location
Stafford, UK
First Name
Colin
It's nice to see things moving along Geoff.
 

Geoffers

SMF Supporter
Joined
Jan 26, 2017
Messages
1,019
Points
113
Location
Shropshire
First Name
Geoff
Hello Chaps,

Time for a quick catch up :smiling:

It’s all ready for paint now so hoping to get the primer on later today.

65BDCAE2-4F8E-4C0D-BC2D-DB7F5AB9C1A6.jpeg

A7195021-7EF2-4F38-9FD0-C28A4CB85A07.jpeg


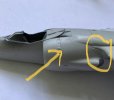
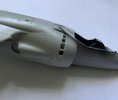
It has all gone together pretty nicely with not too much filler needed. The worst area being around the wing root.
The Aden cannon pods were also a bit tricky as the was no location points on the model but I think they look reasonably right (too late now :tears-of-joy:).

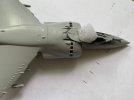
The only things of note are I have opened up the upper vents around the air intakes as I believe these had a tendency to fall open when the aircraft was powered down.
7584F801-277E-459E-A7E1-0911C8DB818C.jpeg
Before.

F24A16DE-4426-45A4-B699-174B973263E8.jpeg
After.

2EB35C3E-F24F-4128-B2BB-C2830F2AFC0E.jpeg

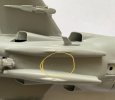
There was also a sizeable location slot between the cannon pods for a pylon to be fitted.

However on the pictures I found of Sea Harriers in the Falklands none seemed to be fitted with this pylon so I filled the gap with the actual pylon cemented into place and the cut it away and sanded it back.

17C691EF-7558-4A1F-9BC5-5385E6A3B375.jpeg

So on with the paint.

Another update soon, thanks for looking :thumb2:

Geoff.
 

colin m

Moderator
Staff member
Moderator
SMF Supporter
Joined
Dec 26, 2008
Messages
8,604
Points
113
Location
Stafford, UK
First Name
Colin
You've been busy Geoff. It's nice to see the classic shape of the Harrier developing.
 

Geoffers

SMF Supporter
Joined
Jan 26, 2017
Messages
1,019
Points
113
Location
Shropshire
First Name
Geoff
Thanks Colin, I’ll hopefully get the painting sorted this week ;)

Geoff.
 

Geoffers

SMF Supporter
Joined
Jan 26, 2017
Messages
1,019
Points
113
Location
Shropshire
First Name
Geoff
Hello guys,

Some more progress to report.

Main colour scheme paint is now done so just a bit of detail painting to do before decalling can start.

It was given a primer coat of black Mr Sufacer 1500 and once this had dried thoroughly it was given a coat of Vallejo Model Air 71-

FED6AC84-F197-4E5E-8C52-2644BBDCA639.jpeg

F91BD2E6-69BD-4089-A05A-5235C1AA082A.jpeg
CEA45366-4A52-4D33-8B13-7AE9D02A4753.jpeg

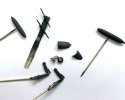
The other ancillary parts also got the same treatment.

E9C815A8-19C2-4050-A9C3-F658FDE73FA8.jpeg

The ejector seat has also been painted up (forgive the poor quality photo the camera was having trouble focusing :sleeping2: )

5BCDFDBB-C89F-4898-B332-B5D4970EA555.jpeg

Not too much more to do, hopefully I will get some more work done on it soo.

Thanks for looking :thumb2:

Geoff.
 

Attachments

  • E2D4656A-C6C7-4870-AF67-A64A0AD2FAAB.jpeg
    E2D4656A-C6C7-4870-AF67-A64A0AD2FAAB.jpeg
    37 KB · Views: 0

Jim R

SMF Supporter
Joined
Apr 27, 2018
Messages
13,754
Points
113
Location
Shropshire
First Name
Jim
Hi Geoff
Just had a catch up and I must say you've done a cracking job. Very neat work. Tidy work opening up those air vents.
Jim
 
Top