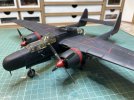
GWH P61A Black Widow - 1/48

Jim R

SMF Supporter
Joined
Apr 27, 2018
Messages
13,729
Points
113
Location
Shropshire
First Name
Jim
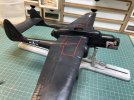
Lines have come out really well. Masking must have taken longer than the painting. :smiling:
Jim
 

BarryW

SMF Supporter
Joined
Jul 23, 2011
Messages
5,040
Points
113
Location
Dover
First Name
Barry
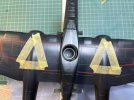
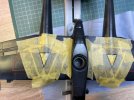
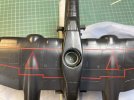
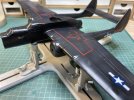
I had decided to use the decals for the triangles but they did not work. They are thin and don’t splinter but as soon as you move them around into position they fold up. It got so bad I had to abandon them and masked up to paint them

7D2CC138-B265-4F5F-AE5B-1113A00FE985.jpeg
First of all I masked the outer edges before filling in.
C7B8F1A6-C3E4-46AD-8796-2EADD1505FFF.jpeg
The positioning was all done by Mk1 eyeball.
2335E969-5870-4C85-A331-A9F07299F06B.jpeg
Perfect.

Decals are the worse job and the hardest. I have never had problems with Kits World decals before but this time the nose art was a massive problem to put into position and Night Take Off simply got so folded up on itself I had to abandon the idea of a different set each side. Coopers Snooper was also a problem and in the end I just had to leave it as close to position as I could get it. Not good at all but it will have to do. The serial number folded up on me as well so I left ‘Take off’ serial on the other side.

00F137FC-6C2F-4EAB-8DA0-2BFC498C9D4C.jpeg3AC8CE65-313F-4A1C-A4C8-819EF54AB4A4.jpeg
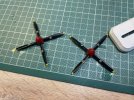
Props done as well
2A4790DB-669C-4A77-802F-F86B599A7836.jpeg
 

adt70hk

I know its a bit sad but I like quickbuild kits!!!
SMF Supporter
Joined
Sep 4, 2019
Messages
9,496
Points
113
First Name
Andrew
Sorry to hear about the decal problems Barry. It's still looking very good though!

ATB.

Andrew
 

Jim R

SMF Supporter
Joined
Apr 27, 2018
Messages
13,729
Points
113
Location
Shropshire
First Name
Jim
Triangles have come out well. More careful and time consuming masking. Shame about the decals but all looking good.
 

BarryW

SMF Supporter
Joined
Jul 23, 2011
Messages
5,040
Points
113
Location
Dover
First Name
Barry
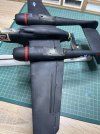
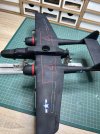
I have done my light grey pin washes and it gives me a nice patina after removing the surplus with a brush dampened in odourless thinner,
Making sure that I wiped in the direction of airflow.

After leaving it to dry over night I then applied a matt coat.
7A3ED388-72F0-4AAF-968D-EC7800F752C7.jpeg99E16A26-3F4B-49C4-B9EE-CF01316E8D8F.jpeg


I am pleased at how the shading now looks, somewhat bleached from the hot sun in places breaking up the starkness of the black. The grey wash gives further interest.

I should add that the above photos were taken before the varnish cured properly so, with the bench lighting, it over emphasises the bleaching.
 

Ian M

Administrator
Staff member
Administrator
Moderator
SMF Supporter
Joined
Dec 14, 2008
Messages
19,721
Points
113
Location
Falster, Denmark
First Name
Ian
You made a great job of getting that all over black to look interesting Barry.
Good job on the Red lines too. I think I might have done it the other way around. Spray the red then put a 1mm masking tape down, then did the black.
 

adt70hk

I know its a bit sad but I like quickbuild kits!!!
SMF Supporter
Joined
Sep 4, 2019
Messages
9,496
Points
113
First Name
Andrew
Barry

That's turned out beautifully. I'm about to 'weather' my first black finish on two 1/72 109s I'm doing and I had assumed it would have needed an almost black pin wash but I can see from yours that would have been a mistake.

Thanks for the timely post.

ATB.

Andrew
 

Jim R

SMF Supporter
Joined
Apr 27, 2018
Messages
13,729
Points
113
Location
Shropshire
First Name
Jim
Hi Barry
That black finish is looking very good indeed. A grey pinwash has worked well and the clean up has added to the faded look beautifully.
Jim
 

BarryW

SMF Supporter
Joined
Jul 23, 2011
Messages
5,040
Points
113
Location
Dover
First Name
Barry
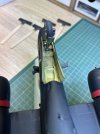
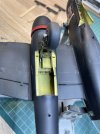
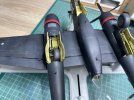
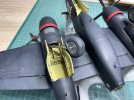
The undercarriage fitted neatly into position. But, as you can see from these photos, each are held very precariously in place and I don’t expect it to stay in place for long before the u/c collapses and the model is binned!!!!
0854D4E4-B80A-458E-9882-62C58CD8BAE8.jpeg
F7A500A8-B306-4954-9D33-F4819CE0BBEE.jpeg

You will recall how I managed to get the mud guard into place held just by a tiny section of pe. Well that did not last long and since fitting the front leg into the fuselage I have tried several times to reattach it. No luck at all and the only thing I managed was to damage the paint. So I decided to leave that off on the basis that this might be done in maintenance…. GWH did a good job on this kit but did not pay enough attention the practicalities.

CC3983BD-BC5E-49EA-98EF-244E7D23B0C7.jpeg
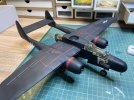
Finally got her on her feet.
A4C6A69B-BA0A-4458-9A63-DF63E360D92A.jpeg

Here she is almost done. I will need to spray a bit of matt in places where I have used c.a and it’s done.

BF1D4F27-E6E0-49CD-B414-635ED74DB4D1.jpeg

I will do a completed thread later provided the undercarriage does not collapse before I take the pictures!!
 

BarryW

SMF Supporter
Joined
Jul 23, 2011
Messages
5,040
Points
113
Location
Dover
First Name
Barry
Well there won’t be completed photos.

I got the varnish sprayed, all fine, then I moved it off my turntable and the u/c collapsed when I put it down.

I have never known a model to have such a weak u/c. It was wobbling as I sprayed the matt varnish!!!

This is how it looked when I put it upside down. Note the prop also came off.
8C43BF0F-DA27-4462-BAE6-4A770DD22B8F.jpeg

As I tried to work it back into place it just got worse, more bits falling off. None of this has any real structural integrity. Yes, we like in scale accurate models but manufacturers really do need to also allow for practicalities.

Another shot
9AF7E88A-2F62-4132-A51B-B5AB1DEFABE0.jpeg

It has got worse since. Even if I did manage to get it all back together will it stay in one piece until I finish the photos? I doubt it.

So this model is going in the bin. Sad, but at least I did finish it and had it all in one piece for what, 60 seconds….
 

Andy the Sheep

SMF Supporter
Joined
Apr 7, 2019
Messages
1,539
Points
113
Location
North Eastern Italy
First Name
Andrea
Any chance of turning it into an "inflight" P61? It's a real pity to bin such a beauty but I admit that adding the crew, or at least the pilot, would involve some important surgery, now.

Andrea (who's waiting for his P70 undercarriage to collapse, sooner or later).
 

Jim R

SMF Supporter
Joined
Apr 27, 2018
Messages
13,729
Points
113
Location
Shropshire
First Name
Jim
That's a shame Barry because it was looking really good.
 

BarryW

SMF Supporter
Joined
Jul 23, 2011
Messages
5,040
Points
113
Location
Dover
First Name
Barry
Any chance of turning it into an "inflight" P61? It's a real pity to bin such a beauty but I admit that adding the crew, or at least the pilot, would involve some important surgery, now.

Andrea (who's waiting for his P70 undercarriage to collapse, sooner or later).
I don’t think that would be practical Andy. No, I have already broken it apart and binned it. Onwards and upwards….
 

adt70hk

I know its a bit sad but I like quickbuild kits!!!
SMF Supporter
Joined
Sep 4, 2019
Messages
9,496
Points
113
First Name
Andrew
Sorry to hear that Barry. That was looking very good indeed.

ATB.

Andrew
 

BarryW

SMF Supporter
Joined
Jul 23, 2011
Messages
5,040
Points
113
Location
Dover
First Name
Barry
Thanks everyone. I don’t get sentimental about these things and just move on. All I really lack are the photos after all, I got a lot of enjoyment from the build despite some issues.

A word of warning though. If you are thinking of getting one of these and an aftermarket metal undercarriage set, that won’t solve the problem. The issue was not the strength of the parts, but the very weak joins and connection points to the fuselage.
 
Top