Humber Armoured car MK.II

geegad

Can't cheat fate..
Joined
Mar 7, 2010
Messages
2,477
Points
113
First Name
John
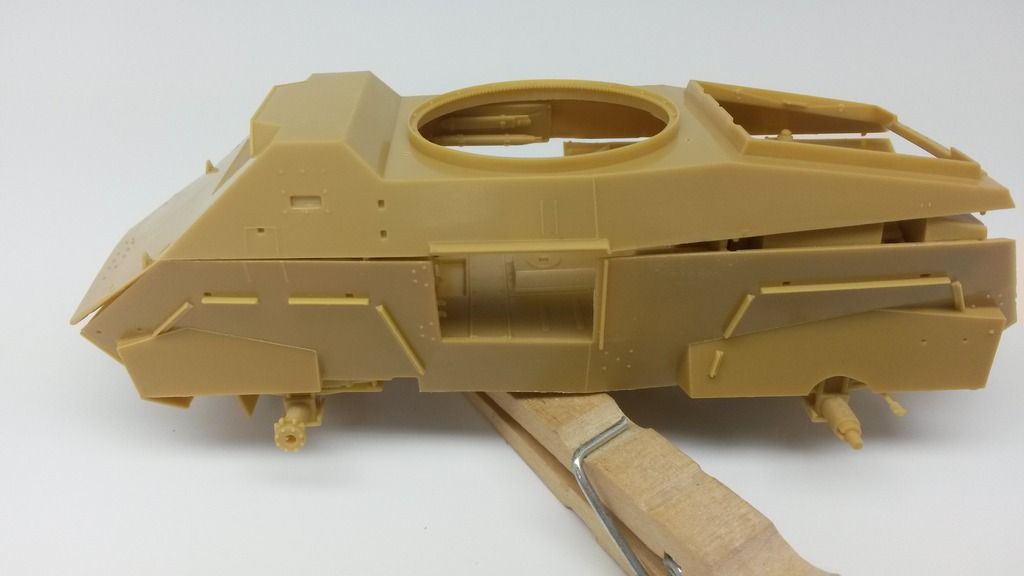
well been on holiday finally this year and as i keep moaning about work work gets in the way so been building this in between work and sleep its a cracking kit for detail as you will see but god its fighting me all the way fit problems a plenty again you will see there are not many locating tabs so its guess work in most part which doesnt help with the final fit arrrrrr so hope you like where im at 


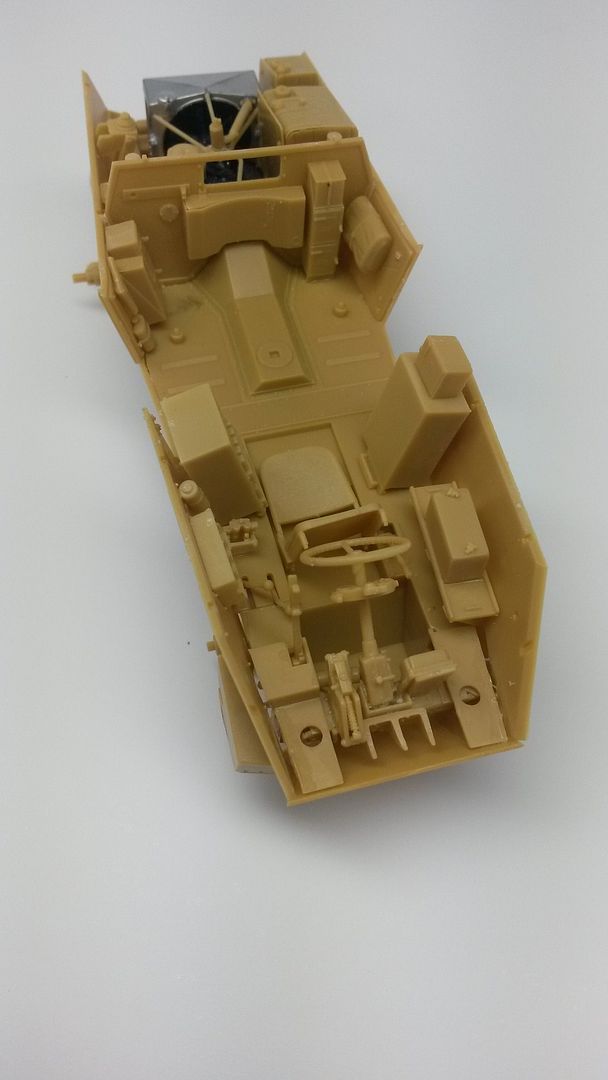
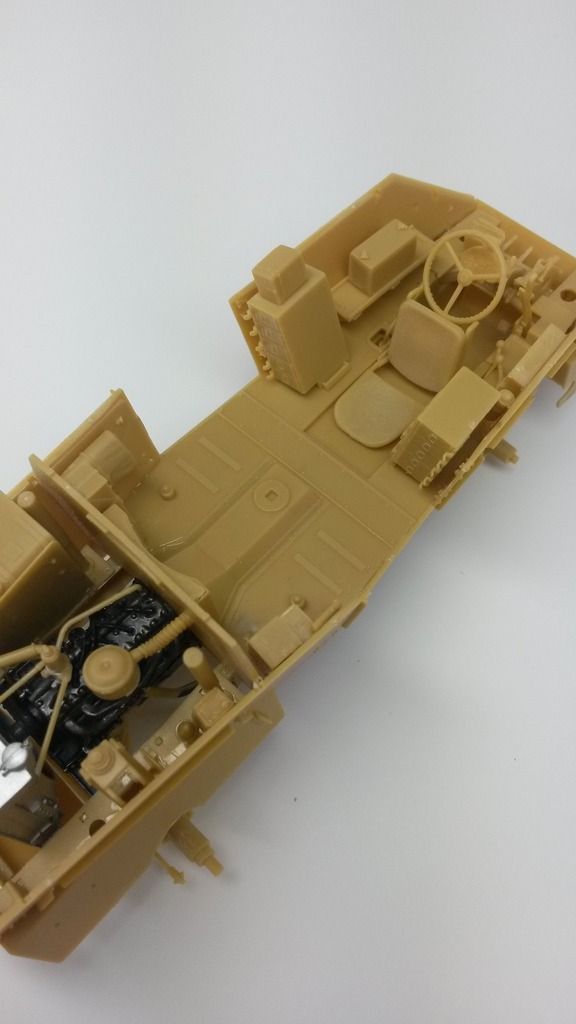
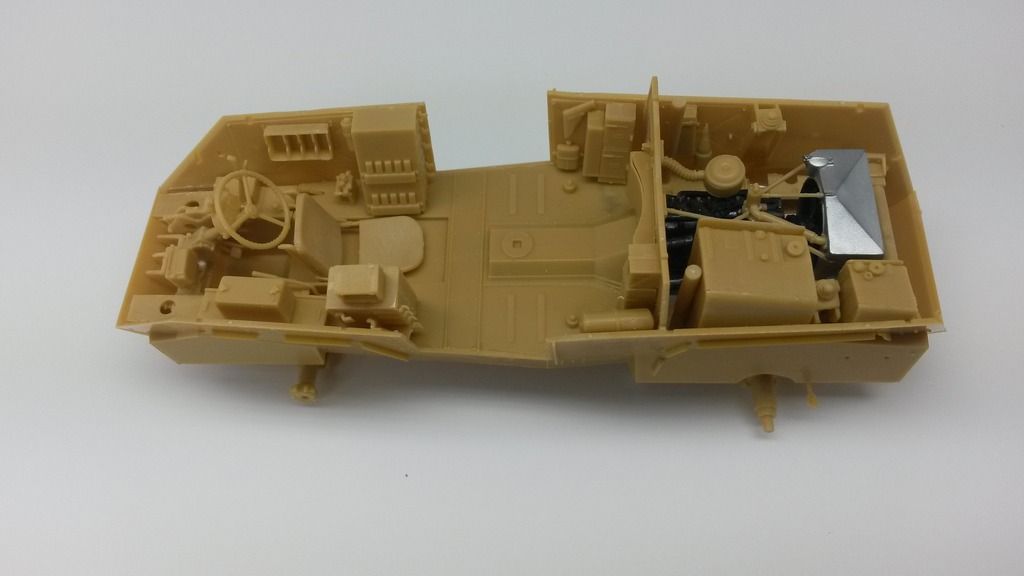
and this is what i mean  and the other side is the same if not worse.how the blue blazes im going to get this together apart from a lot of glue and blue language so wish me luck cause im going to need it 


cheers for looking in lads 
 

yak face

Wossupwidee?
Staff member
Moderator
SMF Supporter
Joined
Jun 13, 2009
Messages
12,398
Points
113
Location
sheffield
First Name
tony
Liking this a lot john , it looks very similar to the bronco kit ive just done- superb fine details but slightly challenging fit in places. Stick with it though , im sure youll beat the problems and it looks as if its going to be a great model , cheers tony
 
Last edited by a moderator:

eddiesolo

It's a modelling time!
SMF Supporter
Joined
Jul 2, 2013
Messages
11,070
Points
113
First Name
Si.
Cripes John, that is a beggar and a half fit wise! I had a Bronco model and it was lovely in detail but the fit was terrible, I gave up in the end :D  Stick with it and I am sure you will lick...or hammer it into shape. Nice start though, you will conquer and have a top drawer model at the end.
 
Last edited by a moderator:

geegad

Can't cheat fate..
Joined
Mar 7, 2010
Messages
2,477
Points
113
First Name
John
cheers lads really losing my temper with this i knocking parts off while trying my hardest to get them together 
 

eddiesolo

It's a modelling time!
SMF Supporter
Joined
Jul 2, 2013
Messages
11,070
Points
113
First Name
Si.
cheers lads really losing my temper with this i knocking parts off while trying my hardest to get them together 

Oh dear, maybe you need to leave alone John, at least for tonight. There is a lot of parts in it and I am not surprised that you are knocking stuff off, especially in trying to get it to fit.
 

geegad

Can't cheat fate..
Joined
Mar 7, 2010
Messages
2,477
Points
113
First Name
John
cheers eddie thinking the same well this is just the dry fit wait till  i paint the inside first you will here scream from here
 

eddiesolo

It's a modelling time!
SMF Supporter
Joined
Jul 2, 2013
Messages
11,070
Points
113
First Name
Si.
cheers eddie thinking the same well this is just the dry fit wait till  i paint the inside first you will here scream from here

LOL, deep breaths John, deep breaths...
 

monica

“When there's no more room in hell, the dead will
SMF Supporter
Joined
Oct 30, 2013
Messages
15,111
Points
113
Location
Melbourne
First Name
monica
nicce start and looking good,even with the fit problems,do like its  detailing as well,


keep at it John,your doing a fine job, 9_9
 

tr1ckey66

SMF Supporter
Joined
Mar 6, 2009
Messages
3,686
Points
113
First Name
Paul
Hi John


Really great choice of kit. I've got the Mk IV and the parts looks great and with a full interior too. Loads of stuff to got at - this will be a really interesting build.


Cheers


Paul
 

Steve Brodie

SMF Supporter
Joined
Sep 17, 2014
Messages
3,732
Points
113
Location
Shropshire
First Name
Steve
That top looks like its meant for a different kit :smiling:
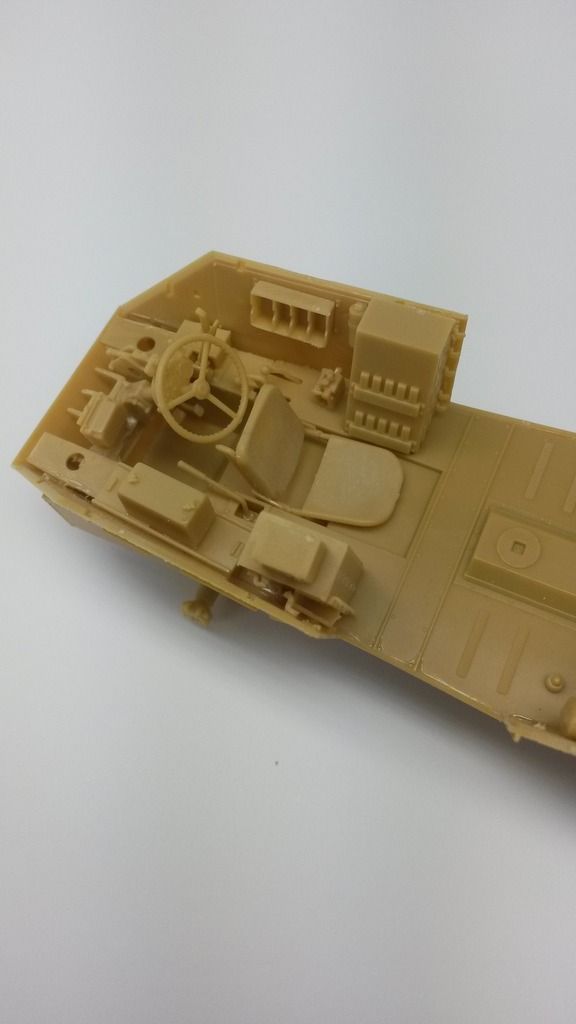
, take it the chair isnt glued in place at this point ?
 

tr1ckey66

SMF Supporter
Joined
Mar 6, 2009
Messages
3,686
Points
113
First Name
Paul
Hi John


I'd try glueing the rear portion of the upper deck first, let it fully cure (use normal liquid cement to weld the parts together) for 24 hours, then heat the middle section with a hair dryer and apply pressure to ease the front upper deck to the body (do this carefully as you don't want to melt anything just soften the shell).


Anyway, I hope you resolve this and thanks for sharing as I'll be prepared for when I attempt mine.


Good luck 


Paul
 

geegad

Can't cheat fate..
Joined
Mar 7, 2010
Messages
2,477
Points
113
First Name
John
Hi John


I'd try glueing the rear portion of the upper deck first, let it fully cure (use normal liquid cement to weld the parts together) for 24 hours, then heat the middle section with a hair dryer and apply pressure to ease the front upper deck to the body (do this carefully as you don't want to melt anything just soften the shell).


Anyway, I hope you resolve this and thanks for sharing as I'll be prepared for when I attempt mine.


Good luck 


Paul

That has gotta be tip off the day on here thanks big time for the advice will follower the the letter you have saved me some heart ache 


Thanks again for the tip
 

tr1ckey66

SMF Supporter
Joined
Mar 6, 2009
Messages
3,686
Points
113
First Name
Paul
Interior look great John Lovely paint work and weathering.


Your welcome with the tip, I just hope it works for you! To give it the best possible chance I would also advise scraping any paint away from mating surfaces to ensure the liquid cement 'welds' properly. I'd also clamp the rear section whilst your gluing it to ensure maximum adhesion.


really looking forward to this coming together.


Cheers


P
 
Last edited by a moderator:

geegad

Can't cheat fate..
Joined
Mar 7, 2010
Messages
2,477
Points
113
First Name
John
Cheers paul going to have to start next week now its my big 40 tom so a party and one big wee wee up so no moderling over the weekend 


And thanks for looking again and giving me quality tips
 

monica

“When there's no more room in hell, the dead will
SMF Supporter
Joined
Oct 30, 2013
Messages
15,111
Points
113
Location
Melbourne
First Name
monica
the Interior look great John, Lovely paint work and weathering,real given it some life so to say,liking it, :D
 
Top