- Home
- Forums
- Group Builds
- The New Group Builds (2017 on)
- The User Created Group Builds
- 2023 Builds
- Pete's wheeled cargo movers GB. August - Dec. 2023
You are using an out of date browser. It may not display this or other websites correctly.
You should upgrade or use an alternative browser.
You should upgrade or use an alternative browser.
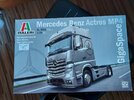
Ian M's Actros MP4 Giga Space. Italeri 1/24
- Thread starter Ian M
- Start date
Nice Ian.
peterairfix
SMF Supporter
Baggsy have the first row
Jim R
SMF Supporter
Good choice.
Very nice front row too Ian.
Got around to the sprue pictures today.
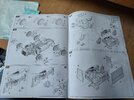
The distractions are B/W drawing type. Clear and concise. There are 44 sections.
Two decal sheets the smaller of the two are Chrome!!!
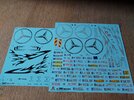
The detail looks OK and crisp.
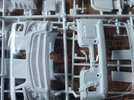
Total of 8 sprues and a set of rubber tyres.
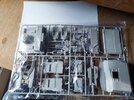
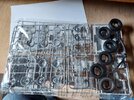
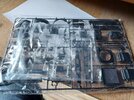
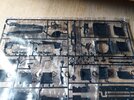
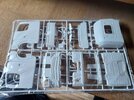
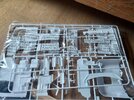
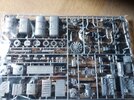
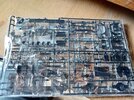
That's all for now me spuds are done and i still need to make the sauce!
Cheers.
The distractions are B/W drawing type. Clear and concise. There are 44 sections.

Two decal sheets the smaller of the two are Chrome!!!

The detail looks OK and crisp.

Total of 8 sprues and a set of rubber tyres.


That's all for now me spuds are done and i still need to make the sauce!
Cheers.
So having spent yesterday and this morning cutting hedgerow and moving plants around. Oh and digging up about 20m2 of overgrow and way past their best Forsythia bushes, then driving back and forth to the recycling center I needed a break and was awarded some time in the cave! Yay.
So glue ready. New blade in the knives and of we jolly well go!
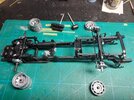
The Side rails for the ladder frame are in two parts! Don't know if that is the norm for these so they fit the box or so they can flog a 6x4 and a 4x2 with as many common parts as possible...
Anyhow.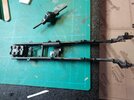
Some heavy mould joins on the rails, One of which I have forgot to sand off!
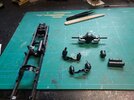
According to the destructions all these parts so far ar the same colour, Matt Gunmetal grey....LOL that sound familiar.... the discs and air bags the only exception.
My truck is not going to be the box art silver. Nor the white. It will be green. What do you lot think of a White chassis, with the green body. . .
So I have finally started.
Rev. K. Ermit.
So glue ready. New blade in the knives and of we jolly well go!
The Side rails for the ladder frame are in two parts! Don't know if that is the norm for these so they fit the box or so they can flog a 6x4 and a 4x2 with as many common parts as possible...
Anyhow.

Some heavy mould joins on the rails, One of which I have forgot to sand off!

According to the destructions all these parts so far ar the same colour, Matt Gunmetal grey....LOL that sound familiar.... the discs and air bags the only exception.
My truck is not going to be the box art silver. Nor the white. It will be green. What do you lot think of a White chassis, with the green body. . .
So I have finally started.
Rev. K. Ermit.
peterairfix
SMF Supporter
And a good start has been achieved
Chipping away at the joints of the parts that need building up.
It's just occurred o me that there are NO chromed parts to this kit.
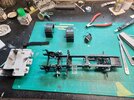
I drilled out all the holes in the 5th wheel mountings slider-rails...Chassis ready for a splosh of primer.
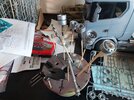
A few bits ready for primer too. Except the hubs and covers, which will most likely be black everything will be the chassis colour. Might do the rims body colour though. not made up my mind yet.
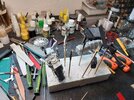
Once primed, the black parts will get a coat of semi matt black. The 'silver' bits Aluminium colour. I could be tempted to do the tanks in Stainless though...or polished Alu.
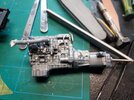
The engine is quite a lump. (13ltr straight 6 if I recall correctly). 90% of it is Aluminium with some rubber hose here and there and some bright red heat insulation on some of the trunking.
As always C&Q welcome.
It's just occurred o me that there are NO chromed parts to this kit.

I drilled out all the holes in the 5th wheel mountings slider-rails...Chassis ready for a splosh of primer.

A few bits ready for primer too. Except the hubs and covers, which will most likely be black everything will be the chassis colour. Might do the rims body colour though. not made up my mind yet.

Once primed, the black parts will get a coat of semi matt black. The 'silver' bits Aluminium colour. I could be tempted to do the tanks in Stainless though...or polished Alu.

The engine is quite a lump. (13ltr straight 6 if I recall correctly). 90% of it is Aluminium with some rubber hose here and there and some bright red heat insulation on some of the trunking.
As always C&Q welcome.
Two things I would like to get sorted befor you start!
No you can never have to many glues.
The Screw drivers are from the RC truck build. (On hold for this).
No you can never have to many glues.
The Screw drivers are from the RC truck build. (On hold for this).
Is it me or is it very quite in here?
Any how. Pearl White. DO NOT try to spray over a black primer with Pearl White! You end up with a rather grey silver look.
So today I sprayed over it with white primer and will have another go in the morrow!
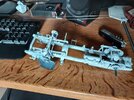
Got the Alu parts painted yesterday as well.
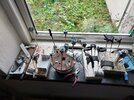
Next up are the semi matt black bits..
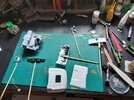
Then there is the cab to sort out. Was surprised to find they are "flat pack". That's going to be fun. Especially as there is an inner and an outer cabin. Hmm
More later comments welcome.
Any how. Pearl White. DO NOT try to spray over a black primer with Pearl White! You end up with a rather grey silver look.
So today I sprayed over it with white primer and will have another go in the morrow!

Got the Alu parts painted yesterday as well.

Next up are the semi matt black bits..

Then there is the cab to sort out. Was surprised to find they are "flat pack". That's going to be fun. Especially as there is an inner and an outer cabin. Hmm
More later comments welcome.
Last edited:
peterairfix
SMF Supporter
Just caught up some nice work going on I hope to start my big one in a couple of days
Right the paint on the subframe has hardened off and some of the loose bits filling the bench can be put in place.
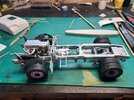
Four, (or is it six? ) wheels on the deck and motor in.
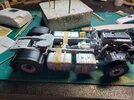
Various tanks and the huge exhaust box fill up nice on the rails. Mudguards Too!
Soon time to start the cab part...should be fun.
Comments welcome as always.
Cheers!

Four, (or is it six? ) wheels on the deck and motor in.

Various tanks and the huge exhaust box fill up nice on the rails. Mudguards Too!
Soon time to start the cab part...should be fun.
Comments welcome as always.
Cheers!
peterairfix
SMF Supporter
Very very nice work I am in awe
Due to the high level of interest in this thread, I forgot to take photos of the inner cabin and its construction. Needless to say it was a fun experience and it looks really great inside. (irony can occur, as I believe it might have just done). I just forgot the photos lol.
Green carpet and trim details through the cabin and seats. Black IP. white everything else! lol.
That out the way the exterior cabin:
As Mick mentioned in his build the distractions call for the side windows and the door cards to be fitted to the inside of the doors prior to construction of the external panels. I found the best way was to do just that then attach and glue the sides of the cab to the rear wall. Let that set up and then you can bend it open and get the doors pop in to the right place. Almost. A bit of pushing and squeezing helped it the last mm or so.
A bit of masking tap clamping and left overnight.
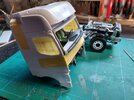
Quite a clever design as all the panels are panels in real life, so if you where really careful you could maybe paint the whole exterior then build it. I thought better of it though lol.
Today was a day of all the fiddly little bits that need sorting and painting. Some of which I judged to be easier to manage if fixed in place and primed 'on site' so to speak then paint them with a brush (!) after the body colour has been sorted.
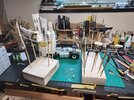
Body bits on the Left in the white plastic ready for a splash of primer then paint of some form. most of the parts on the Right need to be satin black. This however is on its way from the hobby shop so not much going on these except primer.
The chassis and wheels are painted!
Oh the dregs in the bottom of a Tamiya satin black are a great high gloss black if you are interested. lol
More soon.
Green carpet and trim details through the cabin and seats. Black IP. white everything else! lol.
That out the way the exterior cabin:
As Mick mentioned in his build the distractions call for the side windows and the door cards to be fitted to the inside of the doors prior to construction of the external panels. I found the best way was to do just that then attach and glue the sides of the cab to the rear wall. Let that set up and then you can bend it open and get the doors pop in to the right place. Almost. A bit of pushing and squeezing helped it the last mm or so.
A bit of masking tap clamping and left overnight.

Quite a clever design as all the panels are panels in real life, so if you where really careful you could maybe paint the whole exterior then build it. I thought better of it though lol.
Today was a day of all the fiddly little bits that need sorting and painting. Some of which I judged to be easier to manage if fixed in place and primed 'on site' so to speak then paint them with a brush (!) after the body colour has been sorted.

Body bits on the Left in the white plastic ready for a splash of primer then paint of some form. most of the parts on the Right need to be satin black. This however is on its way from the hobby shop so not much going on these except primer.
The chassis and wheels are painted!
Oh the dregs in the bottom of a Tamiya satin black are a great high gloss black if you are interested. lol
More soon.

