Ian M's Austin K2/Y Ambulance. Gecko 1/35

Ian M

Administrator
Staff member
Administrator
Moderator
SMF Supporter
Joined
Dec 14, 2008
Messages
19,744
Points
113
Location
Falster, Denmark
First Name
Ian
Well I did say I would join, luck had it that this can my way. So a bit late But I should be able to reach the dead line....(famous last words! Foreshadowing!)
So the bits: First the box top art.
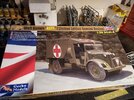
20230220_164151.jpg
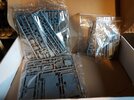
The Gecko boxes are not the most practical but sturdy which is more important.
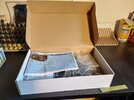
20230220_144322.jpg
Very good box for sending things in the post with though! And it had a LOT in side.
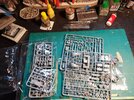
Parts count? No idea. but more than you can shack a stick at and more than there needs to be. Here are a few of them:
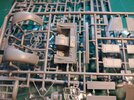
20230220_144719.jpg

20230220_144738.jpg


20230220_144742.jpg

And a bit of brass to really test people
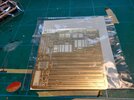
20230220_144527.jpg

The instructions are OK. The modern 3D cad jobs but at first look appear clear enough.
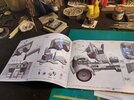
20230220_144345.jpg

So after a couple of hours I got to step 7 and the ladder subframe was done, a couple of wheels and the rear axle stuck together! Spent a lot of time hunting for micro parts that did the lemmings thing off the work top. I can see this being a good challenge!
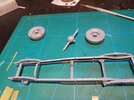
20230220_164038.jpg

Laters!
 

Tim Marlow

Little blokes aficionado
SMF Supporter
Joined
Apr 27, 2018
Messages
16,801
Points
113
Location
Somerset
First Name
Tim
Definitely more detail on your chassis than on mine Ian. This should be an interesting comparison…..what colour scheme are you going for?
 

Jakko

Way past the mad part
SMF Supporter
Joined
Apr 28, 2018
Messages
10,846
Points
113
First Name
Jakko
The Gecko boxes are not the most practical
Did the top part want to come off? I’ve only bought one Gecko kit in my life (their recent LCA), and I almost needed an extra pair of hands just taking the printed lid off the inner box because it was so tight. Once I did, I tore one of the glued flaps in the corner loose just so I could put it back on easily, and of course to take it off later again :smiling3:
 
  • Haha
Reactions: JR

Tim Marlow

Little blokes aficionado
SMF Supporter
Joined
Apr 27, 2018
Messages
16,801
Points
113
Location
Somerset
First Name
Tim
Might go for the brown and do an RAF version. I'll have to think about it.


Not without a fight. Lol.
Thought the RAF ones were blue? There are photos of a blue restored one on the net. Sure it will be fun whatever you go for though.
 

Ian M

Administrator
Staff member
Administrator
Moderator
SMF Supporter
Joined
Dec 14, 2008
Messages
19,744
Points
113
Location
Falster, Denmark
First Name
Ian
Thought the RAF ones were blue? There are photos of a blue restored one on the net. Sure it will be fun whatever you go for though.
Royal Navy where blue gloss Oxford blue I think!
RAF Ground vehicles where camouflaged. I think the blue RAF cars thing was pre and post war. During the war same order as the army.

I saw the Caunter camouflage version, that might be a contender.
 
Joined
Apr 12, 2019
Messages
2,215
Points
113
Location
Selkirk
First Name
Andy
Gecko do tend to overload things with many parts that are never seen and add nothing to the model. I looked at that model once and as I recall it has 420 parts and plenty of PE (which I don't like much).

Andy.
 
  • Wow
Reactions: JR

Geoffers

SMF Supporter
Joined
Jan 26, 2017
Messages
1,020
Points
113
Location
Shropshire
First Name
Geoff
Nice choice Ian but a challenge to get it finished in time :cold-sweat:

I’m looking forward to seeing how it goes together.

Good luck :thumb2:

Geoff.
 

Ian M

Administrator
Staff member
Administrator
Moderator
SMF Supporter
Joined
Dec 14, 2008
Messages
19,744
Points
113
Location
Falster, Denmark
First Name
Ian
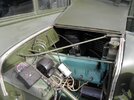
The run up to 'coffee time'
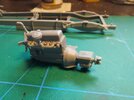
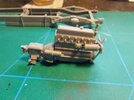
An hour and a half. 26-7 parts. I think I inhaled a bit of PE that was silly small.
20230221_112018.jpg20230221_112106.jpg
I can see my distributer and starter are a bit cock eyed...

Anyone got a half decent colour guild for the motor?
 

Tim Marlow

Little blokes aficionado
SMF Supporter
Joined
Apr 27, 2018
Messages
16,801
Points
113
Location
Somerset
First Name
Tim
Just had a look through a build of this on another site….looks like the big Red Cross decal on the roof doesn’t have cut outs for the vents….I would put them on after the decal because you will never get them to settle over them. Vallejo MC 817 is a good match for my decals, so should suit yours if you need to touch them in.
 

BattleshipBob

Bob, bob, bobing along!
SMF Supporter
Joined
Apr 28, 2018
Messages
6,212
Points
113
First Name
Bob
Count me in Ian, after my pe battles might be handy to drop of at ER lol
 

Ian M

Administrator
Staff member
Administrator
Moderator
SMF Supporter
Joined
Dec 14, 2008
Messages
19,744
Points
113
Location
Falster, Denmark
First Name
Ian
Hmm. Problem.
Those frames to hold the flimsies and Jerrycans that hide below the box at the back. They have just literally fallen apart while removing them from the fret. First part came off with the top protective film. The next two came off removing the part from the bottom protective film! Have had a go at CA'ing the bugger together but its not having it! Grrr.
 

Tim Marlow

Little blokes aficionado
SMF Supporter
Joined
Apr 27, 2018
Messages
16,801
Points
113
Location
Somerset
First Name
Tim
Hmm. Problem.
Those frames to hold the flimsies and Jerrycans that hide below the box at the back. They have just literally fallen apart while removing them from the fret. First part came off with the top protective film. The next two came off removing the part from the bottom protective film! Have had a go at CA'ing the bugger together but its not having it! Grrr.
Can you fold up a replacement from scrap etch?
 

Ian M

Administrator
Staff member
Administrator
Moderator
SMF Supporter
Joined
Dec 14, 2008
Messages
19,744
Points
113
Location
Falster, Denmark
First Name
Ian
Can you fold up a replacement from scrap etch?
Either that or I have a good supply of plastic profiles I can cobble something out of. Fortunately the other PE I have had the pleasure of today have been more robust.
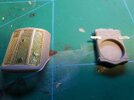
The story so far:
20230222_155618.jpg
In my normal hap hazard order I am working my way through. Today I jumped on the 'customer service' section and started to sort the bunks out and a few other bits and bobs.
20230222_155630.jpg
Still need a bit of CA down one side of the right hand (as you look) Grill section. I'll get that next time.
Talking of which I might have a look at the drivers compartment next.
 

Ian M

Administrator
Staff member
Administrator
Moderator
SMF Supporter
Joined
Dec 14, 2008
Messages
19,744
Points
113
Location
Falster, Denmark
First Name
Ian
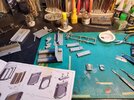
Plugging away, trying to sort out as many sub-assemblies as pos. befor I throw some primer at it.
Paint the insides first, then build the box/passenger compartment then the outside paint.
Bench is chaotic but that's the way I roll i guess.

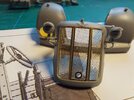
Front grill is done!
20230224_152725.jpg
Those head lamps are 5 parts each.

20230224_152748.jpg
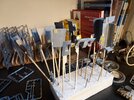
The painting sticks are filling up- Sprues are emptying. Soon primer time. Also will have to make some decision about the scheme.
 

Neil Merryweather

SMF Supporter
Joined
Dec 29, 2018
Messages
4,428
Points
113
Location
London
First Name
Neil
Looking good Ian.
That's a very high quality bit of PE for the radiator grills- I trust the damage is intentional....?
 
  • Like
Reactions: JR
Top